
I’ve sewn for my kids for years and in the past six years, most of the local skating club. Everyone wanted the dip-dyed skirts that one of the fancy dressmakers did. However we heard of the $400 or more price tags, whispered through the stands, and most of the parents felt it was an expense that wasn’t worth it. The skirts were silk, another cost. They’re really nice dresses. I would have liked one, but I made my own dress and bought freeskate lessons instead.
I had a chance to talk to that dressmaker about dip dye. Of course she wouldn’t tell any of the process involved, but did say that she made a lot of garbage before she got the technique down. I left it at that, and besides, I had boys in skating, so I wasn’t personally driven to figure it out.
A few years later, a dressmaker at another rink that I was at experimented with dying. I again heard of the rumors of disaster and messes, and she had some limited success, mostly with painting on the dye.
Then I met a parent, whose husband had a workshop. She made her kids’ dresses because she wanted to and they had airbrushing on them. I asked her how. She said, very directly, “I went out to the shop and put paint in the gun and sprayed the pieces.” Like we would all naturally go out to the shop and put paint in the spray gun but, that’s exactly what you do!
Quickly, difference between dip dye and airbrushing:
- Dying: The fabric is immersed in the dye, and depending on the fabric (synthetic vs. natural cotton/silk) there is complete color change on both sides of the fabric. Some dyes make a very solid band, mostly with synthetics, others make the gradient effect, most noteably on silk. Chemicals are required with synthetics to set the dye and dye is very good for entire color changes or the edge of a skirt. There is not much of any change of hand of the fabric. (Note from Ice Mom: a fabric’s hand is how it feels.)
- Airbrushing: The dye or paint is blown onto the surface of the fabric and doesn’t entirely soak through the fabric, so the original color remains on the underside. It can be applied in different areas of the garment easily and can be over sprayed or painted. Heavily applied paint can make for a stiff fabric. And lastly, airbrushing is LOUD.
Part 1: Materials
What you need for airbrushing, in order of expense:
- Air
- Brush
- Paint
- Something to spray it on.
Textile paint is thick and has big particles (they’re really tiny, but in paint terms they are big). Imagine trying to blow a large pea through a little straw, it takes a lot of force. So it takes a high consistent pressure to blow textile paint. The amount of pressure that works for me is about 40-45PSI.
Don’t even consider buying the cans of air. Not enough ooomph and they freeze up in a minute.
When you look at airbrushes, and there are tons of sites on the internet, they show airbrush compressors that are these little small things. They are great for artists and thin art paint. Their PSI is not so big, but they are quiet. There is big air that is quiet, but it’s expensive. I am cheap, er, thrifty.
Chain stores sell compressors for the shop that blow up to 100 PSI for about $70. Or less. They have tanks on them. Big tank is good but takes up too much space. I have something like this with a 3-gallon tank:

It’s bigger than a breadbox and smaller than a Zuca bag. It was also on sale for $65. Remember I said LOUD? The drawback is when this thing runs to fill the tank, it is like a JACKHAMMER. I wear earplugs. Once you start airbrushing, after about five minutes the tank has run out of pressure so the motor runs to fill it up and you jump when it kicks on. Basically, the motor runs a lot. If I had a big 25-gallon tank model out in the shop, this would not be a problem, but I don’t have a shop nor the space for something the size of a horse. So, I wear earplugs.
Bonus point: Men don’t seem to complain when you buy a compressor.
Brush: I use a Paasche H series. Airbrushes come in three sizes, 1, 2, and 3, meaning the size of the swath they spray, and most importantly it has a single-action siphon feed with a cup. The major airbrush makers are Paasche, Iwata and Badger. Badger also has a single-action siphon, and so does Iwata, but the surplus store had a Paasche on clearance, so that’s what I have. They also had no-name airbrushes for $12.95, so I have one of those, too. It sprays like a $12.95 airbrush. Buy a name brand brush, and make sure it has a siphon feed.

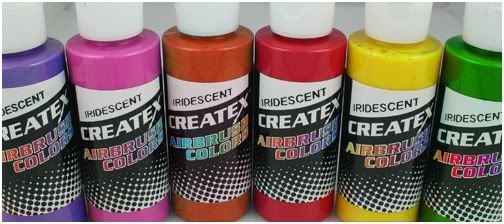
Paint: I recommend using specialized fabric paint. Createx and Jacquard are the two name brands that will work perfectly fine. There is also Setacolor, but it is more expensive.
Createx
Jacquard

Jacquard makes a few lines of paint. I use the Textile Colors because I can water them down for airbrushing or use them directly for painting. They are sprayed on, let dry, then iron to heat set it into the fabric. There is an additive that you can put into the paint instead of heat setting. I’ve never tried it, and would be curious to hear if anyone out there uses it. These paints feel like they’re part of the fabric and not sitting on top of it. They will soak into the fabric, so use that as an effect; it's difficult to get a hard edge, unless you use a stencil or a shaper to cover or redirect the spray off the fabric. (Google: airbrush Frisket) These paints and colors are acrylic paints, so they’re thinned with water and clean up with water. There is an extender that can be used to thin the paint, but I use water. Createx paint can be used right out of the bottle. Jacquard makes an airbrush paint, but I use Textile Colors and thin it down, almost 50% (20% is the recommendation) and spray more layers. I like using the textile paint instead of the airbrush colors because I use the same paint for silkscreening onto fabric and/or handpainting and stamping. (another topic for another day)
I’ll throw this in here: These paints are acrylic. You can spray any acrylic paint onto fabric and it will stay because it stays on my clothes when I accidentally spray paint myself. I’m not convinced that heat setting is necessary; sometimes just letting the pieces sit for a few days works. I’ve tried the craft paint from the dollar store and it sprays just fine, but it sits on top of the fabric and doesn’t sink in, so it's stiff. It might work for the bodysuit, but not a skirt if it's sprayed heavy for a deep color. Depending on what you are spraying and the budget, consider this a thrifty option for cases where you need 30 carnival pumpkin face costumes. The airbrush manual will warn not to do it, it’s up to you, thin it down and try some samples. It’s all about the particles of the paint fitting through the needle of the brush. If you jam the brush, there are a lot of YouTube tutorials of how to disassemble and clean the airbrush.
Anyway, a big set of Createx colors is around $30.
You could spray with dye. I haven’t tried it, but if anyone has, I’d like to hear from them. I imagine that spraying with dye on silk would be amazing…or not? It would have a huge soaking in factor. One day...
To summarize this section, if you’re my friend with the workshop husband, she had all the tools; she just had to buy some fabric paint to put in the gun. (She has since bought a real airbrush.)For the rest of us, after buying a compressor and a brush, and a couple of bottles of paint, it’s about $125 or more. Add in the ear plugs remember. And fabric for the dress, too.
Now go buy a roll of paper towels, find a big cardboard box, and 2-3 yards of white Lycra, and maybe 2-3 yards of chiffon or georgette – whatever you like to use for skirts. If you just want to do a skirt, then stick with the chiffon/georgette. Polyester is fine; this paint sticks to everything.
Stretch velvet? You could try. I did. It feels like I painted the cat. It might work if I wanted some crazy effect involving painted cats, but I wouldn’t plan on airbrushing stretch velvet. In dresses on the market with airbrushing, you will find airbrushed Lycra and mesh in the bodysuit and chiffon/georgette for the skirts, nothing else. It leads to a bit of a conundrum, because some skaters love stretch velvet for its matte look and want airbrush effect on the bodysuit. Which leads to part 2, making samples. When in doubt, make a sample.
Part 2: Practice
Cut 18-inch or thereabouts square pieces of whatever fabric you’re going to use. A meter of 60 inch Lycra will get you six 3x20x18-inch squares. This is the time to make samples of what works and what doesn’t. Pin these to your spray wall. Spray wall?
The cardboard box is your spray booth. Spray wall is more like it. Although it seems natural to spray on something lying flat on the table, the spraying works better when the fabric is vertical. Cut open the box and find a place where you can attach it to a wall. I have a big cardboard that I’ve covered with brown paper, which I change occasionally. It doesn’t have to be entirely vertical. Think of it as an easel. Pin the squares to the spray wall. Pin them tight, but not stretched. That 45 PSI will blow wind at them and cause them to flutter around if they’re loose.
Attach the airbrush to the compressor. Wait for everyone to leave the house, turn on compressor (follow their instructions) and psssst, hit the button on the brush. Prepare the paint by either using Createx from the bottle, thinning Jacquard textile colors, or using airbrush paint straight.
I’ll have to digress here. There’s the airbrush bottle and the siphon cup. For now, pour your paint into the bottle and attach it to the brush. Take those paper towels and make a thick pad out of some of them and holding the brush level, spray into the pad until paint starts coming out of the end. You’re ready.
Starting off the edge of the fabric, push the button, start spraying across the fabric without stopping and take your finger off the trigger once you’re off the fabric. It’s basic spray painting. Did you like the effect? Change the spray width on the nozzle, test, stand closer, stand further, play around with this for a long time until you’re confident you’re comfortable with the brush and how it sprays. You will get sputts and splatters, it’s either related to the air or the pressure on the trigger. Occasionally it can be because the paint was not thinned properly and a chunk has gotten stuck in the nozzle. In that case, spray it out into your paper towels and/or rinse out the nozzle and try again. There’s a lot of YouTube videos about specific techniques. How to spray flames on the hood of your sports car can work out to being flames on a man’s bodyshirt. I just need a man who wants a flaming bodyshirt... Anyone?
Let the samples dry, heat set them by either ironing them for a few seconds on the reverse side (I use a teflon sheet ) or throwing them in the dryer. Then wash them and dry them just for good measure to see what happens. This is overkill, but it’s a good idea to see what happens with your combination of fabric and paint. Washing it also takes out the stiffness that can build up.
Some airbrush sites say to spray on paper to learn technique. I say use fabric, because the paint does soak in and it's something you need to learn how to deal with. It doesn't have to be white Lycra actually; it could be that yard of ugly that's been in your stash for years. Just use a very contrasting paint. Knowing how the paint covers on color fabric is also something to learn.
Do not skip making practice samples. Here are just a few of mine, with different paints, fabrics and lots of splatters.

Part 3: Doing It
Cut out whatever you want to spray. Pin the pieces to the spray wall. Put the pins where the seam allowances will be. Make sure they’re tight, but not stretched.
If I’m spraying a bodice and a back, I line them up side-by-side so that I can spray across both. Sleeves would be the same. For skirts, pin them so that the bottom edge is at the bottom obviously if it’s a full circle, put lots of pins at the top, and you could angle your spray wall flatter.
Think about what direction the pieces will go when they are put together. If you're spraying a sleeve, and you want the spray to be horizontal, it might mean spraying the sleeve sideways, or even a U shape.
Here is a sleeve where I decided to add a purple effect, after the fact. Neckband, and the right sleeve. The pattern is somewhat raglan, it's actually a test of a new pattern draft and I decided to do two tests in one, sew it out of white Lycra for pattern test and then airbrush the heck out of it. I think this is the way that the purple will line up:

Then once all the pieces are done, I lay them out to make sure I've got it right before sewing it together. In this particular case, I didn't like the way the left sleeve had the purple on it, so I discarded it and cut a new sleeve and sprayed again.

Getting down to the details:
Prepare the paint. If I’m doing a multicolor effect, I use the siphon cup and keep pouring the paint in as it empties. It makes a nice color change doing gradients. This is a bit advanced and you’d work it out in practice on samples. For now, try a color effect on a hem.
Pin up the skirt. Starting off the hem, begin spraying with the center of the flow on the edge of the skirt. This puts the most solid color on the hem. Sidenote: I hem the skirt afterwards. Spray another swath overlapping that one and continue upwards. If you angle the brush upwards, you’ll get a thinner effect as you get closer to the top of the skirt. (You worked this out on samples, right?) Let it dry (it probably is already), and then go back and layer that same color on top until it’s evenly thick. It’s common to get a lined effect. You want solid.
To add another color, start with the second color where you want the transition and spray a swath and continue upwards going overtop where you left off with the first color. Go back and deepen the color when it looks like you should. Let it dry and then look again.
For a white hem:
For a skirt, start at the waist edge and spray a circle. Do the same on the other side if it’s two pieces, or if it’s one (pinned up circle) make sure you keep consistent pressure. Do more circles outwards until you’ve reached how far you want to go. I am assuming that you’re going to have a white-edge hem. Then, starting back at the waist, develop the color layers by spraying on top. The paint will dry very quickly. I prefer to water down my paint and make many, many layers. Keep spraying until you’re happy with it, and let it dry. If matching the skirt to a bodysuit fabric, let it dry, compare the color, and possibly respray. It’s tricky to color match an airbrushed piece to an existing Lycra or stretch velvet. Tip: I don’t try to match the Lycra, I cut the entire garment of one color and spray the whole thing. Velvet is easier to match “close enough” because of the shading in velvet.
Perfectionist moment: Because the paint stays mostly on the top of the fabric, if I think the underside is ugly, I’ll turn it over and spray the underside. You could try to spray more densely on the top so that it soaks through, but the soaking is inconsistent. It all depends on the fabric. With the crepe georgette that I use, it soaks right through and looks like dye. With Lycra skirts, the paint sits on top.
Take the fabric off the spray board, heat set and sew it into the garment. After you sew the garment together, you might find that the sides don’t match up evenly or it needs a little extra, like one of the spots where a pin was. You can touch it up by holding the dress over your arm with your arm inside the dress. If you pin it back on the board, made up, make sure you put plastic, or a piece of cardboard between the front and the back in case of soak through.

If I could offer just one piece of advice, this is it: Less is More. Airbrush is a great effect and a little goes a long way.
Thank you, C.R.H.! If you have questions for C.R.H. this is your opportunity! Leave your questions in the comments.
Do you have questions for Ice Mom or the Advisory Board? No problem! Send me an e-mail! Are you an expert like C.R.H. is? Terrific! Contact me about writing a guest post. E-mail: icemom.diane@gmail.com.


No comments:
Post a Comment