 O.K. I've got it figured out. Here's the recipe for do-it-yourself blade covers or soakers.
Supplies:
- One terry cloth hand towel, the thinner and cheaper the cloth, the better. Try to find a towel that has no interesting decoration on it at all, not even a stripe near the bottom of one side. Wash it first to make sure that the color won't bleed all over your kid's skate bag when the blade cover gets wet.
- Thread
- 5/8" elastic, one 1-yard package (you'll have some left over)
- Sewing machine and a few spare needles (step 8 might break a needle)
- Iron and ironing board. The iron should be ready for steam and on the cotton setting.
- Pins
- Drawstring threader (It's not essential, but it's very helpful and you'll use it again and again whenever someone pulls the string all the way through a sweatshirt hood or a sweatpants waistband.)
- Dressmaker's chalk or something similar for marking
Cutting:
This is so easy.
- Cut off the hems on the bottom and the top of the towel. Leave in place the selvage edges from the sides. (For the purposes of this post, we'll call the selvages the parts of the towel that aren't fluffy.)
- Arrange the towel so that the short sides are facing you (hamburger style). Measure the entire towel, short end to short end. Find the midpoint and cut the towel into two pieces at that point, from one selvage edge to the other.
Sewing
- Take one towel half and fold it in half hot-dog style (long end to long end). When you fold it this way, it looks more like a hot dog than a hamburger and the selvage edges are along the short sides. Make sure the cut edges line up and pin in place along the long side. Stitch a 1/4-inch seam with a straight stitch. Repeat for the other towel half.
- Turn the tubes you've just made inside out, so that the seam you've been working on isn't easily seen.
- Bring the towel halves to the ironing board. Iron each half so that the seam runs down the center of each half. In other words, when you're looking at the blade cover and it's oriented so that the long sides are facing you, you see a folded edge at the top, the seam in the middle (about 3" from a folded edge), and another folded edge on the bottom. To the right and left are the selvage edges that lead to the inside of the tube. Got that? Great. Flatten that puppy with your iron. You want nice creases where the folded edges are. Now, flatten the other one.
- Bring them back to the sewing machine. Straight stitch down the center, following the seam line. My mom calls it stitching in the ditch. You should have just sewn the tube in half and now you have two connected tubes. Stitch in the ditch of the other blade cover, too.
- Remember those folded edges that you flattened in step 3? Great. These are going to become casings for the elastic. Sew a straight stitch seam 3/4 of an inch away from that folded edge. You'll need to do this on both folded edges for each blade cover for a total of four seams along the folded edges.
- Take your elastic out of the package. Measure 7 1/2" along the elastic, but don't cut the piece. Instead, mark it with your chalk or whatever you use. Thread the elastic through the 3/4" casings, lining up the cut edge with one side and letting the long tail hang out the other end. If you have a drawstring threader, this will be a walk in the park. If you don't have one, spend the $3 and get one or curse me, elastic, and the world while you figure out how to get that elastic through the casing.
- Sew the cut end of the elastic and the casing, 1/4" from the selvage edge of the fabric. This seam should be really short and just cross the casing end, about 3/4" long. Pull the long, uncut bit of elastic until you see your 7 1/2" chalk mark at the other end of the casing. Pin it even with the other selvage edge and sew it with a straight stitch, just like you did the first side, 1/4" from the cut end. Snip the long bit of elastic along that cut edge. Repeat steps 6 and 7 for the remaining three elastic casings.
- Sew up the sides. Fold the blade covers in half, hot-dog style, so that the selvage edges line up and the elastic casings meet at one end. Sew the side seam with maybe a 1/2" to 5/8" seam allowance. This is where things get a little tough. There's a lot of bulk going through your machine. You might want to drop the feed dogs while you position the fabric under the presser foot so you can stuff it all under the needle. Don't forget to put the presser foot back down and the feed dogs back up. Don't panic if you bust a needle. Just replace it and move on with the seam. Sew up all four sides of the blade covers. The towel selvage edges are good to go, so you don't need to finish off the seams with a zig zag stitch.
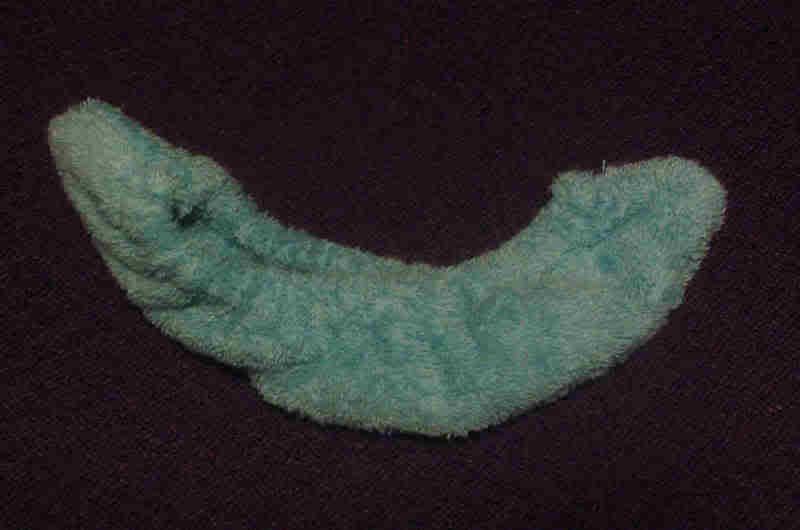
- Turn the blade covers inside out. They should be fully functional and look much like the photo above.
Cost and effort: This project costs $2.94 for the hand towel (Wal-mart), and $.97 for the elastic (Wal-mart again). That's $4 and some time for the soakers. The best part was that Ice Girl did most of the work. I had her cut out the covers and sew all the straight seams. The only thing I did was help her thread the elastic through the first casing and sew up the sides in step 8. She did a pretty good job, I think.


9 comments:
Thanks for this excellent 'how to'.
My son plays ice hockey. Following your explanations, using an used towel, I was able to sew soakers that fit very well on his skates.
My husband, who is the team coach, now wants a pair of soakers for every players in the team!
Thanks again.
Thanks for this post! I'm going to buy supplies today to make soakers for all three of my girls. I'll be sure to let you know how it goes!
Oh thank you soooo much...after checking ebay and seeing most of the soakers for 8+ dollars, this is the project for me!
Thanks again!
you may also acquire elastic from your drawer full of old panties, like i did. just take one of your old, unwearable panties and using a razor-blade cut along the waistline seams and simply extract the elastic out of there.. depending on your waist size you may want to use more or less than one underwear to do this.
Thanks for posting this. I made some adjustments to your pattern. I cut fleece the same size to each of the half washcloth pieces and sewed around the edges. Then folded down about an inch at long side at each end. I sewed near the inner edge. Then I threaded 3/4in elastic with a safety pin. I sewed to each end of elastic to end of fabric. Thanks for the 7.5in key for the length of elastic. Then I sewed the short ends outside together and flipped it out.
I think this cost me maybe $3.
I forgot to add I had to hand sew the short ends together at the end after breaking a sewing needle. It was not big deal because its only about 1 1/2 inches long on each side.
thank you! so glad I found this post. So going to make these for my daughter for Christmas. you know you are the only one of the web to have directions. Ice mom, you are awesome.
Thanks - my sister wanted a bunch of skating stuff for Christmas - now I can afford to do a little more for her :) Nice & easy (P.S. I put a safety pin on end of my elastic & threaded it through with that -worked just dandy)
Thank you. Here in the deep south, we have a few rinks but no stores to buy skating supplies. Thanks to your directions, my daughter will have a pair of fuzzy soakers under the tree.
For those that do not have a elastic threader handy - I taped my elastic to a bamboo skewer to thread the elastic.
Post a Comment