Showing posts with label dresses. Show all posts

Monday, February 15, 2010

Ice Mom's Sewing Guide: Altering Your Growing Skater's Figure Skating Dress

This post is part of Ice Mom's Sewing Guide.
Other posts in this series: All about Patterns, All about Fabrics, How to Dye Silk for Fabric Skating Skirts, Altering Your Growing Skater's Figure Skating Dress, Laying out the Pattern.

Ice Girl eats like a horse. I swear that kid already measures 16 hands. And she’s still growing. She's all arms and legs and skinny, skinny, skinny. Even so, it’s tough to hide the fact that she’s growing when her butt cheeks peek out from behind her figure skate dress panties.

That’s why I found myself frantically sewing the disco ball dress and the Greek goddess dress before a competition in the beginning of February. Ice Girl had grown so much that she was popping out of the pop can dress and the white-panty purple-painted dress was more indecent than ever.

Believe it or not, I sewed two new dresses in two weeks because I’m lazy. Yep. Adjusting a figure skating dress that a skater has outgrown can be done, but it involves ripping out stitches (which I hate) and other surgical procedures. If you're new to sewing, do yourself a favor and take the figure skating dress to a good alterations shop. Bring along whatever fabric you'd like the alterations gal to use. It's much more fun to pay someone else to curse at the dress than to curse at it yourself, I tell you.

However, if you insist upon altering the figure skating dress, here’s how to go about it:

WHEN THE DRESS IS TOO SHORT

The leotard method. Readers of Ice Mom’s Sewing Guide know that I favor the leotard method for fitting because it eliminates the seam line between the panty and the bodice, which makes alterations for length a walk in the park. For information about the method, you’ll have to click on the link in the previous sentence. I’m going to write assuming you know what the leotard method is.

If you have a dress made with the leotard method, adjusting for the skater’s growing body is pretty easy. Rip out those zig-zag stitches you used to attach the skirt. Set the skirt aside to make scrunchies or as practice material for your serger. You can also add a line of Spandex to the skirt, but if you’re that advanced, you know how to do it. New sewers should cut a new skirt with a generous length. Rip out the crotch seam. Cut a new crotch insert and baste it to the crotch panty back and panty front. Have the skater try it on. Does it fit? Adjust it or sew it in pemanantly and then insert elastic like you normally would do (I’ll be writing more about elastic in a future Sewing Guide). Have the skater try on the leotard and gently pin the skirt in place so it hangs over the panty and is straight. Measure up for the hemline, too, and mark the length. Have the skater take off the leo. Mark the skirt placement line and unpin the skirt. Pin the skirt to the placement line, right sides together, with the hemline pointing in the same direction as the neckline. Attach with a zig-zag stitch. At the hemline mark, machine baste all the way around at whatever measurement you’ve decided on. For example, if the skirt’s an inch-and-a-half too long, I’d run a line of machine basting 1.5 inches from the hem’s cut edge. Cut it with scissors and finish the hem with nothing (spandex, netting), a rolled hem (any fabric), or a small folded hem (any fabric).

The pain-in-the-rear method. Better you than me, people. I just make a new dress and sell the old one in a club resale. However, if you and your skater just love, love, love the small dress and it’s not made with the leotard method, here’s what you do. You'll never catch me doing this: it's a lot like work.

On the inside of the dress, rip out the skirt/panty/bodice seam line. If the dress is lined, this is going to complicate matters. Somehow, you’ve got to get to that skirt/panty/bodice seam line, though.

Once the dress is in pieces, set the old skirt aside for scrunchies or serger scrap. You can also add a line of Spandex to the skirt; attempt it only if you already know how to do it. Cut a new skirt with a generous length instead. There are more worthwhile things to do with your life than mess with the old skirt.

Cut a perfect rectangle of fabric that’s the length you’ll need to make the dress fit, plus 1/2 inch. You can sew it in two ways.

Less bulk, uglier seam: 1) Machine baste along the top raw edge of the insert fabric, 1/4 inch from the raw edge. Lay the insert fabric right side up. Place the raw edge of the panty fabric along the basting line and pin. Sew with a cover stitch (if you have a cover stitch machine), a double needle in a standard machine, or a zig-zag that catches the raw edge of the panty fabric. Baste the new skirt to the top of the insert (I use a wide zig-zag). Attach to the bodice with whatever seam treatment you use for stretch fabrics.

More bulk, prettier seam: 2) Pin insert and panty edges, right sides together. Stitch as you would any Spandex seam with a 1/4-inch seam allowance. Baste the new skirt to the top of the insert (I use a wide zig-zag). Attach to the bodice with whatever seam treatment you use for stretch fabrics.

Have the skater try on the dress and mark the hemline. Have the skater take off the dress. At the hemline mark, machine baste all the way around at whatever measurement you’ve decided on. For example, if the skirt’s an inch-and-a-half too long, I’d run a line of machine basting 1.5 inches from the hem’s cut edge. Cut it with scissors and finish the hem with nothing (spandex, netting), a rolled hem (any fabric), or a small folded hem (any fabric).

The stripe method. An easier way to do this is to add a stripe around the entire bodice. This isn’t as ugly as you might think. Consider how a stripe of athletic mesh or a complementary spandex color might look on the dress. Would it look good? Fabulous. You’re in luck. You don’t have to mess with the panty or the skirt at all. Cut a perfect rectangle of fabric that’s the length you’ll need to make the dress fit, plus 1/2 inch. Machine baste along the top and bottom raw edges of the insert fabric, 1/4 inch from the raw edge. Draw the line where you’ll be inserting your fabric on the bodice and back with chalk or a water soluble marker. Zig zag close to the line on both sides of it, but not on top of it. Sewing very straight is crucial. If you can’t sew straight, don’t use this method. Cut the dress along the chalk/marker line so you have the bodice in two pieces. Lay the insert fabric right side up. Place one raw edge of the bodice fabric, right side up, along the basting line and pin. Sew with a cover stitch (if you have a cover stitch machine), a double needle in a standard machine, or a zig-zag that catches the raw edge of the panty fabric. Do the same with the other side of the insert fabric and the other bodice half. You can continually expand a dress with this stripe method. (Which I might do to Ice Girl’s Disco Ball dress.)

WHEN THE DRESS IS TOO NARROW

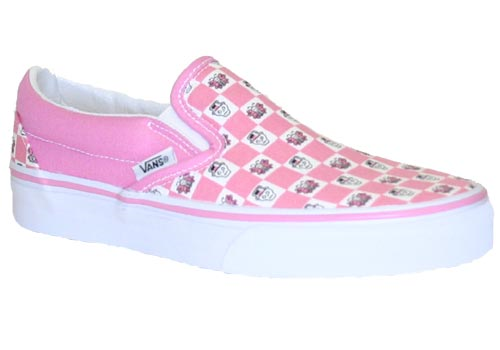
Welcome to the world of the gusset. A gusset is a triangular piece of fabric that you slip into the side seams of any garment. You might be familiar with the gusset from the crotch area of some tights, especially athletic tights or long underwear. You might be familiar with gussets if you’re a knitter. If you have expensive, tall leather boots, you might have an elastic gusset at the top to accommodate your calf. The photo of the slip-on canvas shoe (above) has an elastic gusset at the tongue. If you have a suitcase or a briefcase that has an accordion fold, those folds are gussets, too.

Beware: this is not a universal fix. Slip too much fabric in at the arm hole and you’ll mess up the sleeve. That, readers, is major surgery. I try to leave sleeves alone. However, if you are a master seamstress and are willing to share your sleeve gusset techniques, please consider this your invitation!

Let’s face it, folks: this is down-and-dirty sewing. From the stands, no one’s going to see the gussets. If they’re small, they’ll even be hard to spot up close, but they won’t be invisible. Do not accentuate these gusset seam lines with crystals or sequins.

Too narrow at the hip: About how much wider do you want the area to be? Divide that measurement by two and add 1/2 inch (that’s for the seam allowance). That’s the base of the gusset triangle. You’ve got a decision to make here: How tall do you want the triangle? The taller the triangle, the more it’s going to show. For a big-based gusset, make it tall. For a small-based gusset, make it short .Cut six triangles for a standard construction dress (bodice, panties, skirt) and two diamonds and two triangles for a leotard construction dress. If you’re cutting diamonds, they should be as if you’re putting two triangles together at the bases. Be sure to add a seam allowance at the base, too.

Rip the skirt seams, the dress’s side seams, and the dress’s bodice-waist seams, if any.

Insert the triangles or diamonds into the side seams with the tiny points pointing away from the waistline and the bases along the waistline. Sew in place, right sides together. Yes, it’s a pain, especially at those points. It helps if you think that you’re sewing them like a standard dart. In other words, sew the sides until you can’t sew anymore. Then take it off your machine, fold in half through the point, pull on the point, and sew like a dart. If sewing a standard dart means nothing to you, do not attempt the gusset. You can also hand sew it. Again, this is why I just go ahead and make a new dress. Finish this step for all triangles or diamonds. You should have gussets in the side seams for the panty, bodice, and skirt. Reattach all.

Too narrow at the bust: This is the same procedure as for the waist gussets, so you should read that procedure (above) first. You can open the side seam and slip in a triangle in both the side seam and the arm. The danger is that the sleeve will become so large that it will hang down way past the skater’s armpit. However, you can use gussets in this area in small amounts.

You can also open up the bodice at the bust line, if the skater has had a dramatic development in that area. Have her try on the dress and, yes, mark the pointy part. I know. Ice Girl would hate it, too. Again, you can see the appeal of making a new dress. When your skater takes off the dress, Draw a straight line from your mark to the seam line. Zig zag on both sides of the line you drew and cut straight down the line.

Draw a line on the back bodice, opposite the cut on the front. You want this line to be very short so the triangle insert will be very squatty. I'd go with maybe 1" to 1 1/2" tall. Zig zag on both sides of the line and slice the dress open.

Cut four triangles and add a 1/4-inch seam allowance to all sides. All four triangles will have the same base width, but a different height (the back ones are squatty, remeber?). The triangles for the front and back bodice pieces should match up to the cut line, plus 1/4 inch. Sew the triangles to the bodice pieces following the instructions for inserting triangles in the too narrow at the hip section.

See? I skip this whole nightmare and make a new dress. It’s much more satisfying and I curse a lot less.

Update: From reader, blogger, coach, advisory board member, and skating parent Xan of Xanboni! (visit her comment for links to photos): You can also grow a complex, jeweled dress using the leotard method. If you're making a really elaborate dress like the ones linked below, make a double leotard lining with a flesh toned fabric, and a third leotard to which you affix the design elements. When you want to alter it, simple remake or alter the undertard (as I always called them), and carefully refit the design elements to it.

Update: From reader Anonymous who outwits the growing process in a very clever way: I will add 2 inches extra to the leotard in the hip area and then sew it in a tuck with the fabric to the inside. The seamline is about two inches below where I'm going to put the skirt (leotard method). Once they grow, let out the tuck, and depending on where the skirt then sits, move the skirt. It can sit lower on the hip and still cover the bum and there is enough play in the waist of the skirt if spandex. If it's chiffon, carefully cut the waist a touch bigger, probably only 1/4 inch, or again, plan ahead and make it a front overlap style.

What do you do when your skater outgrows his or her favorite outfit? Please share your rites and rituals in the comments! No need to share your curse words. I've got that part down.

Have a question for Ice Mom? Please consider this an invitation to e-mail me at icemom.diane@gmail.com.

Monday, February 1, 2010

Ice Mom's Sewing Guide: How to Dye Silk for Figure Skating Skirts

This post is part of Ice Mom's Sewing Guide.
Other posts in this series: All about Patterns, All about Fabrics, How to Dye Silk for Fabric Skating Skirts, Altering Your Growing Skater's Figure Skating Dress, Laying out the Pattern.
 
This guest post is courtesy of reader C.M. who knows way more than I do about dyeing anything. Please realize that I have zero experience with dying silk or using silk for figure skating skirts. Post any questions about this technique in the comments. Thanks! Ice Mom.

I (guest poster C.M.) use the silk chiffon from the Dharma Trading Company. They have several different weights available. Any of them can be used for skirts: if you want a "fluffy" skirt with lots of layers, the silk gauze works well. For most standard skirts with two layers I use the medium weight chiffon (10 mm). If you want a non-see-through single layer skirt, the double chiffon is best. They also offer this fabric in black because it is very difficult to dye fabrics a true black color. Black is the only color that I would buy ready-made.

The great thing about dyeing silk is that it is very easy to dye on the stovetop (far easier than tie-dyeing). There are several products available for this. I would steer clear of RIT, Dylon, or any other dye available in a craft store. These are general-purpose dyes that do not react with the fibers to form a permanent bond. The colors are not bright and will fade/run over time. My favorite product is the Jacquard acid dye (you can get this from Dharma, or you can go to the manufacturer’s Website to see if any nearby stores stock it). This dye does a great job of giving results that are vibrant, even, and (very) permanent. It is very safe to use as the only other chemical you need is white vinegar. It is very concentrated and a small jar will go a long way.

I have been following the directions posted on the Dharma Website and I have yet to have any problems. When you receive the dye, there will be a swatch on the jar that indicates the color that the fabric will come out if it is fully saturated with dye. It cannot get any brighter/darker than that. The directions tell you how much dye is needed to fully saturate a pound of fiber. In order to determine how much dye you need, you should weigh your fabric (I have an inexpensive gram scale) and calculate how much dye you need from that. If you use more dye than this, some of it will not react with the fabric and will end up getting poured down the drain (these dyes are not all that hazardous, but it is best to be safe). If you want a lighter shade, you can cut the calculated amount of dye by a factor of 2, 4, etc. To get pastels, I cut it by a factor of 10. As long as you don't exceed the saturation point, there should be little to no color left in the dye bath once the simmering is complete.

I don't cut out the pieces of the skirt before dyeing because the edges of the fabric tend to come out a little darker. Once the process is over, you can rinse the fabric in a special detergent called synthrapol in order to remove any unreacted pigment (there is not a lot of excess runoff with this product, but it will soften the fabric). Once it is done, I hang it to dry. It is best to not put this fabric in the dryer because it will shrink and gain a crinkly texture. Once it's dry, it is good to sew. Just remember to cut the skirt a little bit bigger because it does not stretch.

The most nerve-wracking part about this process is getting the dyed fabric to match the Lycra. The best way to do this is to compare a swatch of your Lycra to the different colored dyes available and select closest color match. Some people are advanced enough that they can successfully mix colors; however I feel that the manufacturer offers enough colors (and most skaters select more or less "standard" colors for their dresses anyway). No matter how hard you try, you will not get an exact color match, but nobody is going to notice as long as it’s close. If you are anal about it, you can dye small swatches and take notes about how much dye you use. I just estimate using the swatch on the jar and I always get "in the ballpark" results.

When I first tried this, I had my doubts. However, after my first attempt, I was shocked at how nicely the fabric dyed. If you follow the directions and keep good notes, you cannot fail at this. Dharma as well as the manufacturer have great product support and are happy to answer your questions if you call them. It seems scary, but it is not that hard.

I have read that some designers also dye their own Lycra with this product (i.e. Sasha Cohen's seamstress). However, the same dye recipe will not yield the same color in the Lycra and the silk. This means that you have to use two different recipes to get the same color (not fun to figure out).

The dyeing technique that I described is only useful for solid color dyeing. I only use it when I need to match the silk to a colored lycra bodice. For example, if I were to make a royal blue dress, I would buy the blue lycra and I would dye the white silk to match the lycra as best as I could. I have heard that some people use tub dyeing to achieve an ombre effect, but I have never tried it, so I can't give you any advice on that. When it comes to doing an ombre effect, I use an airbrush with a special paint called dye-na-flo. This is a special paint that can be used with an airbrush on pretty much any fabric you like (not just silk). Just remember to follow the directions.

The link to the acid dyes (and their instructions) can be found here. You might notice that Sasha Cohen's seamstress is featured on this page for using this product (if it's good enough for her, it's good enough for me!).

Dharma offers silk chiffon in a few weights and any of them could be used depending on what type of skirt you like. This fabric is semi-sheer in most cases, so you will usually need to do multiple layers in order to avoid the see-through skirt. I almost always use the medium weight 10 mm. For this, you need to make a double-layer skirt.

If you want to make a single-layer skirt, use the double chiffon. It all depends on what look you are going for. I think having a see-thru skirt defeats the purpose of having a skirt, so I always double up or go with the thicker material. Be warned that the commercial patterns (such as Kwik-Sew) are designed to make skirts with stretch material, so you will need to cut the skirt a little bit bigger. Pin it to the bodice and have the skater try it on so you can make adjustments to the fullness.

I learned all of this from buying the products and trying them out for myself, so you might find something that works better for you. Unfortunately, a lot of dressmakers are very secretive about how they do things (especially when it comes to airbrushing), making trial and error the only way to learn. That being said, if you are interested in improving you need to be willing to be brave and try out things that have no promise of working. If you think things through before you do them, they usually work. It is also helpful if you have a skating friend who gets their dresses professionally made (and that you like the look of). If you ask them (nicely) to bring it with them to the rink, you can take a good look at them in inside and out to see how they are constructed/beaded etc. My sister (the skater in my family) had a friend who splurged for a Tania Bass dress that she let me take a look at.

Being able to study good examples of handmade dresses takes a lot of mystery out of the (often) mysterious world of making figure skating dresses. I think most skating designers started out as some skater's mom or relative that wanted to save money buy making their own, but ended up really enjoying it.

Thank you, C.M., for your excellent post! You’ve given me the courage to try dyeing silk for a skirt – the flowy effect looks stunning. I’m also asking for an airbrush for my birthday, I can tell you that!

Update: From reader Anonymous: The fabric that has worked very well for me is Glissenette. This is a sheer stretch fabric that doesn't roll at the edges when cut. It is easy to sew with and floats beautifully as the skater moves. It is available in limited colors so there is some matching difficulty. I order it from spandexhouse.com, spandexworld.com and Jone's fabric (more expensive, but bigger selection) There is a sheer nude color that I use over nude spandex for nude looking cut-out backs that still provide some warmth.

Update: From post author C.M.: Although this fabric does not contain any elastic fibers (making it a not suitable for bodice material), the fabric does have a little bit of stretch to it, which makes it a little more resilient. However, you still need to cut it slightly bigger and "gather" it around the bodice so the skater can still pull it on and off.

Update: From reader Anonymous: I airbrush with paint as dying on polyester is too much chemical manipulation for my liking, although I could do it if I was dedicated enough. [...] The secrets are in the products, dye vs paint. I've had great success with Jacquard products but they can be expensive.

Do you know more than Ice Mom? Great! E-mail me with your guest post! icemom.diane@gmail.com

Monday, January 4, 2010

Ice Mom’s Sewing Guide: All about Patterns

Note from Ice Mom: I’m going to write a series of posts about sewing. I figure that I write a lot about sewing and that many of you would like to try it, but don’t know where to begin. So, I’ll be posting about how the process works. As I build this fountain of knowledge, I’ll put all posts under the Sewing Guide category. Of course, if you sew, please write about your process in the comments!

This post is part of Ice Mom's Sewing Guide.
Other posts in this series: All about Patterns, All about Fabrics, How to Dye Silk for Fabric Skating Skirts, Altering Your Growing Skater's Figure Skating Dress, Laying out the Pattern.

Sewing patterns are a bit more involved than finding a pattern and buying it. Pattern prep begins with measurements and ends with alterations. It can be intimidating, but I think you can handle it.

My advice would be to start small and easy. If you've never sewn anything before, start with a practice skirt. My favorite practice skirt is Jalie #2215. Its waistband is like poetry - very smart, very easy, very neat. You can read my two reviews of this pattern: pants and skirt. Even easier than the skirt is Jalie's shrug pattern #2558. I reviewed the shrug pattern, too.

Measuring. Before you shop for patterns, measure your skater. This is an awkward process because you have to measure in spots that are pretty private. Your skater should be dressed in tight-fitting clothes, preferably a leotard and tights or skate pants and a tank top.

Before you begin, it’s a great idea to have a small spiral notebook or a few file cards handy. Use one page or file card per skater. Write these letters down the side of the card, like a column: B, W, H, Dia., In. Those stand for Bust, Waist, Hip, Diagonal, and Inseam. Across the top you’ll put the measurement dates.

  • Bust. Have your skater lift her arms in the air and wrap a flexible tape measure around the widest point of your skater’s chest. Have your skater put her arms down to her sides and stand up straight. Take the measurement and write it down next to B under today’s date.
  • Waist. This is the natural waist, not where your skater wears her jeans. Find the point where the body cinches in. That’s the waist. Measure it and write it down next to W.
  • Hip. This is the widest part of your skater’s body below the belly button. If you’re measuring across the butt cheeks, that’s just fine.
  • Diagonal. This awkward measurement is something that Jalie requires and it’s a good idea, anyway. The measurement figures out how long your skater’s torso is. With feet apart, start the measuring tape at the skater’s left shoulder. Bring it down to the crotch and back up to the shoulder. It makes a big circle around your skater’s torso. Write this measurement next to Dia.
  • Inseam. You don’t have to take this measurement unless you’re sewing pants. Again, this one’s awkward. Ask your skater to stand with her feet apart. Measure from the crotch to the knobby bone at her ankle. That’s the inseam.
Pattern selection. I look for patterns that are multi-sized for easier fitting, on sturdy paper for easier drafting, and have good instructions. Patterns aren’t cheap. Expect to pay $10 – 20 for each one. That’s another fabulous reason to buy multi-sized patterns: more uses.

I recommend Jalie or Kwik Sew for figure skating patterns, but Specialty Sportswear has very nice designs. Jalie includes 22 sizes in the envelope and prints on sturdy paper. Pattern backs and instructions are downloadable in .pdf form on their site. Kwik Sew is a multi-sized pattern on sturdy paper, too. Its instructions are well done, the diagrams are clear, and novice sewers should have plenty of success. Specialty Sportswear has many nice designs, but only one size in the pattern envelope and the instructions and diagrams are for advanced sewers. I don’t touch them, myself, but I know people who have great success with them. You can read my review of Specialty Sportswear patterns here. All patterns are available online. Kwik Sew and Jalie are available in some fabric stores.

I do not recommend Green Pepper patterns. The one I made didn’t fit at all, which is a huge waste of my time and money.

Consider, too, your skater's body type. I once sewed a dress for a skater who had a generous bust measurement. The dress had a halter top. Very cute, but the girls kept getting loose when the skater moved. I added addtional straps to keep the girls inside the dress and the skater comfortable.

Fitting. When choosing a size, it’s always easiest to work off the bust size measurement than any other measurement. Why? Because reshaping arm holes is a real pain. If you make adjustments to the bust, you’ll mess up the arm hole and maybe make it too tight or too loose. Neither is great and both are hard to fix for a novice sewer.

Your skater might be a size small horizontally, but a size medium vertically. My advice is to trace the pattern for the horizontal size and the vertical size. So for that example, I'd use the small measurement for the horizontal and the medium measurements for the vertical. Match up the intersections at logical points.

If this is your first dress you’ve sewn for the skater or the first time you’ve sewn patterns from a pattern company, you might consider combining the panty and bodice (top) pieces. I have instructions to combine pattern pieces below (Combining two pieces into one piece). The idea is that you’ll have a leotard to work with instead of a top and panties. It’s much easier to baste the leotard back and front together using a long, long machine stitch and have the skater try it on than to try to add fabric to the panty after the dress is sewn together.

Fitting the leotard: Even though this post is about patterns, here’s the explanation about how the leotard fitting method works, but first you'll have to follow the instructions in Combining two pieces into one piece. Baste the leotard together (right sides together) at the shoulder, crotch, and side seams. Don’t do any finishing work and make sure you can pull those stitches out. Have the skater try on the leotard, wrong side out. Use a water-soluble fabric pen to indicate where the leo needs to be taken in or let out. Sew the final leo along your markings, rip out the basting, and ask the skater to try it on, right side out. Gently pin the skirt along the markings you made in the Combining two pieces into one piece instructions below. Does the skirt cover the panties? If not, adjust. When you have the dress at your machine, repin the skirt so the right side of the skirt and the right side of the leo bodice are together. The skirt’s hem will be towards the neckline. Zig zag stitch the skirt to the leo at the skirt’s top edge. The skirt will hang down over the stitching and no one will ever see it.

Pattern tracing. You don’t have to trace your patterns, but it’s a pretty good idea. Many patterns will set you back $10 – 20. The patterns are multi-sized and you might have to make adjustments to make the dress fit. If you’re going to make adjustments anyway, you might as well give in and trace the pattern. It takes me about 30 minutes to trace a pattern and watch half an episode of Dexter. Be sure to iron the pattern flat and have a big, flat surface to work on. Some folks use their floor, but I use my kitchen table, which is a good excuse to clean it off.

I recommend that you purchase pattern tracing paper from a fabric store. You can purchase a yard of this thin stuff for about $1.99. I buy in 10-yard batches and try hard to use a 50% off coupon. Ask the gal at the cutting counter to give you an empty bolt for storing the paper. Pattern tracing paper comes in plain and gridded models. Either works fine, but I use plain. I find all the extra grid lines confusing, but that’s just me. You can also use lightweight sew-in interfacing if the fabric store doesn’t have any tracing paper in stock (do not use iron-in interfacing). Another option is plain ol’ white tissue paper, like you’d use for gift wrapping. Tissue paper is thin, though, so it won’t stand up to heavy use.

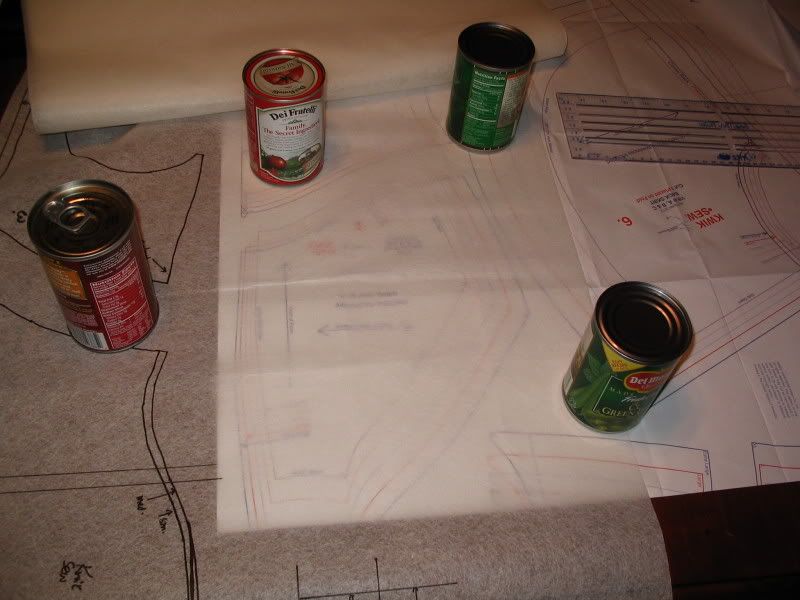
Sharpie, ruler, soup cans. I use all three to trace my patterns. I lay down the pattern, cover it with tracing paper, and weight it all down with soup cans. I trace the pattern using a Sharpie and a ruler. Sometimes it’s tough to see which line to follow. Give yourself permission to lift up the tracing paper (try to keep the lines in place) every once in a while. It helps to approach a jumble of similar lines from two different directions to help you find the correct line.

Be sure to transfer the grain line (the arrow and line down the middle of the pattern piece) or the place-on-the-fold line, the letter or number of the piece, the make and style number of the pattern (so you can pick it out from a potential mess of pattern pieces), the size, the skater’s name, and the number of pieces to cut.

I also keep a roll of medical paper tape with me when I copy patterns. Sometimes tracing paper rips or I cut through it. Repairing the pattern with paper tape allows me to iron over the tape without it sticking to my iron plate and shriveling on the pattern. I also use it to reinforce any guides that the pattern might have. Sometimes patterns have circles where a zipper stops or starts or where a sleeve meets the arm hole. I use the paper tape on both sides of the pattern piece, cut out the hole, and then use my chalk or fabric marker to mark over the hole. The paper tape prevents the marking hole from ripping.

Combining two pieces into one piece. This is a very, very useful technique, especially if you’ve never sewn for a particular skater or never used a pattern company’s materials. The idea is that you’ll combine the bodice (top) and panty pieces into one leotard and fit the leo to the skater. Using the leotard method eliminates the headaches associated with adding fabric for length.

Trace the bodice pieces, both front and back. At the bottom of each piece, measure up for the seam allowance and mark the seam line (where you’ll be sewing). Most seam allowances are either 1/4” or 5/8”. Check the pattern instructions. I use a dashed line to indicate the seam line.

Trace the panty piece, both front and back. Measure the seam allowance down from the top of the panty and mark the seam line with dashes.

Cut out all pieces. Using paper tape, tape the front seam lines on top of one another to create the leotard front. Repeat for the back. I usually retrace the whole pattern piece, but using the taped pieces will work just fine. Transfer the original seamline onto the fabric where the original panty met the original bodice using chalk or a water-soluable fabric marker. That's the skirt line. You'll try hard to match the skirt to that line in the instructions above, Fitting the leotard.

Separating one piece into several. Just as you can combine two pieces, you can also separate them. I’ve separated bodice fronts and backs to create color blocking on dresses. In other words, instead of having a bodice that’s all one color, I can sew a bodice that’s made up of pieces from different fabrics and different colors.

Trace the bodice piece. Draw lines or curves in the position where you'd like a different piece of fabric. Cut out the marked-up bodice piece, which is now your guide bodice piece. Place your guide under the pattern tracing paper and weight it down with soup cans. Trace the bodice piece for the first color of fabric. Where the first color meets the next color, draw a dashed line. Remove the guide. Increase the size of the piece by measuring out from the dashed lines 1/2” for a seam allowance. Draw in the new cutting line 1/2” from the dashed line. Label the pattern piece with the color and move on to the next color. When you're finished, you should have a collection of smaller pieces, that, once you match seamlines, will have the same shape and size as the guide piece.

When you sew the fabric pieces together, it’s a good idea to sew a line of straight stitches (stay stitches) 3/8” from the edge of the fabric first. These stitches should be in the seam allowance. Clip to the straight stitches and pin the pieces right sides together. Clipping the fabric will allow the fabric to lie flat along curves so that the two pieces of fabric easily fit together.

Another way to achieve this color blocking effect is to use appliqué. That’s another post, though.

Do you have any sewing techniques related to patterns? Add them to the comments!

As always, if you have a question or an idea for a blog post, e-mail Ice Mom.

Wednesday, September 9, 2009

Sewing review: Jalie figure skating practice skirt #2215

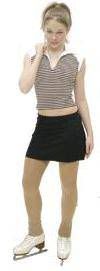
I sewed Jalie #2215, just the figure skating practice skirt pattern, for one of Ice Girl’s young friends. The gal in the photo on the left looks angry, but I assure you: this is a great pattern. I don't know what she's all ticked off about.

Most of you know that I’m a big fan of Jalie because the patterns include 22 sizes and the instructions and diagrams are usually accurate and detailed. Jalie patterns are pricey: $12.99 for this one, plus shipping. But the heavy paper and the multiple sizes make up for it, I think.

I always download and print the .pdf instructions for the Jalie patterns in advance because the company prints them alongside the pattern pieces. Those big sheets of paper are difficult to use when I'm sewing. You can find the printable instructions on the company's site.

In the past, I’ve sewn Kwik Sew #3051 for Ice Girl’s figure skating practice skirts, but I’m not a big fan of the waistband on that pattern.

The Jalie waistband is very clever and easy. There’s no waistband to cut – the skirt and panty make their own waistband.

The instructions explain that sewers should pin the skirt and panty top together with the wrong side of the panty to the right side of the skirt. That just didn’t seem right, but it is.

Here’s the genius of it: the top seam forms the top of the casing. Once the panty is back inside the skirt, Jalie instructs sewers to topstitch the casing and stitch a straight seam an inch or so under the topstitching, leaving about a 2” opening. Sewers insert the elastic between the panty and the skirt, sew the ends, and finish the seam.

Smart, hey?

If you have no idea what I’m talking about, you can see the online pattern instructions and diagrams here: http://www.jalie.com/product_printing_guide/2215.pdf

Anyway, this practice skirt went together very quickly: about one afternoon, start to finish. I had to take in the panty and hike up the skirt hem for the little munchkin, but this is my new go-to practice skirt pattern.

Wednesday, August 26, 2009

Sewing a figure skating undergarment from a swimsuit pattern

If you read this, I have to swear you to silence. Ice Girl won’t like the idea that people are reading about her undergarment. Swear? Good.

I had such trouble finding Ice Girl a leotard-like undergarment for underneath her figure skating dresses. She’s a modest girl and likes to be covered. I get it. But, she’s tried on every flesh-colored undergarment between here and Milwaukee with no success.

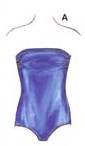
After searching patterns, I decided that the closest thing to what Ice Girl wanted was Kwik Sew 3503, view A. View A is a strapless swimsuit, but I added strap loops and clear straps to it. I offered to lower the back into a deep scoop or replace a bunch of the fabric in the back with flesh-colored athletic mesh, but she didn’t want that. Whatever. You could modify the pattern very easily to accomplish both of those suggestions.

The pattern includes a front lining with a shelf bra and it sews together in an afternoon or less (just five pattern pieces). I was worried about the gathers on the side and in the front lining, but they’re virtually unnoticeable and disappear under a figure skating dress.

Ice Girl loves her undergarment. Here’s what I did:


  1. Fabric. Flesh-colored spandex that matches her skin color.
    High-cut legs. The pattern has options for both low-cut and high cut leg openings. I used the high-cut option because I didn’t want the garment sticking out Ice Girl’s figure skating dress’s leg openings.


  2. Straps. Clear straps made from clear plastic elastic, clear swimsuit hooks on both ends, and a clear slider. I melted the two layers of elastic together instead of sewing them (I used my BeJeweler with the nailhead attachment.) You can buy clear straps, too, but Ice Girl loses them so often that I thought it would be good to have the replacement parts on hand.


  3. Strap loops. I added flesh-colored ribbon loops, spaced evenly around the top of the garment to accommodate the straps in all sorts of configurations.


  4. Fortuitous mistake. I didn’t have the 3/4” elastic for the top of the garment. I used my standard 3/8” elastic instead and zig-zagged the lining close to the elastic. This worked great, actually, because I eventually removed the lining’s top stitching to add a bra insert.


  5. Sew-in bra. Ice Girl didn’t like the minimal support from the shelf bra, so I used my mistake to my advantage. I.G. tried on the undergarment over a clean, but worn, flesh-colored bra. I used my tailor’s chalk to outline the bra on the outside of the garment, pinned it, cut off the bra’s straps and back, tore out the lining’s stitching, repinned the bra, and then basted it all in place. One more fitting before I stitched it permanently and ripped out the basting. It looks good and the bra and stitching are hidden in the lining. We had investigated the bra inserts at the fabric store, but they’re weird. Some models are gel-filled, some are push-up, and some are paper cones. I think using her own bra makes her feel more confident, too.
I was really worried about making this undergarment because Ice Girl is notoriously picky about them – she tried on dozens and didn’t find one she liked. The garment went together quickly, and fit well, so I didn’t end up wasting my Saturday afternoon at the sewing machine for nothing. When Ice Girl needs another undergarment, this is what I’m going to make – with 3/8” elastic at the top, too!

But, we've never had this conversation. You don't know anything about what Ice Girl might or might not be wearing under her figure skating dress. Silence, folks. Remember, you promised.

Is it O.K. to let the undergarment show or not? Let's discuss. How does your teen/preteen feel or how do you feel about flesh-colored garments showing through keyhole openings in figure skating dresses? You know - the kinds of dresses that show a lot in the back or front? Is it O.K. or is it tacky?

Monday, August 3, 2009

Sewing Review: Jalie Figure Skating Halter Dress #2571

I’m working my way through the Jalie figure skating dress line up. A few weeks ago I sewed this dress for Ice Friend. As with most Jalie patterns, this one went together pretty intuitively and without too much trouble. I learned a few things along the way, though.

Fringe. If you’re going to add the fringe, shorten the skirt. I’ve never sewn fringe before, but it wasn’t too difficult. I machine-basted 4” around the bottom of the skirt, sheared off the bottom using the basting as a guide, sewed the fringe to the right side of the hem, ironed the seam to the back, and topstitched the seam allowance flat.

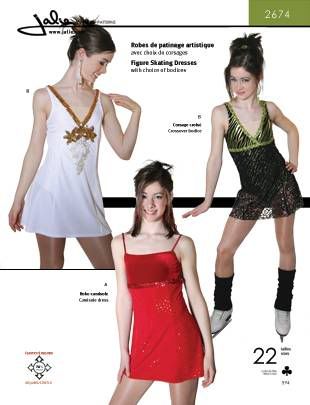
View A’s ring. I sewed view A (bottom left on the photo) and the pattern instruction’s ring diagram took me a lot of think time. I remember thinking, “This can’t possibly be right.” I wish I could tell you what I did, but I remember looking at the diagrams, manipulating fabric, and going for it.

Extra straps. The straps in this pattern hold up the dress, but on a chesty skater, the straps just don’t hold in the girls. Originally, I had just used the two straps on the ring for Ice Friend. She practiced in the dress and the girls spilled out the sides. So I added two additional straps and crisscrossed all of them. Unfortunately, to hold in the girls, the straps had to be really tight – so tight that Ice Friend was trapped in the dress. I cut her loose and used small loops on the back and small swimsuit hooks at the end of each strap. This system worked pretty well – Ice Friend could even do a somersault in the dress and the straps stayed on.

Would I make it again? Yep. It’s a pretty cool dress. However, if your skater has lots of cleavage, I’d choose another pattern.

Tuesday, July 21, 2009

Sewing review: Jalie Empire Waist Figure Skate Dress #2674

The purple painted dress I had made was Jalie pattern #2674, Empire Waist Figure Skating Dress, view B (the white one). I thought that the skirt with an empire waist would look pretty when Ice Girl was spinning.

Actually, it’s not as pretty as Kwik Sew #2796, which flares prettily when a skater spins. This one is too narrow for that pretty flare. Ice Girl has Kwik Sew #2796, but she won’t wear it for reasons that are a mystery to adults (like me and Ice Coach), but make perfect sense to a 13-year-old. For whatever reason, she won’t wear it anymore. Will this fickleness end at some point?

So. I made Jalie #2674, view B for the spins program. I’m pretty happy with the results, but I learned a few things that would be useful to know if you’re making it for the first time:
  • Painting it? Paint the panties, too. Otherwise, look away and giggle nervously when the skater spins and you can see what looks like tidy whities. Yeah. I did this. (Insert head smack here.)

  • Mistake on instructions. I think that Bodice – view B has a mistake when it tells sewers to pin the wrong side of front lining to right side of front pieces. That seriously can’t be right. It should be “Pin right side of front lining to wrong side of front pieces.” That’s what I did anyway, and I’m pretty sure it’s right.

  • Straps. Don’t let your kid convince you that the straps have to be super tight. If you do, you’ll get a pucker where the bodice halves meet. I covered up that pucker with some sequin trim, but still. It irritates me.

  • Keep track of the skirt pieces. There are seven panels to this six-gore skirt, so if you don’t keep good track of them, you might end up sewing back sides together, instead of center backs. Yeah. I ripped out that seam.

  • Sequin trim. I really like the stretchy sequin trim that I put on the bodice and Ice Girl has gotten compliments on it. If I were to do it again, I’d pop for the sequin trim again. The trim’s pretty easy to put on, especially if you do it after you’ve had the skater try on the dress and measure the straps. Just run that trim down the strap and zig-zag the embellished strap to the back bodice. I use a 90-gague needle for the sequin trim, not my puny stretch needles (70- 80-gague) and I usually break one needle when I’m applying the stretch trim with a wide zig zag on both sides of the trim. Better than hand sewing, though.
Bottom line: I’d sew this dress again, but not for a spins program. Oh, and I’m going to let the Jalie folks know about the error in the instructions. Otherwise, it’s a pretty dress, fits well, and goes together without too much drama. Well, not too much sewing drama, anyway.

Monday, July 13, 2009

How-to: Remove Hotfix and E6000 Crystals from Figure Skating Dresses

If you set crystals, this post is going to rock your world.

I heard a rumor a few months ago that a gal was removing crystals from dresses with no damage to the dress. No way, I thought. No way.

Way.

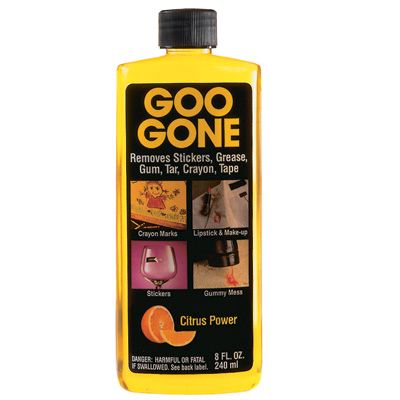
I talked to the gal who removes the crystals and she just shrugged and told me she uses Goo Gone. It takes them right off and doesn’t leave a stain.

I tried it on that Harry Potter pillow case – the one that has both hotfix and E6000 crystals on it. It took off the crystals and left no stain. It also removed the sequins from that troublesome fabric in an earlier post with no stain, either.

How to remove crystals with Goo Gone:
  • Use a tissue. I tried cotton rounds, but cotton left fibers behind.
  • Saturate the tissue. You’ll use lots of Goo Gone for this.
  • Dab the front and back. Dab at the crystal area from both the front of the fabric and the back of the fabric to loosen the crystal.
  • Don’t tug. The crystal will loosen eventually. Don’t tug on it the rest of the way or you’ll remove some of the silver paint on the back of the crystal. Be patient and keep dabbing at the bugger until it releases on its own. Then you can re-use the crystal (with E6000 as a glue; you can’t hotfix it again).
  • Hotfix comes off easily. Hotfix crystals came off the pillowcase the easiest, but the E600 wasn’t too bad. The crystals came off, but left a little lump of glue on the lycra. I just peeled off the little lumps.
  • Do a practice run. Glue some crystals to a scrap of lycra before using the Goo Gone on a dress. You can take my word that it doesn’t stain, but I’d rather you didn’t. Give it a shot for yourself and see if it works for you.
Update: lighter fluid, the kind you put in a lighter and is sold alongside tobacco, not charcoal, is terrific at removing crystals, both hotfix and E6000. As always, test first!

Share your results! Did you try this at home? How did it go? We’re all curious, so let us know!

Monday, July 6, 2009

How-to: Spray Paint a Figure Skating Dress

Remember how I ruined a figure skating dress for Ice Girl last fall? http://tinyurl.com/monssp Well, I did it right over the weekend.

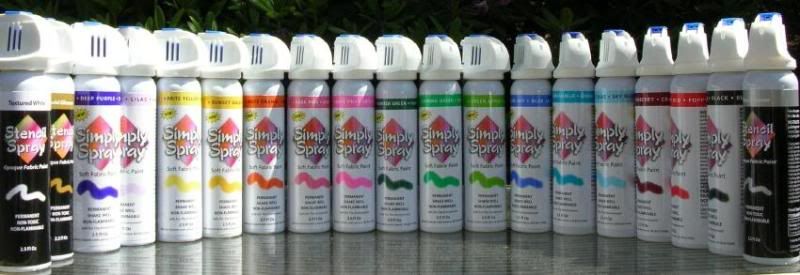
If you’ve read the previous post, you know that constructing the figure skating dress before spraying with Simply Spray fabric paint is a disaster. There’s no way to prevent the dye from spotting through to the panties and back – I don’t care how well you cut out tag board shields.

Here’s how I spray-dyed the figure skating dress:
  1. Cut out all of the pieces from white lycra.
  2. Cover an old folding table with an even older sheet. Ice Dad, a wizard with an iron, ironed the sheet flat using steam and spray.
  3. Let the sheet dry for 30 minutes (the steam and spray need to evaporate).
  4. Set out the pieces, matching notches and hems.
  5. Spread out the pieces just a bit so they’re not touching, but so the seamlines and hems match up. Make sure they're flat, flat flat. No wrinkles.
  6. Spray with Simply Spray fabric paint in an arc starting off the fabric and ending off the fabric.
  7. Allow to dry for a good 24 hours (the package says 1 hour, but I had trouble with this last fall).
  8. Sew as usual.

The fabric is stiffer than unpainted lycra, but it looks really pretty. I used 1 ½ cans on this dress.

Cautions:
  • Shake the can away from the fabric or you’ll have spots.
  • Don’t use all of the paint in the can – it spots as you finish the can.
  • Start and end off the fabric or you’ll have spots.
  • Dry well or you’ll have weird shadow images from whatever is behind slightly damp fabric.
  • Paint and dry on a perfectly flat surface.
  • Be careful to wear an apron or old clothes and spray in an area that you don’t mind covering with fabric dye spots.
  • Don’t spray in the wind or where leaves, twigs, and bugs will fall on your fabric while it’s drying.
Update: Oh, you're going to just love this. You might notice something missing in the photos above. Yep. The panties. I thought I'd outwit the system and allow the dress pieces to dry while I sewed the bodice and the panties. The bodice and panties were both white. I watched Ice Girl skate yesterday at a competition and noticed the white panties peeking out from under the dress. Er. They looked like...well...underpants. Geez. I'm such a dork. I should have sprayed the panties along with the dress. After a fit of guilty giggles and lots of head smacks, I debated for a minute or two about asking Ice Girl to change dresses between the spins event and the jumps event. However, there was little time between the two events, so I decided not to tell her. Yeah. Not my best parenting moment, I'm sure. However, Ice Girl didn't seem to mind when my friend told on me. Ice Girl just shrugged it off and told me she liked the dress anyway.

Bottom line: Again, allow me to be your horrible warning. Um. Paint the panties while you're spraying the rest of the dress. Duh, Ice Mom.

Monday, June 22, 2009

Figure skating dress fabric and Jalie pattern #2801

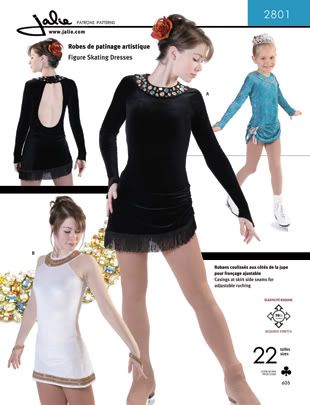
I did some more sewing over the weekend and completed Jalie pattern #2801, a dress with a large keyhole back for Ice Girl’s compulsory program.

As always, the Jalie instructions were good and it went together without any major sewing mistakes.

The mistake I made wasn’t in sewing; it was in the fabric choice. Again, I’m here to be your horrible warning.

I used this beautiful black stretch velvet with a pattern of sequins all over it. I made the white dress you see in the picture and cut out appliqués of the main fabric for the bottom of the black mesh sleeves. I thought I was so wise: all those sequins made for great sparkle. No crystals necessary.
So far, so good, right?

Well, the collar facing, the keyhole opening, and the leg openings are all in the sequin fabric, which is scratchy. Not the velvet part, but the sequins.
Just terrific. I spent hours on this beautiful, classy dress and Ice Girl complains that it is painful to wear.
My solution is to try to remove the sequins on the facings with some kind of solvent. We’ll see how that works.

Bottom line: Use fabric that won’t itch or scratch the skater. As much as I wanted to wring Ice Girl’s neck when she tried on the dress and began to whine, she had a point, darn it. Of course, this is the same kid who can feel a pea under her mattress, so maybe she’s blowing the whole thing out of proportion. Still, I’ll never buy fabric that even looks like it might be uncomfortable. I don’t care how much it sparkles.

Monday, June 15, 2009

Figure Skating Pattern Review: Jalie 2684

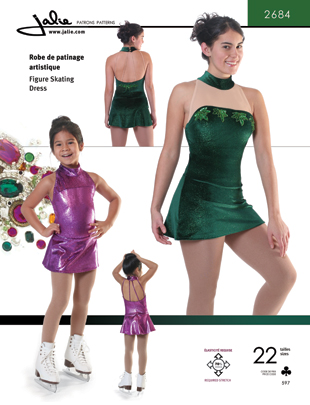
I finished the figure skating dress I've been working on for Ice Girl. It's Jalie pattern #2684 and it looks pretty good. I tell you: I was worried. We've got some bright fabrics working here.

Ice Girl and Ice Coach selected a lycra that's like chrome. I kid you not: you can see a reflection in this stuff. Think aluminum pop can and you'll have it.

They also selected a holographic hot pink, a holographic blue/purple, and a holographic lime green. That's a lot of shine.

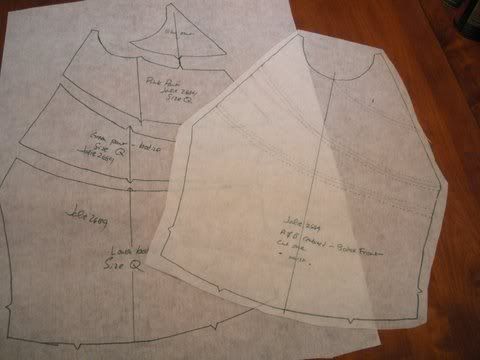
I combined the two bodice pieces into one (see photo at left) and then traced out where I wanted the colored pieces to go. You can see where I added extra seam allowances to the pieces. If you've never pieced anything together, realize that when you sew the pieces, it's a good idea to sew a stabilizing straight stitch just inside the seam line and clip the seam allowance to the straight stitch. It makes pinning and sewing so much easier and pucker-free.

Tip:
use sew-in stabilizer or sew-in interfacing to trace patterns. The stabilizer or interfacing is pretty see-through and very sturdy. It irons well and holds up to multiple cuttings. Sew-in stabilizer is pretty cheap, too. I think I spent $1.09/yard at Wal-Mart for it. I always buy 10 yards at a time because I don't want to run out in the middle of tracing a pattern.


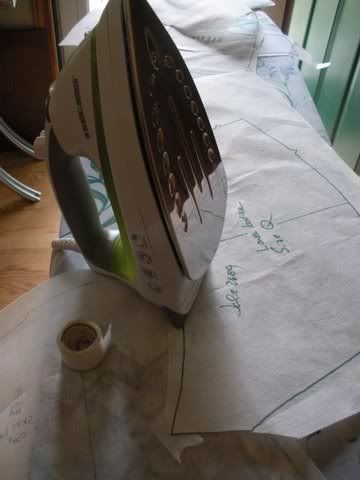
Tip: I also use medical paper tape when I need to tape my patterns together. Irons don't melt paper tape; they melt Scotch tape really well, though. You can see in the photo with the iron that I cut off the top part of a pattern piece. I repaired it with the paper tape and moved on with the project.

Jalie review: Again, I like the Jalie patterns. The instructions and diagrams are clear and sensible. The patterns come with 22 sizes, so adjusting it to fit is pretty simple.

My complaint with this pattern is that I had trouble with the collar. It gapped. When Ice Girl tried on the dress, the collar sagged like a cowl neck instead of fitting to her neck. It took some creative sewing (darts) to make it lie flat and not look funny.

Otherwise, Ice Girl loves the dress. As I said, it's bright, but not so flashy that I'm embarrassed to have passed it through my machine.

The problem? Ice Girl can't figure out where the crystals should go. Um. No crystals, Ice Girl. You'll blind everyone with that much shine.

Bottom line: would I buy another Jalie pattern? You bet. The gaping neckline isn't enough to deter me from their figure skating dresses. Overall the fit is good and I can fix a gaping neckline pretty well.

Monday, April 27, 2009

What to Wear to a Figure Skating Competition

I was reworking Ice Girl’s sock bun at last Saturday’s Basic Skills competition and teaching another mom the basics of the process when a coach I know overheard me.

Coach was judging at the little competition and my hair demonstration seemed to put a quarter in her. She started to talk in a loud voice and wave her arms a lot.

“You should teach a class,” she said.

I had no idea what she was talking about.

“We need to have a seminar for skating moms so that they know how to dress their kids for a skating competition,” Coach said.

Well, she said a lot more and made some comments about coaches who offer no instruction about what the skater should wear or how the skater’s hair should look.

“Neat,” she said. “I just want neat. Neat hair, neat dress, no laces dangling from the skates. I don’t want to be distracted when I judge.”

This makes sense to me, and I’m sure it makes sense to most readers: skaters should dress in a manner that calls attention to the skating, not to tangled hair.

Skating attire/grooming requirements:
Courtesy mostly of Coach (M.R.)

  1. Hair should be neat. A bun is best, but a close second is the ponytail. Don’t leave hair loose and unmanaged.
  2. Figure skating dresses only. Ice dance dresses are not figure skating dresses, Coach said. The extra fabric might look terrific in a spin, but it hides the skater’s leg positions and ticks off Coach when she judges. I’m sure it ticks off other judges, too.
  3. Laces should be tucked in. Boots should be tight, not floppy. Laces shouldn’t drag on the ice. Tuck them into the tights.
  4. Tights in good repair. Over-the-boot, footless, or footed: to a judge, it just doesn’t matter as long as the tights don’t have holes.
  5. Keep the undies hidden. “I don’t want Dora the Explorer underpants peeking out at me from under a skater’s dress,” Coach said. I don’t blame her.
  6. Crystals. I couldn’t help but interrupt Coach’s rant and ask: do crystals matter? She looked at me like maybe I wasn’t the person to teach her fictional new skating mom class. “Crystals?” she said in a shrill voice. “I don’t care about crystals.”
  7. No gloves, no jackets. They’re fine for warm-up, but leave them off the rink when you perform.
  8. Conservative makeup. “It’s not a beauty pageant,” Coach said. “Why are they sending these little girls out with so much eye makeup?” Well, she said a few other things, too, but the gist of this one was: keep makeup conservative and age-appropriate.


Feel free to add your attire/grooming requirements below. If you think Coach and I are off-base, you can write that, too. I might work up the courage to let her know…someday.

Monday, March 30, 2009

Crystals: Are They Necessary for Figure Skating Competition Dresses?

Be sure to read the comments for this post. Many are from judges and give great insight into the world of sparkle and dazzle.

Flip, an ice dad, left me a comment about the influence of crystal-encrusted dresses on figure skating judges.

From Flip:

I didn't realize that there was a sparkle section on the judges’ scorecard. In my opinion a kid can skate in a burlap sack and as long as the criteria is there and they skate better, then why shouldn’t they win?

Flip makes a good point and I’ve been asking everyone I see for their opinions.

Here’s the consensus: Flip, you’re right. Good skating rules the day.

However, you should follow your daughter’s coach’s recommendations because she has your daughter’s best interests at heart. Let me give you an example from my past teaching career:

I taught high school and advised the student newspaper. Every year the guys on the basketball team would complain because Coach wanted them all to have short hair. They whined all the way to the barber and then for days after the shearing. I asked Coach why he did it.

Here’s what Coach said: I don’t want my boys to be memorable except for scoring. No piercings, no tattoos, no long hair. I don’t want the ref looking at some kid’s hair, making a judgment, and penalizing the team. I don’t want one of them sticking out and the ref to think, “Oh, that kid again.”

It made sense to me, but I still encouraged the kids to stop whining and write an editorial about it. They refused. It turns out, none of them wanted to stick out for special treatment from Coach. Freedom of speech issues aside, that’s some beautiful irony, isn’t it?

Anyway, crystals are a figure skating dress expectation, not a requirement. So, you’re right, Flip, but I think you should pop for the crystals anyway. Here are the reasons I’ve gathered from rink parents and coaches:


  1. Ice is very, very white. Crystals help audiences see the skaters better against the bland surface.

  2. Performance. At higher levels, programs have a performance component. Dresses should reflect the music.

  3. Judgments. Judges who rank kids in Basic Skills competitions often make little notes so they can remember which kid is which. Maybe a judge writes ballerina or blue dress next to your daughter’s name. Just be sure the judge doesn’t write burlap sack.

  4. Crystals are fun. So is sparkly hairspray. So is skating. It’s all recreational spending.

  5. Confidence. Your daughter will see that her dress matches those of the other skaters. Minimize the distractions on competition day. You don’t want her worrying about how her dress looks; you want her to focus on her program.

  6. Spend $30 or less. You can pick up some hotfix crystals cheap at JoAnn Fabrics – about $12 for a container of 200 or 300 Tulip brand crystals with glue on the backs (less if you have a coupon). You can use an iron to affix the flat back crystals to the figure skating dress, but I recommend using the hotfix tool (BeJeweler is best - $19) because you have less of a chance of ruining the dress with its focused heat.

  7. Coach said so. Part of the unspoken contract between parent and coach is that you will trust her judgment and allow her to guide you and your daughter through skating. You’ve paid her good money for her expert opinion; you should follow her advice.

I’m all for logic. I’m all for cutting costs. However, I’m also for spending money to make my daughter not just sparkle on the ice, but shine.

Best wishes for success, Flip!

Ice Mom

Update: Aaron over at Axels, Loops, and Spins wrote a great commentary: To Sequin...or Not to Sequin.

Thursday, March 12, 2009

How-to: Clean Figure Skating Dresses with Vodka

You can skip sending the sequined and beaded figure skating dress to the dry cleaners or hand washing it: spritz it with – get this – vodka instead.

Yep. Vodka has other uses besides martinis. Who knew?

Guy Rehorst, founder of the Great Lakes Distellery, the makers of the award-winning Rehorst vodka, confirmed that vodka has the makings of not only a good drink, but a good cleaning agent, too.

“[Vodka’s] basically 40% ethanol and 60% water, so it will have some solvent qualities to it,” Rehorst wrote in an e-mail. “If you're going to try it on an outfit, I'd test it first to make sure it doesn't do any damage; alcohol could weaken some man-made materials. Of course there are probably other, better products for this and I'd rather drink vodka than pour it on my clothes.”

I learned about this little trick on Tuesday at the rink from a gal who volunteered one Nutcracker season with the Madison Ballet (thanks, K.R.). She told me that the ballet company put vodka in spray bottles and asked volunteers to spritz costumes, especially around the necklines, armpits, and nether regions.

Gretchen Bourg, Education and Outreach Coordinator for the Madison Ballet, confirmed this practice.

“We most certainly do use vodka to keep our costumes fresh between cleanings!” Bourg wrote in an e-mail. “Many of our costumes are very fragile—our company’s Cinderella costumes are probably 25 years old—and we try to minimize the exposure to harsh chemicals for such precious works of art. In fact, the practice of using vodka to freshen both costumes and wigs has been around for hundreds of years.”

I can’t confirm how long people have been cleaning with vodka, but I can tell you that the alcohol in the vodka would kill off odor-causing bacteria very well. The alcohol evaporates as it dries and the garment is fresh and not boozy at all.

Bottom line: Am I going to use this trick? You bet! I have $50 or more in crystals on some of those dresses and I’m not eager to weaken stitching or fabric with excess cleaning. I think I'll buy a cheap bottle of vodka for the cleaning and use Rehorst vodka for mixing. However, I will not mix the vodka with orange juice until I’m finished spritzing. You have to spritz responsibly and all that.

Thank you very much to Guy Rehorst of Great Lakes Distillery, Gretchen Bourg of the Madison Ballet, and K.R. for their help with this post.

Tuesday, March 3, 2009

Review: Chinese Figure Skating Dresses on eBay


Ice Girl’s friend, Ice Friend, has bought two figure skating dresses from China via eBay. Both were less than $50 each, including shipping, both arrived in about a week, and both fit well.

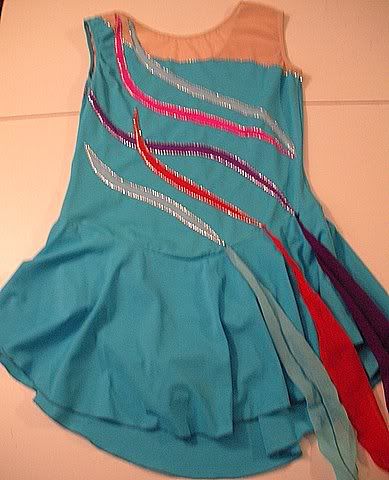
New Exclusive Figure Skating Dress (217-3). That’s the one in blue with the colorful appliqué and trailing ribbons. $24.99 plus $23.00 shipping. Includes a matching scrunchie. Sizes vary from tiny to big; use online size chart or send measurements according to instructions.

Seller: ice-dress0010, eBay member since December 2, 2004. As of this writing: 1448 sales, 99.8% positive feedback.

Fit: the dress fits Ice Friend well.

Quality: the dress is lined and well made with lots of crystals outlining each sewn-on applique. One of the bottom ribbons fell off last weekend, but a quick tack down with a needle and thread repaired it. It’s not the sort of problem that comes from poor construction, but rather it comes from use. The construction is good.

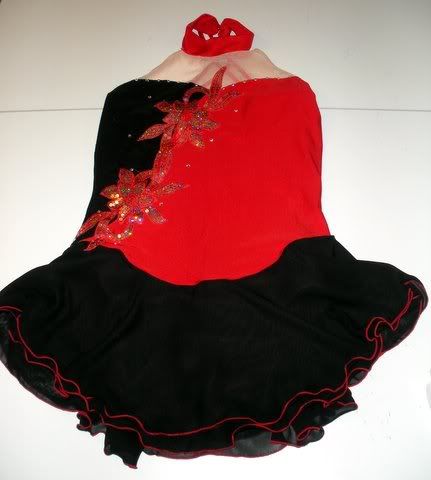
New custom figure skating/competition ice dress C04. That’s the red and black one with the appliqué. $8.00 plus $25 shipping. Sizes vary from tiny to big; use online size chart or send measurements according to instructions.

Seller: yibei_shop, eBay member since April 18, 2005. As of this writing: 431 sales, 100% positive feedback.

Fit: the dress fits Ice Friend well.

Quality: the appliqué started to separate from the rest of the dress, so Ice Friend used super glue on it. I know, I know. I offered to stitch it for her, but I don’t think my needle can make it through there anymore. The quality isn’t bad, but it’s not fabulous, either.

Bottom line: Would I buy one? Yep. You know me: I’m cheap. $50 for a dress with crystals? You can’t sew one at home and put crystals on it for that. By the time you purchase the fabric, pattern, and thread, you’re at $50 without crystals.

The quality that I saw was pretty good, with the exception of the separating appliqué. I tell you: I’ve seen worse sewing in a local dance/skate dress shop than these two dresses.
Don't worry: I'm still going to sew Ice Girl's competition dresses. But for a practice dress? You bet. And if you don't sew, this is a great option.

Update: From reader Skater's Mom: Ordered first dress. It was a little too small, but it was ok to wear one time for a competition. Ordered second dress a size bigger to make sure its not small -- and it was way too small. Emailed the seller, they asked if I could sell the dress and purchase another dress from them.


I will never buy from them again -- will still to American seller instead.

Update: A size problem from reader Cathy: We did try ordering a dress from China, but not a big success....the dress is on the small side (wearable, but not without a lot of complaining from my skater), even though we ordered 2 sizes larger than I thought my daughter needed based on size charts...and they are throwing up lots of excuses for why we should just keep it (ie the $25 shipping on the $25 dress), so I imagine that will end up being donated to the silent auction at the skate club!

Monday, November 3, 2008

How-to: Ruin a figure skating dress with fabric paint


I ruined a dress on Saturday. This is not the fault of Simply Spray, the spray-on color that I used to ruin the dress ($4.99/can). Nope, I was pretty pleased with the initial results. The paint is pretty and easy to use. In fact, I plan to construct another dress and have another go at it.

What I did right:
I practiced a few times with the paint and I’d recommend that to anyone who wants to try a color fade on a dress (ombre effect). I did my test on an old white T-shirt and a scrap of fabric leftover from cutting.

What I did wrong:
I took the advice of someone who’d used an airbrush on some skirts for our club’s spring show. She took the finished skirts to her husband’s body shop and just airbrushed them there. It was simple, she told me, and the skirts looked great.

My experience wasn’t so simple. Before I sprayed the finished dress, I cut out tagboard to fit underneath the layers so the paint wouldn’t seep onto the leotard or make spots on the back of the dress. This worked pretty well on the front, but the back of the dress had a zipper, so the paint seeped through to the front of the dress and made stains that I couldn’t spray out.

After half an hour, I had to remove the tagboard because the paint was starting to stick to it. Once I removed the tagboard, the paint began to dry darker in some spots than in others, which created an embarrassing Shroud of Turin effect along the panty line.

Lessons:
  1. Spray the fabric before constructing the dress.
  2. Spray the fabric on a very smooth surface. My first test was on a box that I’d opened up. The slight dips in the corrugated cardboard made the fabric dry in stripes, which is cool, but not what I was going for.
  3. Start spraying off the fabric and then spray on the fabric in a continuous spray. Don’t shut off the spray on the fabric, either. You’ll get spots.
  4. Watch it at the end of the can. Don’t try to spray the last bits of paint out of the can or you’ll have spots.
  5. Try to do this outside, weather permitting, but be careful of the wind. (It’s going to be snowing/raining this coming weekend, so I plan to spray in my garage. Don't tell Ice Dad.)
  6. Buy more cans than you think you need, but check the store’s return policy. I used two cans to destroy that dress and one to practice on the shirt and fabric scrap.

I was pretty ticked off Saturday night when I realized I’d ruined that dress. After all, I’d struggled with that darn Specialty Sportswear pattern (more on that later) and I finally had the dress constructed and presentable when I ruined it with my purple stains. *sigh* I didn’t cry. Much.

Ice Girl was very sweet and told me that she had many beautiful dresses to choose from and that she wasn’t disappointed. She handed me tissues. Really, Momma, it’s O.K.

Ice Girl wore the dress I’d made last month to yesterday’s Cranberry Classic competition in Rockford. She skated well and is a pretty sweet kid, too.

Anyway, I have $80 worth of violet crystals, four cans of purple paint, and a JoAnn Fabrics coupon. I get paid on Wednesday. Ice Dad flies to Florida on Thursday and I have a half-day on Friday. Ice Girl has a sleepover and I have the house to myself. That dress is mine.

Wednesday, October 15, 2008

Buying crystals for figure skating dresses


Anyone who reads my blog knows that I’m obsessed with the cost of everything in the skating world. The prices just floor me.

I sew Ice Girl’s dresses and I put the beads on myself. I know that I’m saving money on the dress, but should I be cutting corners on the crystals?

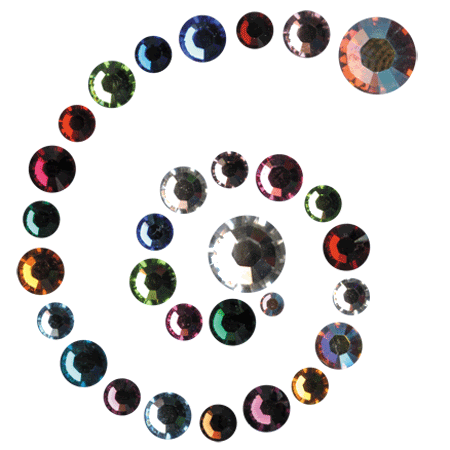
Lots of folks swear by Swarovski and claim that their crystals are more sparkly than anything else. I’ve sewn a bunch of dresses and used the cheaper, machine-cut Preciosa crystals on each one.

Here’s the thing: no one – not one person – has said to me, “What a beautiful dress, but those crystals just aren’t very sparkly.”

In fact, the opposite is true. The last dress I made and beaded had a gross of 42ss and a half gross of 40ss cystals on it. I think the bling blinded folks – including me.

Preciosa crystals are real lead crystals, just like Swarovski crystals are lead crystal. The difference is that the Czech-made Preciosa has fewer facets (8) than Swarovski (12). Some folks believe that the Swarovski has more sparkle, but from a distance, like at an ice rink with no spotlight, the crystals look pretty darn similar.

You’re not saving huge amounts of money buying Preciosa, though, so don’t get too excited. Swarovski crystals cost about 20 percent more than Preciosas. So, if I’m buying a gross of 12ss flatback crystals, Preciosa will set me back $4.85 for a gross of crystal; $7.50 for a gross of colored. Swarovski will cost $5.90 for a gross of crystal; $6.75 for a gross of colored.

I think I saved about $10 in the last order I placed for Preciosa crystals, but I spent $7 for shipping. Buying Preciosa instead of the Swarovski is like getting the shipping for free or paying for an hour of ice time.

Of course, Ice Coach would point out to me that I'm not saving money when I make a dress every other month instead of making one per season.

But, well, I like the sparklies. And I can't resist the pretty fabric.

Resources – all of these are U.S. retailers
http://www.espallstarrhinestones.com/
Good prices, standard shipping rates. Terrible online color charts.

http://www.dreamtimecreations.com/
Competitive prices (some are a few cents higher, some a few cents lower), standard shipping rates. Great online color and size charts. Lots of Preciosa colors to choose from. Good shipping times.

http://www.rhinestoneguy.com/
Good prices on crystal, great prices on colored stones. Weird site layout. Shipping unknown. Good online color chart, but blurry. Not as many Preciosa colors to choose from.

Wednesday, September 17, 2008

setting crystals with E6000 glue on figure skating dresses


Renee at the Pettit’s Rainbo Sports shop sat me down for an E6000 lesson last time I visited. Her method? She uses a paper plate and toothpicks. I kid you not. So…I tried it on the Ron and Harry pillowcase last night.

It works surprisingly well. Use a small dab of glue on the paper plate (in my case, it was a sheet of printer paper, folded over) – about the size of a nickel. Sprinkle your crystals on another piece of paper/paper plate. Flip them flat-side up. Touch the toothpick to the glue and swirl a small amount on the tip. Touch the glue-y toothpick to the flat side of a crystal. It will stick. Move the crystal to the fabric; flip the crystal carefully onto the fabric so that the toothpick is at about a 45-degree angle between fabric and crystal. Slide the toothpick out and use the dry end to push the crystal into the fabric.

What I like best about this low-tech application is what happens when the glue begins to dry out, which is right away. When the glue begins to dry, it leaves webby strings. I turned the toothpick over a few times and most of the strings disappeared. Any strings that remained I could remove before I touched a bead with the glue. Stray stringy glue is easy to remove from the fabric with a dry toothpick.

Renee uses a lot of glue when she sets her crystals – she makes sure that the glue comes up the sides. Renee does this because sometimes the crystal separates from its foil back. I decided not to do this, but if I see Ice Girl sprinkling crystals over the ice, I might.

I beaded the collar of Ice Girl’s figure skating dress last night with the honking huge crystals (40s and 34s). It took me maybe ½ hour. I have a lot more beading to do tonight. It’s important to remember that, unlike hot fix stones, E6000 requires drying time.

That means I’ll be setting crystals all night tonight. Ice Girl competes on Friday!

Friday, September 5, 2008

Harry Potter and the E6000 Glue Experiment


Becky from Sammy Skate Wear suggested on one of my posts that I try E6000 glue to affix crystals to figure skating dresses.

It's something I've wanted to do because my beloved hotfix crystals don't come in the very, very large sizes.

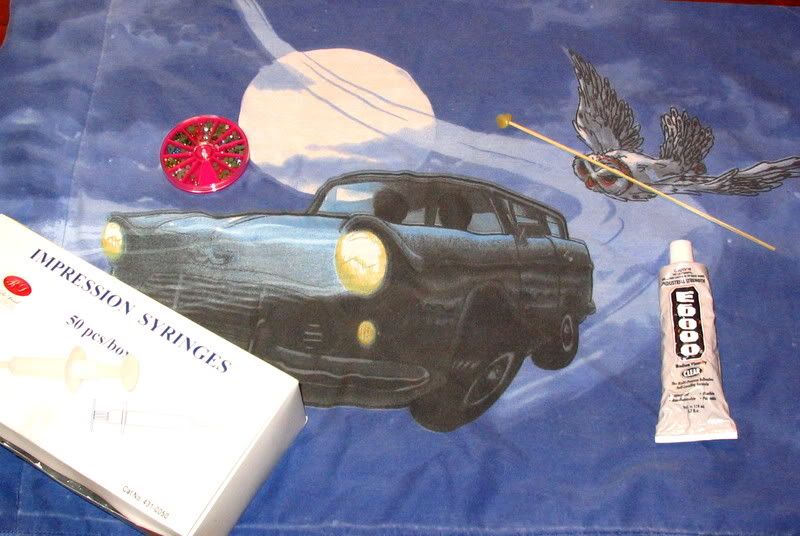
As Becky suggested, I found some syringes to squirt the glue. These are a must because the glue comes out of the tube in one big burp. I bought the entire box of 50 disposable, needleless, dental impression syringes online for $9.99.

I also bought some tacky wax that I found at a modeling store. It's cheap; a whole hockey puck of it set me back $5 and I can't imagine going through very much of it. I wrapped it around the end of a wooden skewer (that's the magic wand thing you see in the photo).

For my experiment I used an old Harry Potter and the Chamber of Secrets pillowcase. I figured Harry and Ron wouldn't mind some sparkle and glamour.

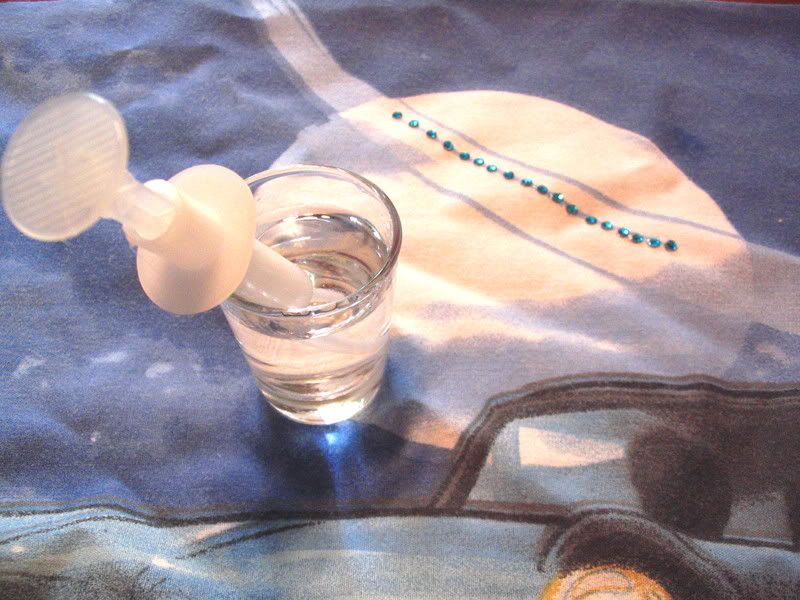
The experiment went well. I laid out about 10 beads of glue initially and picked up the beads using the tacky wax. The bead released when it hit the glue. The second try with the glue had the glue freezing up a bit and leaving strings. The strings didn't stick to the fabric, so when the beads dried, I brushed them off using a clothes brush. To prevent the glue drying up in the syringe, I dipped the whole syringe in a shot glass full of water. E6000 is magical stuff - it can dry underwater, too. It just does it slowly. I decided to force out a bead on some paper before returning to my beading line.

These beads take about 10 - 20 minutes to fully dry, during which time I could reposition them slightly to make them form a better line. That's something you can't do with hotfix.

I also found that putting the glue on the fabric is a bit like making a soft-serve cone: squeeze a little glue onto the fabric and push down with the syringe instead of lifting up right away. You'll get the same curl-top that you do when you make a soft-serve cone. (I knew that stint in a frozen yogurt shop would pay off some day.)

Bottom line: After the test, I'm willing to risk it on the figure skating dress I just made. Initial costs are kind of high: E6000 glue = $6 at my local, pricey hardware store. Wax = $5. Syringes (50) = $9 plus $4 shipping. Beads = always pricey. If I use the E6000 often, the price will go down, of course, because that tube o' glue will last years and so will the wax. I have 49 syringes, so I'm set for a while, too. It's those beads that kill me. I just bought 3 gross for $66.

Saturday, August 9, 2008

Altering figure skating dress patterns

Those of you who sew often know this little alterations trick, but as I set out my soup cans, I thought that some of you who are new to sewing might not know about it.

What you see in the photo on the left are my soup cans, a multi-sized pattern (but a regular pattern will do), a see-through ruler, and sew-in stabilizer.

The stabilizer is the key to this trick. Buy the cheap stuff ($1/yd), nice and thin, and make sure it's sew-in. (When you wrinkle the pattern pieces, you can iron the sew-in variety. The one with little glue dots will stick to your ironing board.)

Hold the stabilizer and pattern down with soup cans. Trace the pattern using the see-through ruler and Sharpie markers; make your alterations right on the pattern pieces. You can see on the left where I've extended the bodice as well as increased the width of the seam for the bodice. The panties, I know from sewing this brand of pattern before, fit fine, so I'm altering them just where they hit the bodice.

I used to think that altering patterns was a waste of time - I'd just cut that bugger up and save myself a bit of time. What's 10 bucks for a new pattern? Yeah. Only some patterns are close to $20 and gas is close to $4. Ice is $10 an hour and I've come to my senses. I've already cleared the table to cut; I might as well spend the extra 30 minutes to trace the darn pattern and alter it.

Then, when Ice Girl grows, the pattern will live on and I can make it again without wasting money, gas, trees, etc. Oooh. I feel so green. :)

Side note to new figure skating dress sewers: I used to be frustrated that the patterns didn't feature measurements or symbols at key areas like bust, waist, and hip. That was me in normal sewing mode. There shouldn't be any ease on a figure skating dress pattern because it's supposed to fit like a second skin. When I realized this, I bopped myself on the forehead. It seems obvious, but it wasn't to me. Just measure your skater's actual hip, waist and bust, and measure where those places hit your skater. Find the waist on the pattern (where the pattern cinches in) and locate the bust and hip on the pieces. You can then measure the pattern with accuracy. Best wishes for success! Ice Mom