Showing posts with label Sewing. Show all posts

Thursday, March 25, 2010

Ice Mom’s Guide to Sewing: All about Cutting

This post is part of Ice Mom's Sewing Guide.
Other posts in this series: All about Patterns, All about Fabrics, How to Dye Silk for Fabric Skating Skirts, Altering Your Growing Skater's Figure Skating Dress, Laying out the Pattern.

Like adjusting the pattern and laying it out, cutting is one of those unglamorous steps that you shouldn’t rush.  I have my cutting table in the center of my front room, a movie in the DVD player, two stools, one on either side of the table, and plenty of good light.

If you haven’t copied, adjusted and laid out your pattern yet, you need to do that first. Instructions assume that you’ve done that.

Make sure your shears or rotary cutter is sharp. Never let your kids or husband run off with your sewing scissors to cut paper, plastic, or sheet metal. I buy a ton of cheap scissors and plant them in every room of the house, sometimes two pair. This prevents anyone getting the ridiculous idea of using my good Ginghers for anything. I even keep those cheap scissors in my sewing room's scissor drawer, just in case anyone gets the very dumb idea of grabbing my Ginghers for something. I buy the scissors at the back-to-school sales in August, when they're at a deep discount. Ginghers, however, are never cheap.

If you don't remember the last time you've had your scissors sharpened, it's time to take them in. Call your sewing store to find out who does them and how long you'll have to be parted from your scissors.

Materials:
  • Sharp shears
  • Rotary cutter and cutting mat (optional)
  • Sharp snips
  • Tailor’s chalk or disappearing fabric marker

Method:
  1. Make sure everything's flat. Fabric and pattern pieces need to be as flat as possible against the table. If they’re not, unpin, re-adjust, and re-pin. You’ll be wasting your time if the fabric is lumpy. It won’t fit right.
  2. Cut along the pattern cut lines. If you’re using shears, keep the bottom blade as flat against the table as practical. Try to cut very smoothly and do not lift up the fabric as you cut. If you’re using a rotary cutter, make sure your mat is under your pattern pieces. Roll the blade like a pizza cutter along the pattern’s cut lines.
  3. Cut notches. When you arrive at a notch, stop. Using your snips, snip along the triangle and up past the triangle’s point. The idea here is that you’ll extend the triangle’s side to about double its size. Come from the other direction to cut the other side of the triangle. You’ll be making a big X in the fabric. The reason you’re doing this is so that you won’t have to lift the fabric. If you need room for your shears to cut along the rest of the cutting line, use your snips to cut a few inches. Those inches will give you room to use your shears. (Note: sometimes seamstresses will cut through the notch and make a little snip into the seamline at the center of the notch. I do this in regular garment sewing where I have a more generous 5/8-inch seam allowance. With skating dresses, I rarely have that much of a seam allowance, so I just cut the triangles instead of risking cutting past the seam allowance.)
  4. Leave it on the table. When you have your piece cut, don't move it yet. Remember those marking holes you reinforced with paper tape when you adjusted and traced your pattern? This is a great time to use your tailor’s chalk or disappearing fabric marker to mark the spot. If you’re using the marker, remember that you can’t iron over the mark because it will become permanent.
  5. Unpin the pattern piece. I usually fold the piece and the fabric in half and stack them in order according to the pattern piece’s number or letter. That way, they’ll be in order when I want to sew them and I can refer to the pattern piece if I have questions.
  6. Finish cutting all pieces. Mark, unpin, fold, and stack.
  7. Keep some of your scraps. You’ll want them to practice on when it comes to sewing seams. If you have a serger, they’re great for running through the machine to make sure that your loops aren’t too loopy. I keep just a few scraps and throw the rest away - unless I so much fabric that I might be able to cut out a skirt panty, skirt, or extra pattern piece if I mess something up.
It’s pretty straightforward, but I want to encourage you to take your time. Rushing this or the other preparation steps will make for a poorly fitting garment.

Next time: sewing seams.

I have many talented seamstresses among my readers. Double-check me, please! Did I miss something? Do you do it better? Please comment so we can all benefit!
New seamstresses: leave your questions in the comments, too!

Do you have a question for Ice Mom or the Advisory Board? Terrific! Send me your questions! 
Are you a better seamstress than I am? Wonderful! Please e-mail me about writing a guest post.
Do you have some other question or concern? Great!
E-mail me at icemom.diane@gmail.com

Ice Mom's Summer Camp Survey

Friday, March 5, 2010

Ice Mom’s Sewing Guide: Laying out the Pattern

This post is part of Ice Mom's Sewing Guide.
Other posts in this series: All about Patterns, All about Fabrics, How to Dye Silk for Fabric Skating Skirts, Altering Your Growing Skater's Figure Skating Dress, Laying out the Pattern.

Laying out and cutting the pattern will take you longer than any other step. However, if your layout and cutting are terrible, the dress isn’t going to look right. Resign yourself to taking a long time with this process.

Before beginning this step, you should have prepared your pattern. If you haven’t, please read Ice Mom’s Sewing Guide: All about Patterns.

My set-up: I have a folding cut-out table on casters in my front room. I push the coffee table out of the center of the room, settle my dog and his dog bed by the door, wheel my cutting table in front of the wide-screen TV, and pop a DVD in the player (my preference: Dexter. Serial killing goes well with pinning and cutting.) I have two high wooden stools and I place them on either side of the table. A glass of iced tea and I’m set for two hours.

I know a very good seamstress who lays out and cuts patterns on her vinyl floor. That sounds uncomfortable to me. I used my kitchen table for years (rectangle are much better than round). I really like my white folding cut-out table, though, because it’s countertop height and it folds up so I can hide it behind the sofa. No stooping over the table to cut or pin. The table set me back $50; normally, it’s $100, but I had a half-price coupon at the fabric store.

You will need:
  • Fabric, pre-washed (if washable)
  • Pattern pieces (that you’ve traced and fitted)
  • Sharp pins (dull ones snag, especially on Lycra)
  • A long, wide table that you don’t mind nicked up
  • Sharp fabric shears
  • Sharp fabric snips
  • Tailor’s chalk or disappearing ink fabric pen
  • Iron and ironing board
  • Flexible measuring tape
Iron everything. Be sure that your iron is set to a low setting for most of your ironing. Lycra is a synthetic and it will melt like plastic under a hot iron. It will stick to your iron plate and make a messy goo. This is experience talking here, people. If your iron’s too hot, but you haven’t melted your fabric, you run the risk of leaving the impression of your iron plate on the fabric – think Shroud of Turin, but for irons.

If you’re ironing velvet or anything with a pile (like panné, Polartec brand polar fleece, or velour), iron on the back side of the fabric, again to avoid that unattractive Iron Shroud of Turin effect.

It’s a fantastic idea to fold your fabric precisely in half as you iron, selvage edge to selvage edge. You want a line down the middle for the next step.

Put the fabric on the table. This might seem deadly obvious, but it’s not. Often pattern instructions don’t tell you how to orient the fabric on the table so you’ll be able to cut out all of the fabric pieces and not need more fabric.

For figure skating outfits, lay the fabric on the table, wrong side up with the ironed crease running down the table’s center and the selvage edges hanging over the sides. Bring the selvage edges up to the folded center so that the two selvage edges are touching. When you look at the fabric, you should see this: long fold, selvage edge at the center, opposite selvage edge at the center, long fold. At either end are two layers of cut edges.

You’re orienting the fabric in this manner so that you have more folds to work with. You also want to keep the fabric straight. You’ll orient your fabric parallel to the selvage edges, so you want to make sure that the fabric underneath is not crooked. Crooked fabric doesn’t lie well on the body.

Deal out the fabric pieces. Place the ironed pattern pieces on the fabric. If you see a straight line with two arrows on a pattern piece, that means that you’ll need to lay that piece out parallel to the selvage edges. If you see a line and arrows pointing to the cut edge of the fabric, that means to lay it out with the edge on the fold. Double-check what your pattern pieces are telling you, too. They’ll tell you if you need to cut on the fold or not. They’ll also tell you if you need one or two of the pieces.

I always orient my pattern pieces in the same direction. In other words, the tops of all the pattern pieces point the same way. This is a wise idea for fabrics with a pile or nap, like velvet. You know how velvet looks different from one direction to another? Yep. That’s why I lay all pattern pieces in the same direction, even if the fabric doesn’t have a nap.

It’s perfectly fine to turn a pattern piece wrong side up. That won’t affect anything.

Once you have all of your pieces in place on the fabric and you’re sure that you can cut them out without buying more fabric, you’re ready to pin.

Pin the fold lines and the grain lines first. I always start with pinning the fold lines first so the fabric doesn't shift around. I pin the pattern to the fabric parallel to the fold line and make sure that the fold line of the pattern matches the foldline of the fabric exactly.

For those of you who have never pinned before, there’s a trick to it. Begin stabbing the pattern and fabric at a 45-degree angle. When you hit the table, bring the pin back up at a 135-degree angle (the other 45-degree angle). If you’ve never pinned before, this will seem to take ages. Don’t worry – you’ll get better at it.

Next, pin down the grain lines. The grain line is the straight line with a error at both ends. Make sure this line is parallel to the selvages. Pin one end of the grain line to the fabric, keeping the pattern straight. With your measuring tape, measure the distance from the pinned part of the line to the selvage edge. Slide the tape measure down the line. Adjust the pattern piece so that the grain line end is at the same measurement as the first grain line end. Pin in place.

Smooth out and pin. Working parallel from your fold line or grain line pins, smooth out the pattern gently over the fabric and pin in place, parallel to the pattern edge about ¼ - ½ inch from the edge. You’re just smoothing things out here, you’re not stretching anything. Pin the entire pattern in place, making sure that the corners are tacked down.

That’s it for the layout post. Next post, we’ll cut!

Update: From reader Beth: When sewing on woven (non-stretchy) fabrics, the grainline (arrow on pattern pieces) should be parallel to the selvages. On stretchy fabrics the arrow follows the greatest degree of stretch in the fabric. Depending on the fabric, the grainline will be either parallel to or perpendicular to the selvage. On the disappearing ink or water soluble pens, always test on a scrap of fabric and never iron over those marks or they may become permanent. Don't ask how I know this. 
Note from Ice Mom: Ugh. Don't ask how I know it, either.

Update: From reader Silver Blades who cautions sewers against letting excess fabric hang off the cutting table: I also forgot to mention two things about cutting out stretch fabrics. Do NOT let the fabric dangle over the edge of the cutting surface! It will stretch prior to cutting and once you cut the piece it will spring back and be too small. Yes, I have done this. I now pull up a chair or stool to the edge of the table or neatly fold the excess up at the table edge so it is not pulling itself out of shape.

Do you have any questions about this process? Better yet, did I leave something out? Even better: do you have a fabulous tip? Please write about it in the comments!

Have a question for Ice Mom and the Advisory Board? Do you have an idea for a post? Would you like to write a guest post? That's fabulous! E-mail me at icemom.diane@gmail.com.

Ice Mom's Summer Camp Survey

Monday, February 15, 2010

Ice Mom's Sewing Guide: Altering Your Growing Skater's Figure Skating Dress

This post is part of Ice Mom's Sewing Guide.
Other posts in this series: All about Patterns, All about Fabrics, How to Dye Silk for Fabric Skating Skirts, Altering Your Growing Skater's Figure Skating Dress, Laying out the Pattern.

Ice Girl eats like a horse. I swear that kid already measures 16 hands. And she’s still growing. She's all arms and legs and skinny, skinny, skinny. Even so, it’s tough to hide the fact that she’s growing when her butt cheeks peek out from behind her figure skate dress panties.

That’s why I found myself frantically sewing the disco ball dress and the Greek goddess dress before a competition in the beginning of February. Ice Girl had grown so much that she was popping out of the pop can dress and the white-panty purple-painted dress was more indecent than ever.

Believe it or not, I sewed two new dresses in two weeks because I’m lazy. Yep. Adjusting a figure skating dress that a skater has outgrown can be done, but it involves ripping out stitches (which I hate) and other surgical procedures. If you're new to sewing, do yourself a favor and take the figure skating dress to a good alterations shop. Bring along whatever fabric you'd like the alterations gal to use. It's much more fun to pay someone else to curse at the dress than to curse at it yourself, I tell you.

However, if you insist upon altering the figure skating dress, here’s how to go about it:

WHEN THE DRESS IS TOO SHORT

The leotard method. Readers of Ice Mom’s Sewing Guide know that I favor the leotard method for fitting because it eliminates the seam line between the panty and the bodice, which makes alterations for length a walk in the park. For information about the method, you’ll have to click on the link in the previous sentence. I’m going to write assuming you know what the leotard method is.

If you have a dress made with the leotard method, adjusting for the skater’s growing body is pretty easy. Rip out those zig-zag stitches you used to attach the skirt. Set the skirt aside to make scrunchies or as practice material for your serger. You can also add a line of Spandex to the skirt, but if you’re that advanced, you know how to do it. New sewers should cut a new skirt with a generous length. Rip out the crotch seam. Cut a new crotch insert and baste it to the crotch panty back and panty front. Have the skater try it on. Does it fit? Adjust it or sew it in pemanantly and then insert elastic like you normally would do (I’ll be writing more about elastic in a future Sewing Guide). Have the skater try on the leotard and gently pin the skirt in place so it hangs over the panty and is straight. Measure up for the hemline, too, and mark the length. Have the skater take off the leo. Mark the skirt placement line and unpin the skirt. Pin the skirt to the placement line, right sides together, with the hemline pointing in the same direction as the neckline. Attach with a zig-zag stitch. At the hemline mark, machine baste all the way around at whatever measurement you’ve decided on. For example, if the skirt’s an inch-and-a-half too long, I’d run a line of machine basting 1.5 inches from the hem’s cut edge. Cut it with scissors and finish the hem with nothing (spandex, netting), a rolled hem (any fabric), or a small folded hem (any fabric).

The pain-in-the-rear method. Better you than me, people. I just make a new dress and sell the old one in a club resale. However, if you and your skater just love, love, love the small dress and it’s not made with the leotard method, here’s what you do. You'll never catch me doing this: it's a lot like work.

On the inside of the dress, rip out the skirt/panty/bodice seam line. If the dress is lined, this is going to complicate matters. Somehow, you’ve got to get to that skirt/panty/bodice seam line, though.

Once the dress is in pieces, set the old skirt aside for scrunchies or serger scrap. You can also add a line of Spandex to the skirt; attempt it only if you already know how to do it. Cut a new skirt with a generous length instead. There are more worthwhile things to do with your life than mess with the old skirt.

Cut a perfect rectangle of fabric that’s the length you’ll need to make the dress fit, plus 1/2 inch. You can sew it in two ways.

Less bulk, uglier seam: 1) Machine baste along the top raw edge of the insert fabric, 1/4 inch from the raw edge. Lay the insert fabric right side up. Place the raw edge of the panty fabric along the basting line and pin. Sew with a cover stitch (if you have a cover stitch machine), a double needle in a standard machine, or a zig-zag that catches the raw edge of the panty fabric. Baste the new skirt to the top of the insert (I use a wide zig-zag). Attach to the bodice with whatever seam treatment you use for stretch fabrics.

More bulk, prettier seam: 2) Pin insert and panty edges, right sides together. Stitch as you would any Spandex seam with a 1/4-inch seam allowance. Baste the new skirt to the top of the insert (I use a wide zig-zag). Attach to the bodice with whatever seam treatment you use for stretch fabrics.

Have the skater try on the dress and mark the hemline. Have the skater take off the dress. At the hemline mark, machine baste all the way around at whatever measurement you’ve decided on. For example, if the skirt’s an inch-and-a-half too long, I’d run a line of machine basting 1.5 inches from the hem’s cut edge. Cut it with scissors and finish the hem with nothing (spandex, netting), a rolled hem (any fabric), or a small folded hem (any fabric).

The stripe method. An easier way to do this is to add a stripe around the entire bodice. This isn’t as ugly as you might think. Consider how a stripe of athletic mesh or a complementary spandex color might look on the dress. Would it look good? Fabulous. You’re in luck. You don’t have to mess with the panty or the skirt at all. Cut a perfect rectangle of fabric that’s the length you’ll need to make the dress fit, plus 1/2 inch. Machine baste along the top and bottom raw edges of the insert fabric, 1/4 inch from the raw edge. Draw the line where you’ll be inserting your fabric on the bodice and back with chalk or a water soluble marker. Zig zag close to the line on both sides of it, but not on top of it. Sewing very straight is crucial. If you can’t sew straight, don’t use this method. Cut the dress along the chalk/marker line so you have the bodice in two pieces. Lay the insert fabric right side up. Place one raw edge of the bodice fabric, right side up, along the basting line and pin. Sew with a cover stitch (if you have a cover stitch machine), a double needle in a standard machine, or a zig-zag that catches the raw edge of the panty fabric. Do the same with the other side of the insert fabric and the other bodice half. You can continually expand a dress with this stripe method. (Which I might do to Ice Girl’s Disco Ball dress.)

WHEN THE DRESS IS TOO NARROW

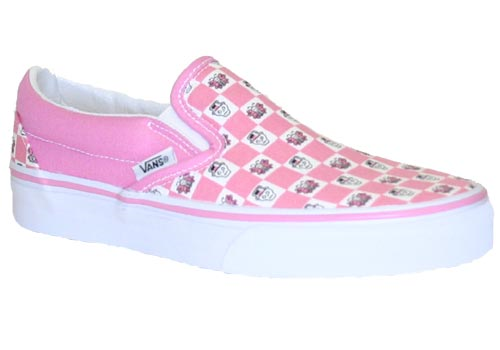
Welcome to the world of the gusset. A gusset is a triangular piece of fabric that you slip into the side seams of any garment. You might be familiar with the gusset from the crotch area of some tights, especially athletic tights or long underwear. You might be familiar with gussets if you’re a knitter. If you have expensive, tall leather boots, you might have an elastic gusset at the top to accommodate your calf. The photo of the slip-on canvas shoe (above) has an elastic gusset at the tongue. If you have a suitcase or a briefcase that has an accordion fold, those folds are gussets, too.

Beware: this is not a universal fix. Slip too much fabric in at the arm hole and you’ll mess up the sleeve. That, readers, is major surgery. I try to leave sleeves alone. However, if you are a master seamstress and are willing to share your sleeve gusset techniques, please consider this your invitation!

Let’s face it, folks: this is down-and-dirty sewing. From the stands, no one’s going to see the gussets. If they’re small, they’ll even be hard to spot up close, but they won’t be invisible. Do not accentuate these gusset seam lines with crystals or sequins.

Too narrow at the hip: About how much wider do you want the area to be? Divide that measurement by two and add 1/2 inch (that’s for the seam allowance). That’s the base of the gusset triangle. You’ve got a decision to make here: How tall do you want the triangle? The taller the triangle, the more it’s going to show. For a big-based gusset, make it tall. For a small-based gusset, make it short .Cut six triangles for a standard construction dress (bodice, panties, skirt) and two diamonds and two triangles for a leotard construction dress. If you’re cutting diamonds, they should be as if you’re putting two triangles together at the bases. Be sure to add a seam allowance at the base, too.

Rip the skirt seams, the dress’s side seams, and the dress’s bodice-waist seams, if any.

Insert the triangles or diamonds into the side seams with the tiny points pointing away from the waistline and the bases along the waistline. Sew in place, right sides together. Yes, it’s a pain, especially at those points. It helps if you think that you’re sewing them like a standard dart. In other words, sew the sides until you can’t sew anymore. Then take it off your machine, fold in half through the point, pull on the point, and sew like a dart. If sewing a standard dart means nothing to you, do not attempt the gusset. You can also hand sew it. Again, this is why I just go ahead and make a new dress. Finish this step for all triangles or diamonds. You should have gussets in the side seams for the panty, bodice, and skirt. Reattach all.

Too narrow at the bust: This is the same procedure as for the waist gussets, so you should read that procedure (above) first. You can open the side seam and slip in a triangle in both the side seam and the arm. The danger is that the sleeve will become so large that it will hang down way past the skater’s armpit. However, you can use gussets in this area in small amounts.

You can also open up the bodice at the bust line, if the skater has had a dramatic development in that area. Have her try on the dress and, yes, mark the pointy part. I know. Ice Girl would hate it, too. Again, you can see the appeal of making a new dress. When your skater takes off the dress, Draw a straight line from your mark to the seam line. Zig zag on both sides of the line you drew and cut straight down the line.

Draw a line on the back bodice, opposite the cut on the front. You want this line to be very short so the triangle insert will be very squatty. I'd go with maybe 1" to 1 1/2" tall. Zig zag on both sides of the line and slice the dress open.

Cut four triangles and add a 1/4-inch seam allowance to all sides. All four triangles will have the same base width, but a different height (the back ones are squatty, remeber?). The triangles for the front and back bodice pieces should match up to the cut line, plus 1/4 inch. Sew the triangles to the bodice pieces following the instructions for inserting triangles in the too narrow at the hip section.

See? I skip this whole nightmare and make a new dress. It’s much more satisfying and I curse a lot less.

Update: From reader, blogger, coach, advisory board member, and skating parent Xan of Xanboni! (visit her comment for links to photos): You can also grow a complex, jeweled dress using the leotard method. If you're making a really elaborate dress like the ones linked below, make a double leotard lining with a flesh toned fabric, and a third leotard to which you affix the design elements. When you want to alter it, simple remake or alter the undertard (as I always called them), and carefully refit the design elements to it.

Update: From reader Anonymous who outwits the growing process in a very clever way: I will add 2 inches extra to the leotard in the hip area and then sew it in a tuck with the fabric to the inside. The seamline is about two inches below where I'm going to put the skirt (leotard method). Once they grow, let out the tuck, and depending on where the skirt then sits, move the skirt. It can sit lower on the hip and still cover the bum and there is enough play in the waist of the skirt if spandex. If it's chiffon, carefully cut the waist a touch bigger, probably only 1/4 inch, or again, plan ahead and make it a front overlap style.

What do you do when your skater outgrows his or her favorite outfit? Please share your rites and rituals in the comments! No need to share your curse words. I've got that part down.

Have a question for Ice Mom? Please consider this an invitation to e-mail me at icemom.diane@gmail.com.

Monday, February 1, 2010

Ice Mom's Sewing Guide: How to Dye Silk for Figure Skating Skirts

This post is part of Ice Mom's Sewing Guide.
Other posts in this series: All about Patterns, All about Fabrics, How to Dye Silk for Fabric Skating Skirts, Altering Your Growing Skater's Figure Skating Dress, Laying out the Pattern.
 
This guest post is courtesy of reader C.M. who knows way more than I do about dyeing anything. Please realize that I have zero experience with dying silk or using silk for figure skating skirts. Post any questions about this technique in the comments. Thanks! Ice Mom.

I (guest poster C.M.) use the silk chiffon from the Dharma Trading Company. They have several different weights available. Any of them can be used for skirts: if you want a "fluffy" skirt with lots of layers, the silk gauze works well. For most standard skirts with two layers I use the medium weight chiffon (10 mm). If you want a non-see-through single layer skirt, the double chiffon is best. They also offer this fabric in black because it is very difficult to dye fabrics a true black color. Black is the only color that I would buy ready-made.

The great thing about dyeing silk is that it is very easy to dye on the stovetop (far easier than tie-dyeing). There are several products available for this. I would steer clear of RIT, Dylon, or any other dye available in a craft store. These are general-purpose dyes that do not react with the fibers to form a permanent bond. The colors are not bright and will fade/run over time. My favorite product is the Jacquard acid dye (you can get this from Dharma, or you can go to the manufacturer’s Website to see if any nearby stores stock it). This dye does a great job of giving results that are vibrant, even, and (very) permanent. It is very safe to use as the only other chemical you need is white vinegar. It is very concentrated and a small jar will go a long way.

I have been following the directions posted on the Dharma Website and I have yet to have any problems. When you receive the dye, there will be a swatch on the jar that indicates the color that the fabric will come out if it is fully saturated with dye. It cannot get any brighter/darker than that. The directions tell you how much dye is needed to fully saturate a pound of fiber. In order to determine how much dye you need, you should weigh your fabric (I have an inexpensive gram scale) and calculate how much dye you need from that. If you use more dye than this, some of it will not react with the fabric and will end up getting poured down the drain (these dyes are not all that hazardous, but it is best to be safe). If you want a lighter shade, you can cut the calculated amount of dye by a factor of 2, 4, etc. To get pastels, I cut it by a factor of 10. As long as you don't exceed the saturation point, there should be little to no color left in the dye bath once the simmering is complete.

I don't cut out the pieces of the skirt before dyeing because the edges of the fabric tend to come out a little darker. Once the process is over, you can rinse the fabric in a special detergent called synthrapol in order to remove any unreacted pigment (there is not a lot of excess runoff with this product, but it will soften the fabric). Once it is done, I hang it to dry. It is best to not put this fabric in the dryer because it will shrink and gain a crinkly texture. Once it's dry, it is good to sew. Just remember to cut the skirt a little bit bigger because it does not stretch.

The most nerve-wracking part about this process is getting the dyed fabric to match the Lycra. The best way to do this is to compare a swatch of your Lycra to the different colored dyes available and select closest color match. Some people are advanced enough that they can successfully mix colors; however I feel that the manufacturer offers enough colors (and most skaters select more or less "standard" colors for their dresses anyway). No matter how hard you try, you will not get an exact color match, but nobody is going to notice as long as it’s close. If you are anal about it, you can dye small swatches and take notes about how much dye you use. I just estimate using the swatch on the jar and I always get "in the ballpark" results.

When I first tried this, I had my doubts. However, after my first attempt, I was shocked at how nicely the fabric dyed. If you follow the directions and keep good notes, you cannot fail at this. Dharma as well as the manufacturer have great product support and are happy to answer your questions if you call them. It seems scary, but it is not that hard.

I have read that some designers also dye their own Lycra with this product (i.e. Sasha Cohen's seamstress). However, the same dye recipe will not yield the same color in the Lycra and the silk. This means that you have to use two different recipes to get the same color (not fun to figure out).

The dyeing technique that I described is only useful for solid color dyeing. I only use it when I need to match the silk to a colored lycra bodice. For example, if I were to make a royal blue dress, I would buy the blue lycra and I would dye the white silk to match the lycra as best as I could. I have heard that some people use tub dyeing to achieve an ombre effect, but I have never tried it, so I can't give you any advice on that. When it comes to doing an ombre effect, I use an airbrush with a special paint called dye-na-flo. This is a special paint that can be used with an airbrush on pretty much any fabric you like (not just silk). Just remember to follow the directions.

The link to the acid dyes (and their instructions) can be found here. You might notice that Sasha Cohen's seamstress is featured on this page for using this product (if it's good enough for her, it's good enough for me!).

Dharma offers silk chiffon in a few weights and any of them could be used depending on what type of skirt you like. This fabric is semi-sheer in most cases, so you will usually need to do multiple layers in order to avoid the see-through skirt. I almost always use the medium weight 10 mm. For this, you need to make a double-layer skirt.

If you want to make a single-layer skirt, use the double chiffon. It all depends on what look you are going for. I think having a see-thru skirt defeats the purpose of having a skirt, so I always double up or go with the thicker material. Be warned that the commercial patterns (such as Kwik-Sew) are designed to make skirts with stretch material, so you will need to cut the skirt a little bit bigger. Pin it to the bodice and have the skater try it on so you can make adjustments to the fullness.

I learned all of this from buying the products and trying them out for myself, so you might find something that works better for you. Unfortunately, a lot of dressmakers are very secretive about how they do things (especially when it comes to airbrushing), making trial and error the only way to learn. That being said, if you are interested in improving you need to be willing to be brave and try out things that have no promise of working. If you think things through before you do them, they usually work. It is also helpful if you have a skating friend who gets their dresses professionally made (and that you like the look of). If you ask them (nicely) to bring it with them to the rink, you can take a good look at them in inside and out to see how they are constructed/beaded etc. My sister (the skater in my family) had a friend who splurged for a Tania Bass dress that she let me take a look at.

Being able to study good examples of handmade dresses takes a lot of mystery out of the (often) mysterious world of making figure skating dresses. I think most skating designers started out as some skater's mom or relative that wanted to save money buy making their own, but ended up really enjoying it.

Thank you, C.M., for your excellent post! You’ve given me the courage to try dyeing silk for a skirt – the flowy effect looks stunning. I’m also asking for an airbrush for my birthday, I can tell you that!

Update: From reader Anonymous: The fabric that has worked very well for me is Glissenette. This is a sheer stretch fabric that doesn't roll at the edges when cut. It is easy to sew with and floats beautifully as the skater moves. It is available in limited colors so there is some matching difficulty. I order it from spandexhouse.com, spandexworld.com and Jone's fabric (more expensive, but bigger selection) There is a sheer nude color that I use over nude spandex for nude looking cut-out backs that still provide some warmth.

Update: From post author C.M.: Although this fabric does not contain any elastic fibers (making it a not suitable for bodice material), the fabric does have a little bit of stretch to it, which makes it a little more resilient. However, you still need to cut it slightly bigger and "gather" it around the bodice so the skater can still pull it on and off.

Update: From reader Anonymous: I airbrush with paint as dying on polyester is too much chemical manipulation for my liking, although I could do it if I was dedicated enough. [...] The secrets are in the products, dye vs paint. I've had great success with Jacquard products but they can be expensive.

Do you know more than Ice Mom? Great! E-mail me with your guest post! icemom.diane@gmail.com

Monday, January 18, 2010

Ice Mom’s Sewing Guide: All about Fabrics

This post is part of Ice Mom's Sewing Guide.
Other posts in this series: All about Patterns, All about Fabrics, How to Dye Silk for Fabric Skating Skirts, Altering Your Growing Skater's Figure Skating Dress, Laying out the Pattern.

I really, really love fabrics. I can spend hours in the fabric store just browsing the aisles and touching all the pretty choices.

The problem is that national fabric chains stock very few fabrics that are suitable for sewing figure skating dresses or other ice wear. Browsing the dance/swimwear section at JoAnn Fabrics takes maybe three minutes. Very unsatisfying.

In this ginormous post, you’ll find basic fabric words, what to look for in figure skating fabric, buying fabric and notions, prewashing fabric, non-stretch fabric, and online vendors who sell two-way stretch fabric. I encourage sewers to contribute their methods to this post in the comments. If you have a great figure skating fabric or stretchy trim source, let us know that, too!

Basic Fabric Terms
  • Bias: The bias is the line that runs at a 45-degree angle from one selvage edge to the other. It’s the weakest part of the fabric and also the stretchiest. Sometimes you’ll find bias-cut skirts in ready-to-wear clothing, especially formal wear, because it has a pretty drape. I hate the bias, though, because it’s shifty and can warp once you’ve sewn a hem. If you ever work with a bias-cut skirt, allow the skirt/dress to hang for a couple of days and then even out the hem. That’ll save you some curse words.

    I’ve never had to use any bias-cut fabric on a figure skating dress, but you might encounter a call for bias-cut strips. You can find these near the zippers in your fabric store, or, if you’re ambitious, you can make them yourself. I’ve only been ambitious once. Bias strips are stretchy and wrap well around curvy seams. They’re often used in tailored clothing to enclose a seam. Want to see some? Look at the waistband of most men’s trousers. You’ll find bias tape at the bottom. Looks like a lot of work to me.
  • Bolts: At the fabric store, you’ll find yards of fabric wrapped around a flat cardboard core. That’s called a bolt of fabric. If I buy a lot of one kind of fabric, I often ask the cutter for an empty bolt. The cutter will wrap my fabric around a bolt, which makes managing and storing my fabric easier. The bolt ends contain useful information like fabric width, fabric content, and laundering instructions. If you can’t figure out what the laundering symbols mean, ask the fabric store’s cutter. Sometimes fabric stores offer a flyer that explains the laundering symbols. I always misplace that flyer.
  • Cut edge: The cut edge of the fabric is the second weakest part of the fabric. The cut edge runs perpendicular to the selvage edges and is the part where the person at the fabric store has cut your fabric from the rest of the bolt. If you tug the fabric from selvage edge to selvage edge, you’ll find that the cut edge, even of woven fabric, is stretchy.
  • Drape: This is how the fabric moves. Canvas has very little drape to it: it’s stiff. You’d use canvas for sturdy shoes, not a flowy dress, right? Spandex has a nice drape that lends itself well to a skirt.
  • Elastic: Elastic is generally the white, stretchy braided stuff that sewers put around the panty legs, neck lines, and arm openings of a figure skating dress. Elastic holds the fabric close to the skater’s body for a good fit. I buy 3/8-inch elastic (for leg, neck, and arm openings) and 1-inch elastic (for waistbands) in packages when it goes on sale. You can also purchase elastic by the yard and have it cut at the fabric counter.

    Clear plastic elastic is a pain in the butt. It’s difficult to sew because thread often tears through the elastic. If you choose clear plastic elastic, use a heating tool to melt the two layers of the plastic together. Clear elastic is great for bra straps and hat straps, but it’s too much trouble for anything else.
  • Grainline: All fabrics have a grain, or a part of the fabric that’s more stable and not as stretchy as the cut edge or the bias. Take any fabric – woven or knit – in your hands and pull outward in one direction. Now grab the fabric perpendicular to the first direction and pull. You’ll feel that the fabric, even woven fabric, stretches more one way than the other. The grain line runs parallel to the selvage edge and is important when you lay out pattern pieces.
  • Nap: Nap is the optical direction of the fabric or the direction of the printed pattern. This is an important concept especially when you deal with velvets or printed spandex. Velvet looks either lighter or darker, depending upon the direction you view the fabric. If you have a print, even what looks like a random print, lay out your pattern pieces in the same direction, tops all pointing the same way.
  • Notions: Everything that isn’t fabric, a pattern, a machine, or furniture is a notion. Elastic, trim, zippers, and thread are all notions.
  • Right/wrong side: You’d think this would be obvious, but sometimes it isn’t. In cases where it’s difficult to see a difference between a right side and a wrong side of the fabric, check out the selvage edge’s finish. Its finish is neater on the right side of the fabric. However, sometimes even that’s difficult to tell. Sometimes a piece of stretchy fabric’s edges will curl more to one side than another. I usually choose the side with the curl. The main thing is to be consistent. You might not think that consistency matters because you can’t tell which is the right/wrong side while you’re constructing the outfit, but often you can see the difference when your skater wears the figure skating dress. I put a chalk mark on the right sides of fabric pieces so I can be consistent.
  • Selvage edge: The selvage edges are the factory-made straight edges of the fabric and are the fabric’s strongest part. If you tug the fabric from cut edge to cut edge, you’ll find that the stretchiness is not as great as along the cut edge, so it holds its shape better.

    Selvages often look different from the rest of the fabric – they’re about 1/4 – to 1/2-inch wide and might have a tighter knit or different color. You’ll find the selvage edges at the top and bottom of a bolt, perpendicular to the cut edge. Selvage edges are useful for finding the right side of a piece of fabric as well as for aligning pattern pieces. The right side of the fabric will often have a selvage edge that looks more finished on one side than the other. When you layout patterns, you’ll use the selvage edge to help you align the pattern piece to a grain line.
  • Stretch: Stretch fabric literally stretches when you pull on it, but retains its shape when you release it. That’s why it’s well suited for figure skating dresses and ice wear as well as swimwear and other athletic clothing. Athletes move easily in stretch fabric.
  • Swatch: A small bit of fabric. Don’t be afraid to ask fabric stores or online fabric retailers to give you a swatch. At fabric stores and some online retailers, it’s free. Other online retailers will sell you a swatch book. It’s very useful to have a few swatches for matching up colors, especially if you’re ordering online.
  • Thread: we call the string thread, not string. No idea why. I use all-purpose thread, not cotton quilter’s thread, buttonhole twist, or embroidery thread. When you look at the thread display at the fabric store, you’ll find all four types of thread. Be sure to buy all-purpose thread.
  • Trim: Trim is the ribbon or sequin chain that sewers use to embellish a figure skating dress or ice wear. Make sure whatever you buy is stretchy. I don’t care how pretty it is, if it doesn’t stretch, put it back on the shelf.
  • Width: Fabric comes in 45- or 60-inch widths. In other words, if I buy a yard of 45-inch fabric, the piece will measure 36 inches by 45 inches. It’s a good idea to look at the bolt end to find out how wide your fabric is.
  • Yardage: In the U.S., fabric is sold by the yard and portions thereof in eighths. In other words, you’ll hear people asking for 1/2 yard at the fabric store’s cutting table, not 18 inches.
Figure Skating Fabric: What to Look for

Two-way stretch. For most purposes, the only fabric you’ll want for figure skating dresses is two-way stretch. You can tell if a fabric has a two-way stretch if you pull it both parallel to the cut edge and parallel to the selvage edge. If both directions are stretchy, you’ve got two-way stretch.

Keep in mind that most of what you use on a figure skating outfit should be two-way stretch, even the trim. There are exceptions, which I’ll get to in Non-stretch Fabrics below.

The names of the different kinds of stretch fabrics are confusing, even for me. If anyone knows what ITY is,  please leave it in the comments. I’ve bought it before and it looks like plain ol’ two-way stretch to me. *Update: Thank you reader pdanek! See her explanation way below in the updates.
  • Athletic mesh – this is two-way stretch fabric, but it’s not solid, it’s a mesh. You’ll often see sewers use this for details on a dress or over/under skirts. I’ve used flesh-colored athletic mesh near the neckline of dresses to cover the skater, but hide the fact that fabric is on the skin. Look closely at many top-level skaters’ outfits in skating magazines. You’ll find lots of flesh-colored athletic mesh around the neckline. I’ve also used colored athletic mesh, especially for dress sleeves. Athletic mesh is difficult to find in the fabric store chains.
  • Cotton spandex – This cotton/spandex blend is a great fabric for practice pants, tops, and shorts. It’s not great for skirts or dresses.
  • Glissenette – Very fine, almost sheer spandex, often with a glimmer finish. You can make a dress out of it, but be sure to line the entire leotard or you’ll send your skater out on the ice in a cold, see-through dress.
  • Knit – Most two-way stretch fabric is knit fabric. It’s not bulky like a sweater, though, it’s a fine knit that you’ll find in all sorts of garments like T-shirts and underwear. Knits are, by nature, stretchy.
  • Lycra/spandex – What’s the difference? None. Lycra is DuPont’s brand name of spandex fabric. Spandex is the name for the stretchy, elastic fibers. You can find pure spandex fabric or spandex combined with other fibers (cotton, nylon, rayon). Popular spandex applications include swim suits and comfy, stretchy denim jeans.
  • Nylon spandex – A fabric blend made from both nylon and spandex. I’ve found shiny, moleskin, and other forms of this fabric. It’s a good choice for ice wear.
  • Panné - This is a one-way stretch fabric that I’ve used for practice skirts. It’s cheap (maybe $3/yard), plentiful (a rainbow of colors at the national fabric store chains), pretty (kind of a crushed velvet texture), and washes well. It’s stretchy along the cut edge, so line up your pattern pieces so the grain line is parallel to the selvage edge. Like velvet, panné has a nap. Be sure to layout all pattern pieces in the same direction (all top edges should be pointing the same way). You can also use this without fear for figure skating skirts.
  • Rayon spandex – Another fabric blend with spandex. Suitable for ice wear, but be sure to check the laundering instructions on the bolt end.
  • Slinky – This two-way stretch fabric is often crinkled and has a very pretty drape to it. I wouldn’t sew a figure skating dress leotard with slinky fabric; I’d use it for the skirts where you want a lot of swing.
  • Spandex/Lycrasee Lycra/spandex above
  • Stretch lace – This is the only kind of lace you’ll want to use to make ice wear. Some of it looks like Grandma’s tablecloth, but you can also find a wide variety of patterns and colors, especially online. I’ve never found the stuff at national fabric chains. Stretch lace is great for creating texture and color variations in ice wear. Many people cover bodice fabric with stretch lace.
  • Stretch vinyl – Looking for the fake leather look? Here you go. Ice Girl’s pop can dress was made of silver stretch vinyl. It sews well and is kind of funky. I used the leftover pieces to make panties for a practice skirt – every time she spins or jumps, she flashes a bit of silver – very cool.
  • Stretch velvet – I really love the rich look of stretch velvet and I was surprised that the pieces I bought machine washed and dried with no problem. I’d still check the bolt ends to make sure that you can wash them this way. If you’re a new sewer, stretch velvet’s going to give you a problem. The velvety fibers will shift under your machine’s presser foot. I recommend a walking foot, if you have one. Stretch velvet has a nap to the fibers, so be sure to cut out all pattern pieces in the same direction. In other words, the tops of all the pieces should point toward the same cut edge of your fabric. I know a new sewer who created a dress out of stretch velvet successfully, so don’t let its shiftiness deter you. Just be aware that you might have to stop sewing every three to four inches to check or adjust your fabric.
  • Tricot Tricot in French means knit. This fabric is usually smooth and used for lining outfits. I use a flesh-colored tricot to line all of Ice Girl’s figure skating dresses and to make figure skating undergarments. When I buy flesh-colored tricot, I buy it in 5- to 10-yard amounts and just keep it on hand.
  • Two-way stretch: Another word for spandex fabric. See Lycra/spandex above.
Buying Fabric and Notions

Double-check the back of your pattern to verify the yards that you’ll need. Patterns will often list yardage for 45-inch wide fabric and 60-inch wide fabric, so take a look at the bolt end for that information. I usually add 1/8 yard to my cut yardage so I’m sure I’ll have enough fabric. Sometimes I add a half yard to squeeze in a practice skirt out of the material.

If you’re a first-time sewer, here’s what my friend and advisory board member C.L. says: “Buy enough fabric to sew another complete dress. It takes the pressure off! For me that was just an extra $10, but well worth the piece of mind.”

Watch the person at the cutting counter as she rolls out, measures, and cuts your fabric. Most cutters do a great job, but people make mistakes. Watch for stained fabric and/or fabric with cuts or flaws. I reject that fabric, but often the cutter will offer it to you at a discount. Make sure that she’s cutting both layers of the fabric evenly and that she’s not cutting on an angle. If you’re worried about something, mention it the cutter while you’re at the cutting counter. If you notice a problem with the fabric once you’re home, take your receipt and the fabric back to the store.

When you’re buying the fabric, you should also buy your all-purpose thread. Don’t buy all-cotton quilter’s thread, expensive and shiny embroidery thread, or way-too-thick buttonhole twist. Walk your fabric cut or swatch over to the thread display and choose a spool that looks very close to your fabric color. Pull a bit of thread off the spool and lay it on your fabric. Does it disappear? Is it really, really close? Great. That’s the one. A small spool of thread should be enough for most figure skating dresses.

While you’re at the store, trot over to the ribbon and trim shelves with your fabric. Can you find stretchy sequins or ribbon that will look nice on the fabric? This is a good time to pick it up. Make sure the trim is stretchy. If it’s not stretchy, your skater will have a very hard time putting on the figure skating dress and the stitching might rip out.

Prewashing Fabric

Be sure to ask the cutter or online seller how to wash and dry the fabric before you attempt to launder it. If you have skipped this step, wash and dry a swatch to make sure your method doesn’t ruin the fabric. Whatever laundry method you choose, make sure you prewash with the one you plan to use on the finished figure skating dress or ice wear. It’s terrible to wash a finished garment just to ruin it in the spin cycle.

You’re not prewashing the spandex fabric because of shrinkage issues. Spandex doesn't shrink. Your’re prewashing to remove excess fabric dye, which can bleed on the figure skating dress’s other fabrics as well as your regular clothes. Prewash each piece of fabric separately in its own load.

For finished figure skating dresses, I recommend the vodka method for in-between cleanings, both for embellished and dry-clean only figure skating dresses. Test it in a small spot on the dress, like the upper back panty, where no one will see. Let it dry and see if the vodka damages the dress. If not, spritz away. Remember: no orange juice. (This method is fabulous for anything you send to the dry cleaner: suit coats, fancy trousers, sweaters, etc.)

Dry-clean-only fabric doesn’t need to be dry cleaned before you sew it. Just remember that you can’t run it through your washer when the time to clean the figure skating dress comes. Between cleanings, test a scrap of fabric with the vodka method to see if you can delay a trip to your dry cleaner a bit longer.

Non-stretch Fabric

Woven fabric is non-stretch fabric and your local fabric store will have many tempting colors and patterns. You can use non-stretch fabric, but only for skirts and men’s shirts. Be sure to look at the fabric’s drape before you use it. You don’t want something stiff that won’t flow with your skater’s movements. I’d choose a rayon or a sheer tulle.

If you’ve fallen in love with a non-stretch trim, you can use it on the non-stretch fabric. You can buy a non-stretch lace medallion to use as an embellishment, but make sure to place the medallion on the dress while your skater is wearing it. Gently pin it and sew.

Online Spandex Vendors

Online spandex vendors have many more fabric choices than your local fabric store. Just search for spandex or Lycra fabric online to find thousands of options. I have experience with just two. If you have a favorite online spandex vendor, please help me add to this list with your experiences, both good and bad! Write about them in the comments.
  • Performancewearfabrics.com This source used to be YourDesigns.com or the Lycra Lady. I order most of my fabrics from this vendor, but most of the fabric isn’t available for viewing online. I know the vendor’s working on it, though. What I like is that she has an affordable sample club. Pay the small fee ($25 when I signed up) and receive hundreds of swatches. I like having the samples because it’s easier to show people the fabric, easier to match colors, and I like to feel the fabric before I buy it. Sample club members receive discounts on ordering fabric and occasional e-mails about sales. Her standard two-day shipping is not free and the fabric is more expensive than other vendors. However, the selection and service are outstanding. Once, I bought a piece of fabric that looked like some man had rubbed his beard all over it. In other words, it was fuzzy in spots, not smooth. The owner immediately refunded my money. Another time I didn’t receive my order in two days. She sent it and refunded my shipping costs. I've also called her many, many times to ask about fabrics that might work well together or her opinion about using a certain fabric for a bodice, skirt, or sleeve. She's very, very helpful. There is no minimum purchase using this vendor and you don't have to purchase your fabric in one-yard increments.
  • Spandexworld.com I really like this source’s printed spandex and the prices are great. All of their fabrics are available online for viewing, but you need to realize that computer monitors don’t always display colors accurately. Shipping isn’t free, but it’s first-class and much cheaper than two-day shipping. I was disappointed in some of the printed spandex I’d received. On the wrong side of the fabric was some residual dye from the front. Since it didn’t leak through, I didn’t return it to the company. I have no experience with their return policy. If you ask for swatches, they’ll send them to you for free, but the wait time is a good two weeks unless you pay extra. However, they were really good about sending me samples that matched a swatch online. I picked out a swirly orange fabric and wanted a solid that would coordinate with it. They sent 10 samples from which to choose, which was very helpful. You must order at least two yards of fabric, in one-yard increments.
Update: I have three recommendations for SpandexHouse.com. Here's what the readers have to say:

From reader Anonymous: I've had good luck with Spandex House, and the milliskin has great selection of colors and matching sheers.You can order fabric swatches for free.

From reader c.m.: I agree. Spandex House is great!

From reader pdanek: I've been using SpandexWorld for my fabrics. Love the swatches. You can call and ask for all the pink fabrics and they will send them. It does take some planning ahead since they are a bit slow but I'm happy with their service so far.

Update: Reader c.m. offers informtation about non-stretch fabric and an online vendor:

For skirts, a lot of people use stretch mesh and glissenette. However, no other type of fabric can replicate the look and flow of silk chiffon. I get it from http://www.dharmatrading.com/ in white (medium weight) and dye it to match the lycra. From this source, it is quite cheap (2-5 dollars per yard). Colored silk is very expensive, so I don't bother with it. I find that this fabric gives the dress an expensive and professional look and is also great for airbrushing.

Update: From reader Bonnie: Just thought I would give you another source to add for spandex, etc. http://www.maryjos.com/ is online and a fantastic, huge place to shop filled with fabric and trims of all kinds in Gastonia NC. I am new to ice skating dresses but found a rainbow of colors and all types of stretch online at Mary Jo's. They are great to work with and will send swatches.

Update: An answer to my ITY question! Thank you, reader pdanek!
After a little internet hunting I think I found the answer to your question about ITY spandex. I was curious myself. "ITY Jersey Interlock twist jersey is a medium weight jersey knit that is available in a wide variety of prints. This fabric is soft, beautiful, and comfortable to wear! It’s perfect for travel, as well. copied directly from the EmmaOneSock site"


I have only seen "ITY" associated with prints which I find odd since the abbreviation seems to apply only to the weave.

That’s everything I know about fabric. Did I miss something? Do you have an experience to share? Do you love clear plastic elastic and know how to deal with the evil stuff? Have you any idea what ITY spandex is? Know of a good spandex vendor? Add to the comments!

Do you have a question for Ice Mom? E-mail me at icemom.diane@gmail.com.

Monday, January 4, 2010

Ice Mom’s Sewing Guide: All about Patterns

Note from Ice Mom: I’m going to write a series of posts about sewing. I figure that I write a lot about sewing and that many of you would like to try it, but don’t know where to begin. So, I’ll be posting about how the process works. As I build this fountain of knowledge, I’ll put all posts under the Sewing Guide category. Of course, if you sew, please write about your process in the comments!

This post is part of Ice Mom's Sewing Guide.
Other posts in this series: All about Patterns, All about Fabrics, How to Dye Silk for Fabric Skating Skirts, Altering Your Growing Skater's Figure Skating Dress, Laying out the Pattern.

Sewing patterns are a bit more involved than finding a pattern and buying it. Pattern prep begins with measurements and ends with alterations. It can be intimidating, but I think you can handle it.

My advice would be to start small and easy. If you've never sewn anything before, start with a practice skirt. My favorite practice skirt is Jalie #2215. Its waistband is like poetry - very smart, very easy, very neat. You can read my two reviews of this pattern: pants and skirt. Even easier than the skirt is Jalie's shrug pattern #2558. I reviewed the shrug pattern, too.

Measuring. Before you shop for patterns, measure your skater. This is an awkward process because you have to measure in spots that are pretty private. Your skater should be dressed in tight-fitting clothes, preferably a leotard and tights or skate pants and a tank top.

Before you begin, it’s a great idea to have a small spiral notebook or a few file cards handy. Use one page or file card per skater. Write these letters down the side of the card, like a column: B, W, H, Dia., In. Those stand for Bust, Waist, Hip, Diagonal, and Inseam. Across the top you’ll put the measurement dates.

  • Bust. Have your skater lift her arms in the air and wrap a flexible tape measure around the widest point of your skater’s chest. Have your skater put her arms down to her sides and stand up straight. Take the measurement and write it down next to B under today’s date.
  • Waist. This is the natural waist, not where your skater wears her jeans. Find the point where the body cinches in. That’s the waist. Measure it and write it down next to W.
  • Hip. This is the widest part of your skater’s body below the belly button. If you’re measuring across the butt cheeks, that’s just fine.
  • Diagonal. This awkward measurement is something that Jalie requires and it’s a good idea, anyway. The measurement figures out how long your skater’s torso is. With feet apart, start the measuring tape at the skater’s left shoulder. Bring it down to the crotch and back up to the shoulder. It makes a big circle around your skater’s torso. Write this measurement next to Dia.
  • Inseam. You don’t have to take this measurement unless you’re sewing pants. Again, this one’s awkward. Ask your skater to stand with her feet apart. Measure from the crotch to the knobby bone at her ankle. That’s the inseam.
Pattern selection. I look for patterns that are multi-sized for easier fitting, on sturdy paper for easier drafting, and have good instructions. Patterns aren’t cheap. Expect to pay $10 – 20 for each one. That’s another fabulous reason to buy multi-sized patterns: more uses.

I recommend Jalie or Kwik Sew for figure skating patterns, but Specialty Sportswear has very nice designs. Jalie includes 22 sizes in the envelope and prints on sturdy paper. Pattern backs and instructions are downloadable in .pdf form on their site. Kwik Sew is a multi-sized pattern on sturdy paper, too. Its instructions are well done, the diagrams are clear, and novice sewers should have plenty of success. Specialty Sportswear has many nice designs, but only one size in the pattern envelope and the instructions and diagrams are for advanced sewers. I don’t touch them, myself, but I know people who have great success with them. You can read my review of Specialty Sportswear patterns here. All patterns are available online. Kwik Sew and Jalie are available in some fabric stores.

I do not recommend Green Pepper patterns. The one I made didn’t fit at all, which is a huge waste of my time and money.

Consider, too, your skater's body type. I once sewed a dress for a skater who had a generous bust measurement. The dress had a halter top. Very cute, but the girls kept getting loose when the skater moved. I added addtional straps to keep the girls inside the dress and the skater comfortable.

Fitting. When choosing a size, it’s always easiest to work off the bust size measurement than any other measurement. Why? Because reshaping arm holes is a real pain. If you make adjustments to the bust, you’ll mess up the arm hole and maybe make it too tight or too loose. Neither is great and both are hard to fix for a novice sewer.

Your skater might be a size small horizontally, but a size medium vertically. My advice is to trace the pattern for the horizontal size and the vertical size. So for that example, I'd use the small measurement for the horizontal and the medium measurements for the vertical. Match up the intersections at logical points.

If this is your first dress you’ve sewn for the skater or the first time you’ve sewn patterns from a pattern company, you might consider combining the panty and bodice (top) pieces. I have instructions to combine pattern pieces below (Combining two pieces into one piece). The idea is that you’ll have a leotard to work with instead of a top and panties. It’s much easier to baste the leotard back and front together using a long, long machine stitch and have the skater try it on than to try to add fabric to the panty after the dress is sewn together.

Fitting the leotard: Even though this post is about patterns, here’s the explanation about how the leotard fitting method works, but first you'll have to follow the instructions in Combining two pieces into one piece. Baste the leotard together (right sides together) at the shoulder, crotch, and side seams. Don’t do any finishing work and make sure you can pull those stitches out. Have the skater try on the leotard, wrong side out. Use a water-soluble fabric pen to indicate where the leo needs to be taken in or let out. Sew the final leo along your markings, rip out the basting, and ask the skater to try it on, right side out. Gently pin the skirt along the markings you made in the Combining two pieces into one piece instructions below. Does the skirt cover the panties? If not, adjust. When you have the dress at your machine, repin the skirt so the right side of the skirt and the right side of the leo bodice are together. The skirt’s hem will be towards the neckline. Zig zag stitch the skirt to the leo at the skirt’s top edge. The skirt will hang down over the stitching and no one will ever see it.

Pattern tracing. You don’t have to trace your patterns, but it’s a pretty good idea. Many patterns will set you back $10 – 20. The patterns are multi-sized and you might have to make adjustments to make the dress fit. If you’re going to make adjustments anyway, you might as well give in and trace the pattern. It takes me about 30 minutes to trace a pattern and watch half an episode of Dexter. Be sure to iron the pattern flat and have a big, flat surface to work on. Some folks use their floor, but I use my kitchen table, which is a good excuse to clean it off.

I recommend that you purchase pattern tracing paper from a fabric store. You can purchase a yard of this thin stuff for about $1.99. I buy in 10-yard batches and try hard to use a 50% off coupon. Ask the gal at the cutting counter to give you an empty bolt for storing the paper. Pattern tracing paper comes in plain and gridded models. Either works fine, but I use plain. I find all the extra grid lines confusing, but that’s just me. You can also use lightweight sew-in interfacing if the fabric store doesn’t have any tracing paper in stock (do not use iron-in interfacing). Another option is plain ol’ white tissue paper, like you’d use for gift wrapping. Tissue paper is thin, though, so it won’t stand up to heavy use.

Sharpie, ruler, soup cans. I use all three to trace my patterns. I lay down the pattern, cover it with tracing paper, and weight it all down with soup cans. I trace the pattern using a Sharpie and a ruler. Sometimes it’s tough to see which line to follow. Give yourself permission to lift up the tracing paper (try to keep the lines in place) every once in a while. It helps to approach a jumble of similar lines from two different directions to help you find the correct line.

Be sure to transfer the grain line (the arrow and line down the middle of the pattern piece) or the place-on-the-fold line, the letter or number of the piece, the make and style number of the pattern (so you can pick it out from a potential mess of pattern pieces), the size, the skater’s name, and the number of pieces to cut.

I also keep a roll of medical paper tape with me when I copy patterns. Sometimes tracing paper rips or I cut through it. Repairing the pattern with paper tape allows me to iron over the tape without it sticking to my iron plate and shriveling on the pattern. I also use it to reinforce any guides that the pattern might have. Sometimes patterns have circles where a zipper stops or starts or where a sleeve meets the arm hole. I use the paper tape on both sides of the pattern piece, cut out the hole, and then use my chalk or fabric marker to mark over the hole. The paper tape prevents the marking hole from ripping.

Combining two pieces into one piece. This is a very, very useful technique, especially if you’ve never sewn for a particular skater or never used a pattern company’s materials. The idea is that you’ll combine the bodice (top) and panty pieces into one leotard and fit the leo to the skater. Using the leotard method eliminates the headaches associated with adding fabric for length.

Trace the bodice pieces, both front and back. At the bottom of each piece, measure up for the seam allowance and mark the seam line (where you’ll be sewing). Most seam allowances are either 1/4” or 5/8”. Check the pattern instructions. I use a dashed line to indicate the seam line.

Trace the panty piece, both front and back. Measure the seam allowance down from the top of the panty and mark the seam line with dashes.

Cut out all pieces. Using paper tape, tape the front seam lines on top of one another to create the leotard front. Repeat for the back. I usually retrace the whole pattern piece, but using the taped pieces will work just fine. Transfer the original seamline onto the fabric where the original panty met the original bodice using chalk or a water-soluable fabric marker. That's the skirt line. You'll try hard to match the skirt to that line in the instructions above, Fitting the leotard.

Separating one piece into several. Just as you can combine two pieces, you can also separate them. I’ve separated bodice fronts and backs to create color blocking on dresses. In other words, instead of having a bodice that’s all one color, I can sew a bodice that’s made up of pieces from different fabrics and different colors.

Trace the bodice piece. Draw lines or curves in the position where you'd like a different piece of fabric. Cut out the marked-up bodice piece, which is now your guide bodice piece. Place your guide under the pattern tracing paper and weight it down with soup cans. Trace the bodice piece for the first color of fabric. Where the first color meets the next color, draw a dashed line. Remove the guide. Increase the size of the piece by measuring out from the dashed lines 1/2” for a seam allowance. Draw in the new cutting line 1/2” from the dashed line. Label the pattern piece with the color and move on to the next color. When you're finished, you should have a collection of smaller pieces, that, once you match seamlines, will have the same shape and size as the guide piece.

When you sew the fabric pieces together, it’s a good idea to sew a line of straight stitches (stay stitches) 3/8” from the edge of the fabric first. These stitches should be in the seam allowance. Clip to the straight stitches and pin the pieces right sides together. Clipping the fabric will allow the fabric to lie flat along curves so that the two pieces of fabric easily fit together.

Another way to achieve this color blocking effect is to use appliqué. That’s another post, though.

Do you have any sewing techniques related to patterns? Add them to the comments!

As always, if you have a question or an idea for a blog post, e-mail Ice Mom.

Monday, December 21, 2009

Specialty Sportswear Pattern Review: I Don’t Like ‘Em

Note from Ice Mom: Please read the Updates at the end of this post. Some readers disagree with me - that's great. You'll be able to read about their experiences at the bottom and in the comments. Thanks, readers, for sending in your opinions.
 
Bah, humbug. Here I am, a Scrooge for the holidays, but it’s high time I wrote this review. Remember that figure skating dress I ruined a year ago? Well, part of what made me cry when I ruined that stupid dress was that it was a Specialty Sportswear pattern. I'd spent hours on that stupid dress, trying to figure out the Specialty Sportswear pattern, trying to make it fit, and struggling with the zipper. When I finally had it perfect, I painted it and totally messed it up. Throwing it away was painful, but satisfying, too. That stupid Specialty Sportswear dress is in some landfill where it belongs.

Here are my likes/dislikes:

Style. Charlie has a ton of neat dresses on her site. Very cool styles and lots of them.

Website. The navigation for the Specialty Sportswear site isn’t very clear. What’s a series? What’s a system? What’s a multi? How do I know which skirt to buy? What's with the 300, 400, 800, etc. numbers? It’s pretty confusing.

Manual. I know I’m a professional writer and pickier that most, but the Specialty Sportswear instruction manual is very poorly written. If you’re not an experienced sewer, a lot of it won’t make much sense to you. The instructions for drafting your own patterns are really vague and the sewing tips have terrible diagrams. Much of the advice in the manual is: just try it or just play around with it! I don't have time for that.

Pattern. The Specialty Sportswear patterns come on sturdy paper, which I like. However, for my $17 plus shipping, I only get one size in the envelope. That makes alterations more difficult and if my kid grows, I have to buy another $17 pattern. The pattern doesn’t have markings on it, either. No notches, no bust or waistline markings. The pattern I attempted had a sleeve that was combined with the top of the bodice. It was the weirdest thing I’d ever seen and I had no idea what it was. The label on it was top. Top? How about top and sleeve? How about letting me know where the zipper goes so I have a clue how to orient the piece? A nightmare.

Instructions. The instructions for the Specialty Sportswear pattern I sewed looked like Dr. Frankenstein had pieced them together from the decaying remains of other pattern instructions. I’m not kidding you. The diagrams didn’t match the pattern and they were weird looking. It was hard to tell from the diagrams what I was supposed to do. The sewing order didn’t flow well and some of the instructions didn’t match the pattern I was sewing. The instructions for the invisible zipper were: follow the instructions on the zipper package. Not very helpful.

Fit. The panties are enormous. I have no idea what kinds of rear-ends other peoples’ skaters have, but the Jalie and Kwik Sew panties fit Ice Girl's behind. The Specialty Sportswear panties would have fit me. It was amazingly hard to alter the bust line because I had no idea where the bust line was on the pattern until I constructed the leotard. I know a gal who sews these patterns all the time. How does she get the dresses to fit? She sews a practice dress first. Look. I have this job thing I do. I don’t have time to sew two dresses. I barely have time to sew one. I just want it to fit, O.K.?

Assistance. You can call Charlie and she’ll help you over the phone. This is absolutely true. However, when I called her, she seemed eager to get me off the line and insisted that it was all very simple and I should just go for it. I was no better off after our call.

Bottom line. You can tell I harbor resentment toward Specialty Sportswear patterns. I’ve been sewing for over 20 years and I had a tough time with the pattern. I spent hours cursing at it, ripping out stitches, and inventing ways to make the stupid dress fit Ice Girl. I can’t imagine how a novice sewer would sew a dress successfully from the patterns. My time is valuable and the pattern and fabric cost money. When I plunk down my $17 plus shipping, I expect that pattern to fit and the instructions to be clear. Nope and nope. I don’t recommend Specialty Sportswear patterns; although, I do really like the styles. Bah, humbug.

Update: From reader Skittl1321: I've never bothered ordering because I was always so confused by the website.

Update: From reader Anonymous: I have worked with Charlie in the past, and she was amazingly helpful both for me and my friend who agreed to sew the pattern for me. My skater has no bum to speak of, so all panties fit pretty much the same.

My daughter and I designed her dress, and with help from Charlie, we got a completely custom and basically couture dress for a fraction of the price.

Update: From reader Anonymous who disagrees with me completely. This is very good for you, readers, because you get a better picture of the Specialty Sportswear experience. I'm putting her comment here in full and I want to thank her for offering the opposing opinion.

This is a very unfortunate review of patterns that I personally think are far superior to Kwik Sew or Jalie patterns. I have had nothing but success with Specialty Sportswear patterns and just taught myself to sew this summer. After the first 200 line dress I made for my daughter, I had the hang of them and have been to the moon and back with Charlie's patterns. The Jalie dress patterns are sized too small (I didn't find that out until the dress was just about finished) and the skirt lines on many are too low.

The wonderful thing about Specialty Sportswear is that you can mix and match bodice lines with different skirts and vice versa. I was able to make my own pattern with Charlie's manual with ease just following her directions. With any dress, I try on the dress before fitting panties with elastic. It is simple to cut away the excess panty before putting elastic on.

My experience with Kwik Sew has been mixed. Most of the Kwik Sew dresses I see look like Kwik Sew dresses - kinda boring and cheap looking. I stick to Kwik Sew for practice dresses and skirts.

The fact that Charlie actually took the time to talk to you (or any other customer) is amazing. You cannot get that kind of customer service from Jalie or Kwik Sew. I had a very difficult "Flame Cutout" pattern from Charlie that I was struggling with and she stayed on the phone with me for 45 minutes talking me through the pattern.

I would recommend that readers give all patterns a try until they find the line that works best for their skater.


Update: From littleskatersmom: Charlie has always been helpful, but I've always felt a bit talked down to... and I've been making skating dresses for over 10 years. I've made, with some success, my own patterns (not following directions), and yet, I have trouble following her directions. I usually just toss the directions and put it together how I feel it should go... sometimes it works, sometimes it doesn't.
 
All of that being said, some of the most beautiful dresses I've made have come from Charlie's patterns. Kwik Sew is probably my favorite for practice dresses, but I find I always have to lengthen the back of the skirt.
Tons of you are going to disagree with me. That's great! Voice your support for or displeasure with Specialty Sportswear patterns in the comments.

Wednesday, September 9, 2009

Sewing review: Jalie figure skating practice skirt #2215

I sewed Jalie #2215, just the figure skating practice skirt pattern, for one of Ice Girl’s young friends. The gal in the photo on the left looks angry, but I assure you: this is a great pattern. I don't know what she's all ticked off about.

Most of you know that I’m a big fan of Jalie because the patterns include 22 sizes and the instructions and diagrams are usually accurate and detailed. Jalie patterns are pricey: $12.99 for this one, plus shipping. But the heavy paper and the multiple sizes make up for it, I think.

I always download and print the .pdf instructions for the Jalie patterns in advance because the company prints them alongside the pattern pieces. Those big sheets of paper are difficult to use when I'm sewing. You can find the printable instructions on the company's site.

In the past, I’ve sewn Kwik Sew #3051 for Ice Girl’s figure skating practice skirts, but I’m not a big fan of the waistband on that pattern.

The Jalie waistband is very clever and easy. There’s no waistband to cut – the skirt and panty make their own waistband.

The instructions explain that sewers should pin the skirt and panty top together with the wrong side of the panty to the right side of the skirt. That just didn’t seem right, but it is.

Here’s the genius of it: the top seam forms the top of the casing. Once the panty is back inside the skirt, Jalie instructs sewers to topstitch the casing and stitch a straight seam an inch or so under the topstitching, leaving about a 2” opening. Sewers insert the elastic between the panty and the skirt, sew the ends, and finish the seam.

Smart, hey?

If you have no idea what I’m talking about, you can see the online pattern instructions and diagrams here: http://www.jalie.com/product_printing_guide/2215.pdf

Anyway, this practice skirt went together very quickly: about one afternoon, start to finish. I had to take in the panty and hike up the skirt hem for the little munchkin, but this is my new go-to practice skirt pattern.

Wednesday, August 26, 2009

Sewing a figure skating undergarment from a swimsuit pattern

If you read this, I have to swear you to silence. Ice Girl won’t like the idea that people are reading about her undergarment. Swear? Good.

I had such trouble finding Ice Girl a leotard-like undergarment for underneath her figure skating dresses. She’s a modest girl and likes to be covered. I get it. But, she’s tried on every flesh-colored undergarment between here and Milwaukee with no success.

After searching patterns, I decided that the closest thing to what Ice Girl wanted was Kwik Sew 3503, view A. View A is a strapless swimsuit, but I added strap loops and clear straps to it. I offered to lower the back into a deep scoop or replace a bunch of the fabric in the back with flesh-colored athletic mesh, but she didn’t want that. Whatever. You could modify the pattern very easily to accomplish both of those suggestions.

The pattern includes a front lining with a shelf bra and it sews together in an afternoon or less (just five pattern pieces). I was worried about the gathers on the side and in the front lining, but they’re virtually unnoticeable and disappear under a figure skating dress.

Ice Girl loves her undergarment. Here’s what I did:


  1. Fabric. Flesh-colored spandex that matches her skin color.
    High-cut legs. The pattern has options for both low-cut and high cut leg openings. I used the high-cut option because I didn’t want the garment sticking out Ice Girl’s figure skating dress’s leg openings.


  2. Straps. Clear straps made from clear plastic elastic, clear swimsuit hooks on both ends, and a clear slider. I melted the two layers of elastic together instead of sewing them (I used my BeJeweler with the nailhead attachment.) You can buy clear straps, too, but Ice Girl loses them so often that I thought it would be good to have the replacement parts on hand.


  3. Strap loops. I added flesh-colored ribbon loops, spaced evenly around the top of the garment to accommodate the straps in all sorts of configurations.


  4. Fortuitous mistake. I didn’t have the 3/4” elastic for the top of the garment. I used my standard 3/8” elastic instead and zig-zagged the lining close to the elastic. This worked great, actually, because I eventually removed the lining’s top stitching to add a bra insert.


  5. Sew-in bra. Ice Girl didn’t like the minimal support from the shelf bra, so I used my mistake to my advantage. I.G. tried on the undergarment over a clean, but worn, flesh-colored bra. I used my tailor’s chalk to outline the bra on the outside of the garment, pinned it, cut off the bra’s straps and back, tore out the lining’s stitching, repinned the bra, and then basted it all in place. One more fitting before I stitched it permanently and ripped out the basting. It looks good and the bra and stitching are hidden in the lining. We had investigated the bra inserts at the fabric store, but they’re weird. Some models are gel-filled, some are push-up, and some are paper cones. I think using her own bra makes her feel more confident, too.
I was really worried about making this undergarment because Ice Girl is notoriously picky about them – she tried on dozens and didn’t find one she liked. The garment went together quickly, and fit well, so I didn’t end up wasting my Saturday afternoon at the sewing machine for nothing. When Ice Girl needs another undergarment, this is what I’m going to make – with 3/8” elastic at the top, too!

But, we've never had this conversation. You don't know anything about what Ice Girl might or might not be wearing under her figure skating dress. Silence, folks. Remember, you promised.

Is it O.K. to let the undergarment show or not? Let's discuss. How does your teen/preteen feel or how do you feel about flesh-colored garments showing through keyhole openings in figure skating dresses? You know - the kinds of dresses that show a lot in the back or front? Is it O.K. or is it tacky?

Monday, August 3, 2009

Sewing Review: Jalie Figure Skating Halter Dress #2571

I’m working my way through the Jalie figure skating dress line up. A few weeks ago I sewed this dress for Ice Friend. As with most Jalie patterns, this one went together pretty intuitively and without too much trouble. I learned a few things along the way, though.

Fringe. If you’re going to add the fringe, shorten the skirt. I’ve never sewn fringe before, but it wasn’t too difficult. I machine-basted 4” around the bottom of the skirt, sheared off the bottom using the basting as a guide, sewed the fringe to the right side of the hem, ironed the seam to the back, and topstitched the seam allowance flat.

View A’s ring. I sewed view A (bottom left on the photo) and the pattern instruction’s ring diagram took me a lot of think time. I remember thinking, “This can’t possibly be right.” I wish I could tell you what I did, but I remember looking at the diagrams, manipulating fabric, and going for it.

Extra straps. The straps in this pattern hold up the dress, but on a chesty skater, the straps just don’t hold in the girls. Originally, I had just used the two straps on the ring for Ice Friend. She practiced in the dress and the girls spilled out the sides. So I added two additional straps and crisscrossed all of them. Unfortunately, to hold in the girls, the straps had to be really tight – so tight that Ice Friend was trapped in the dress. I cut her loose and used small loops on the back and small swimsuit hooks at the end of each strap. This system worked pretty well – Ice Friend could even do a somersault in the dress and the straps stayed on.

Would I make it again? Yep. It’s a pretty cool dress. However, if your skater has lots of cleavage, I’d choose another pattern.