Showing posts with label How-to. Show all posts

Thursday, April 1, 2010

How-to: Counsel a Kid out of Figure Skating

We've all seen this kid: she drags herself into the rink, slooooowly puts on her figure skates, gets on the ice like she's going to prison, and skates around aimlessly. She exits the rink to retie her skates, to adjust her ponytail, to get a drink of water, to hide and read a book. When she does skate, she practices moves, jumps, and spins that she learned three years ago in Basic 8.

Mom, I'm going to tell it to you straight: you need to counsel your kid out of figure skating. The other parents aren't saying anything when your skater whines in the lobby and complains in the parking lot. They're too polite and they've known you for years. They're your friends and they think you'll be offended if they have the awkward conversation with you.

I'm going to do it: save your money and find your figure skater something to do outside of the rink.

Mom, I'm not trying to be mean. Really. I like you. I even like your whiny kid, when she's away from the rink and having fun. It's just painful to watch the scene your skater makes every week and it's painful, too, to know how you're scraping together the money to put her on the ice.

Here's how you do it, Mom:
  1. Cold turkey. Just take a break. Maybe a month. Maybe the summer. When the time for the next ice contract comes around, ask your figure skater if she misses it. She probably won't.
  2. Maintain friendships. Arrange for times to spend with her (former) figure skating friends. Keep those friendship ties, but do it away from the rink.
  3. Bandwagon. Ask your skater what her school friends enjoy. I don't care if it's knitting, find a way for your kid to join in.
  4. Replace. At the very same time that your skater would be on the ice, find something wonderful, marvelous, adventurous for her to try. Normally I would never recommend horse back riding (the only thing more expensive than figure skating), but if it gets your kid off the ice, it's worth the money. 
  5. Bait-n-switch. Does your skater love the musicality of figure skating? Try dance. Does she like the performance aspect? Try theater. Does she like the movement? Get her roller blades and crown her queen of the roller rink.
  6. The long goodbye. Reduce her ice time so gradually that she doesn't even notice it happening. Pretty soon she'll be weaned off of the ice.
  7. Reward behaviors you want to see. When she's trying the new activity, gush appropriately. Watch her and be amazed. Encourage her to talk about her new activity and how very, very cool it is.
Mom, don't listen to your kid when she says in that whiny voice that she loves figure skating and doesn't want to quit. Instead, listen to her behavior. Her attitude, her actions, and her level of activity should all be good indicators that this sport isn't for her. Be strong, Mom. You can do it.

Tell her that just because she doesn't like figure skating as much as she had thought, she isn't a failure and she isn't a bad person. She just needs to find that passion, that spark, that special interest that will take her from whiny to wonderful.

Give your kid permission to quit. Please. I promise I'll call you. We'll have coffee. We'll take the kids to the movies. We'll catch up and laugh. You'll show me photos of your kid on her horse, on stage, or at the gymnasium. The kid will beam with pride. We'll both gush appropriately.

I can't wait.

Alright, parents. Do you have any ideas for this mom? How would you recommend that she counsel her kid off the ice?

Do you have a question for Ice Mom? Ice Coach? Ice Girl? Synchro Mom? Are you an expert and you want to contribute to the Wednesday Ask the Expert Feature? Do you have a suggestion for a post you'd like to see? Wonderful. E-mail me at icemom.diane@gmail.com.

Monday, March 29, 2010

How-to: Make Your Own Figure Skate Deodorizer

I’ve spent $25 in the past on cute Stinkeez odor absorbing thingies. They’re made of colorful fleece and come in fun shapes like sharks and lizards. The idea is to stuff the Stinkeez in the figure skating boot to absorb foot odors and moisture.

The Stinkeez is filled with silica gel, which is a desiccant. You know those little paper packets that come in purses or shoe boxes? Those are filled with silica gel. You can find silica gel in bulk at craft stores. Crafters use it to dry flowers.

You can make a home-made Stinkeez very cheaply using single socks and cheap ingredients.

Materials:
  • Two clean, mismatched socks - with tops (not little ankle socks)
  • A desiccant: baking soda or white rice or cornmeal and borax or silica gel (You just need one of these, not all of them. So, if you choose baking soda, you don't need rice, etc. You'll get the best results with silica gel.)
  • Wide-mouthed funnel or a rolled-up piece of paper or  a narrow drinking glass
  • Optional: scented oil (peppermint, etc.)
I'm sure you see where this is going. Using the funnel or a piece of paper that's been rolled up into a funnel shape, fill each sock with the desiccant, stopping about three inches from the top. You can also use a narrow drinking glass for this purpose. Put the sock inside the glass and fold the sock's top over the edge to hold the sock open. Spoon in the desiccant.

Add a couple of drops of scented oil and tie off the sock's top with an overhand knot.

See? Cheap and simple. If you want to go fancy, buy some funky toe socks or holiday socks.

Update: From Advisory Board member S.F.: One of the best ways to combat stinky skates is to remove them from the skate bag so they can dry out. It also  prevents them from rotting. My daughter had a pair of skates rot last year because we never took them out of the bag when we got home. We have been removing them religiously every day and they no longer are smelly.

I also would like to comment about laces. I change laces frequently because white laces get dirty pretty fast. My daughter's ice coach likes clean skates and laces on test days and competition days.


Do you have a good idea for keeping boots dry and socially acceptable? Let us all know!

Have a question for Ice Mom or the Advisory Board? Do you have an idea for a post? Would you like to write a guest post? Awesome! E-mail me at icemom.diane@gmail.com

Ice Mom's Summer Camp Survey

Monday, March 22, 2010

How-to: Tie Figure Skates

This guest post comes to you from Ice Coach. My blog, Ice Mom's Adventures in Figure Skating will move to IceMom.net on Saturday, April 3. Joining me in blogging will be Ice Coach, Ice Girl, and Synchro Mom. Together, we'll try to give you honest answers and occasional laughs as we look at figure skating from different perspectives. This guest post will give you a little introduction to what you might find on Ice Coach's blog.

Tying figure skates correctly is important because improperly tying skates could lead to injury and bad habits. The biggest issue of tying skates is making them tight. I have repeatedly seen new skating parents not tie skates tight enough. Their child gets on the ice; his or her ankles are falling inward and not supported at all. I also know of parents who thought they needed new skates or blades remounted because their child was having difficulty skating. When it came down to it, the solution was simply tying the skates tighter.

No socks. If you’re a competitive skater you should not be wearing socks in your skates. Socks can lead to blisters, which are no fun. What’s worse than socks? Bare feet. Bare feet lead to blisters and smelly skates. Skates should fit as snug to your foot as possible leaving little room for your foot to slide around. I recommend trouser socks; they are form- fitting and thick enough to wear multiple times without getting numerous holes. You can even get moisture wicking trouser socks.


Untie your skate all the way. (See photo above.) I have seen many people untie the first couple holes only. Make sure the laces are loose enough to easily slip your foot inside the boot. Start tightening the laces at the toe and work your way up the boot. Tie the skates tight, but not so tight they cut off your circulation. I always tie my skates as tight as I can pull and never have an issue with numb feet, and I always have enough bending room. New skates are a different story. You might want to only lace the top three hooks on new skates so you have room to bend.

No skate lace tighteners. Does anyone like these things? They seem like more of a hassle.  You can tie your skates faster and tighter by using your fingers.


Cris-cross the laces and wrap them around the fourth hook, the one closest to the lace holes. (See photo above.) I prefer wrapping them over the hook rather than under it, but you can go under to over, too.


Wrap the laces. (See photo above.) On the third hook, when you cross your laces, wrap them around each other a couple of times to keep them from slipping. Do this on the first hook as well.

Bunny ears. (See photo above) On the first hook, tie a bow. Take the bow’s right “bunny ear” and hook it around the first hook again and tighten it; do the same with the left “bunny ear.” Your skates should not slip.

Never wrap extra laces around your ankle or boot. If your laces are long enough to do this, they are too long. Buy a shorter pair. Skates should bend at the ankle; if you wrap laces around the top part of the boot it will prevent this.

Lace materials. If your laces still slip and you’re using 100% cotton blends, try a nylon/cotton blend. I personally prefer them and think they slip less. But I have others tell me that the cotton ones slip less. It just depends on what you like.

Tying your skates well will help prevent injury and is the first step to proper skating technique.

Do you have a suggestion about tying skates? Do you have problems with it? Let Ice Coach know what you're thinking in the comments! If you have other questions for Ice Coach, you can put them in the comments or e-mail her at IceCoach@IceCoach.net

As always, if you have a question for Ice Mom or the Advisory Board, please send it to me. If you have an idea for a post you'd like to see, let me know that, too. Are you an expert? Wonderful. I'm looking for figure skating experts. E-mail me if you'd like to write a guest post. icemom.diane@gmail.com 

Ice Mom's Summer Camp Survey

Wednesday, March 17, 2010

Ice Mom's Sewing Guide: How to Airbrush a Figure Skating Dress


It is my great pleasure to introduce this guest post from reader C.R.H., who responded to my request to explain how to airbrush a figure skating dress. Thank you very much, C.R.H.! Technically, it's also the first Ask the Expert post, too.

I’ve sewn for my kids for years and in the past six years, most of the local skating club.  Everyone wanted the dip-dyed skirts that one of the fancy dressmakers did.  However we heard of the $400 or more price tags, whispered through the stands, and most of the parents felt it was an expense that wasn’t worth it. The skirts were silk, another cost. They’re really nice dresses. I would have liked one, but I made my own dress and bought freeskate lessons instead.

I had a chance to talk to that dressmaker about dip dye. Of course she wouldn’t tell any of the process involved, but did say that she made a lot of garbage before she got the technique down. I left it at that, and besides, I had boys in skating, so I wasn’t personally driven to figure it out.

A few years later, a dressmaker at another rink that I was at experimented with dying. I again heard of the rumors of disaster and messes, and she had some limited success, mostly with painting on the dye.

Then I met a parent, whose husband had a workshop. She made her kids’ dresses because she wanted to and they had airbrushing on them. I asked her how. She said, very directly, “I went out to the shop and put paint in the gun and sprayed the pieces.” Like we would all naturally go out to the shop and put paint in the spray gun but, that’s exactly what you do!

Quickly, difference between dip dye and airbrushing: 
  • Dying: The fabric is immersed in the dye, and depending on the fabric (synthetic vs. natural cotton/silk) there is complete color change on both sides of the fabric. Some dyes make a very solid band, mostly with synthetics, others make the gradient effect, most noteably on silk. Chemicals are required with synthetics to set the dye and dye is very good for entire color changes or the edge of a skirt. There is not much of any change of hand of the fabric. (Note from Ice Mom: a fabric’s hand is how it feels.)
  • Airbrushing: The dye or paint is blown onto the surface of the fabric and doesn’t entirely soak through the fabric, so the original color remains on the underside.  It can be applied in different areas of the garment easily and can be over sprayed or painted. Heavily applied paint can make for a stiff fabric. And lastly, airbrushing is LOUD.
So I’ll quit talking about dye because I don’t really do that.

Part 1: Materials

What you need for airbrushing, in order of expense:
  • Air
  • Brush
  • Paint
  • Something to spray it on.
Air: The thing that took me the longest to figure out was air. My friend with the body shop? She used the huge compressor in the shop. Lotsa Air. Big Air is Good.

Textile paint is thick and has big particles (they’re really tiny, but in paint terms they are big). Imagine trying to blow a large pea through a little straw, it takes a lot of force. So it takes a high consistent pressure to blow textile paint. The amount of pressure that works for me is about 40-45PSI.

Don’t even consider buying the cans of air. Not enough ooomph and they freeze up in a minute.

When you look at airbrushes, and there are tons of sites on the internet, they show airbrush compressors that are these little small things. They are great for artists and thin art paint. Their PSI is not so big, but they are quiet. There is big air that is quiet, but it’s expensive. I am cheap, er, thrifty.

Chain stores sell compressors for the shop that blow up to 100 PSI for about $70. Or less. They have tanks on them. Big tank is good but takes up too much space.   I have something like this with a 3-gallon tank:

It’s bigger than a breadbox and smaller than a Zuca bag. It was also on sale for $65. Remember I said LOUD?  The drawback is when this thing runs to fill the tank, it is like a JACKHAMMER. I wear earplugs. Once you start airbrushing, after about five minutes the tank has run out of pressure so the motor runs to fill it up and you jump when it kicks on. Basically, the motor runs a lot. If I had a big 25-gallon tank model out in the shop, this would not be a problem, but I don’t have a shop nor the space for something the size of a horse. So, I wear earplugs.

Bonus point: Men don’t seem to complain when you buy a compressor.

Brush: I use a Paasche H series. Airbrushes come in three sizes, 1, 2, and 3, meaning the size of the swath they spray, and most importantly it has a single-action siphon feed with a cup. The major airbrush makers are Paasche, Iwata and Badger. Badger also has a single-action siphon, and so does Iwata, but the surplus store had a Paasche on clearance, so that’s what I have. They also had no-name airbrushes for $12.95, so I have one of those, too. It sprays like a $12.95 airbrush.  Buy a name brand brush, and make sure it has a siphon feed.

You could read lots about airbrushes and I recommend you do; in particular, search out T-shirt airbrush painters. Here’s the difference: there are single-action and double-action airbrushes. Single action sprays a defined width of spray that is adjusted by twisting a ring on the tip. Double action can adjust the spray by toggling the spray button. Double action mixes the paint with air in the brush; single action does it at the tip. Single action can also handle bigger paint. Since for dress hems, we’ll mostly be cranking up the air and spraying a swath, single action is perfectly fine, and quite inexpensive, but the cheapest starting price is around $50.


Paint: I recommend using specialized fabric paint. Createx and Jacquard are the two name brands that will work perfectly fine. There is also Setacolor, but it is more expensive.

Createx


Jacquard


Jacquard makes a few lines of paint. I use the Textile Colors because I can water them down for airbrushing or use them directly for painting. They are sprayed on, let dry, then iron to heat set it into the fabric. There is an additive that you can put into the paint instead of heat setting. I’ve never tried it, and would be curious to hear if anyone out there uses it. These paints feel like they’re part of the fabric and not sitting on top of it. They will soak into the fabric, so use that as an effect; it's difficult to get a hard edge, unless you use a stencil or a shaper to cover or redirect the spray off the fabric. (Google: airbrush Frisket) These paints and colors are acrylic paints, so they’re thinned with water and clean up with water. There is an extender that can be used to thin the paint, but I use water. Createx paint can be used right out of the bottle. Jacquard makes an airbrush paint, but I use Textile Colors and thin it down, almost 50% (20% is the recommendation) and spray more layers. I like using the textile paint instead of the airbrush colors because I use the same paint for silkscreening onto fabric and/or handpainting and stamping. (another topic for another day)

I’ll throw this in here: These paints are acrylic.  You can spray any acrylic paint onto fabric and it will stay because it stays on my clothes when I accidentally spray paint myself. I’m not convinced that heat setting is necessary; sometimes just letting the pieces sit for a few days works. I’ve tried the craft paint from the dollar store and it sprays just fine, but it sits on top of the fabric and doesn’t sink in, so it's stiff. It might work for the bodysuit, but not a skirt if it's sprayed heavy for a deep color. Depending on what you are spraying and the budget, consider this a thrifty option for cases where you need 30 carnival pumpkin face costumes. The airbrush manual will warn not to do it, it’s up to you, thin it down and try some samples. It’s all about the particles of the paint fitting through the needle of the brush. If you jam the brush, there are a lot of YouTube tutorials of how to disassemble and clean the airbrush.

Anyway, a big set of Createx colors is around $30.

You could spray with dye. I haven’t tried it, but if anyone has, I’d like to hear from them. I imagine that spraying with dye on silk would be amazing…or not? It would have a huge soaking in factor. One day...


To summarize this section, if you’re my friend with the workshop husband, she had all the tools; she just had to buy some fabric paint to put in the gun. (She has since bought a real airbrush.)For the rest of us, after buying a compressor and a brush, and a couple of bottles of paint, it’s about $125 or more. Add in the ear plugs remember. And fabric for the dress, too.

Now go buy a roll of paper towels, find a big cardboard box, and 2-3 yards of white Lycra, and maybe 2-3 yards of chiffon or georgette – whatever you like to use for skirts. If you just want to do a skirt, then stick with the chiffon/georgette. Polyester is fine; this paint sticks to everything.

Stretch velvet? You could try. I did. It feels like I painted the cat. It might work if I wanted some crazy effect involving painted cats, but I wouldn’t plan on airbrushing stretch velvet. In dresses on the market with airbrushing, you will find airbrushed Lycra and mesh in the bodysuit and chiffon/georgette for the skirts, nothing else. It leads to a bit of a conundrum, because some skaters love stretch velvet for its matte look and want airbrush effect on the bodysuit. Which leads to part 2, making samples. When in doubt, make a sample.

Part 2: Practice

Cut 18-inch or thereabouts square pieces of whatever fabric you’re going to use. A meter of 60 inch Lycra will get you six 3x20x18-inch squares. This is the time to make samples of what works and what doesn’t. Pin these to your spray wall. Spray wall?

The cardboard box is your spray booth. Spray wall is more like it. Although it seems natural to spray on something lying flat on the table, the spraying works better when the fabric is vertical. Cut open the box and find a place where you can attach it to a wall. I have a big cardboard that I’ve covered with brown paper, which I change occasionally. It doesn’t have to be entirely vertical. Think of it as an easel. Pin the squares to the spray wall. Pin them tight, but not stretched. That 45 PSI will blow wind at them and cause them to flutter around if they’re loose.

Attach the airbrush to the compressor. Wait for everyone to leave the house, turn on compressor (follow their instructions) and psssst, hit the button on the brush. Prepare the paint by either using Createx from the bottle, thinning Jacquard textile colors, or using airbrush paint straight.

I’ll have to digress here. There’s the airbrush bottle and the siphon cup. For now, pour your paint into the bottle and attach it to the brush. Take those paper towels and make a thick pad out of some of them and holding the brush level, spray into the pad until paint starts coming out of the end. You’re ready.

Starting off the edge of the fabric, push the button, start spraying across the fabric without stopping and take your finger off the trigger once you’re off the fabric. It’s basic spray painting. Did you like the effect? Change the spray width on the nozzle, test, stand closer, stand further, play around with this for a long time until you’re confident you’re comfortable with the brush and how it sprays. You will get sputts and splatters, it’s either related to the air or the pressure on the trigger. Occasionally it can be because the paint was not thinned properly and a chunk has gotten stuck in the nozzle. In that case, spray it out into your paper towels and/or rinse out the nozzle and try again. There’s a lot of YouTube videos about specific techniques. How to spray flames on the hood of your sports car can work out to being flames on a man’s bodyshirt. I just need a man who wants a flaming bodyshirt... Anyone?

Let the samples dry, heat set them by either ironing them for a few seconds on the reverse side (I use a teflon sheet ) or throwing them in the dryer. Then wash them and dry them just for good measure to see what happens. This is overkill, but it’s a good idea to see what happens with your combination of fabric and paint. Washing it also takes out the stiffness that can build up.

Some airbrush sites say to spray on paper to learn technique. I say use fabric, because the paint does soak in and it's something you need to learn how to deal with. It doesn't have to be white Lycra actually; it could be that yard of ugly that's been in your stash for years. Just use a very contrasting paint. Knowing how the paint covers on color fabric is also something to learn.

Do not skip making practice samples. Here are just a few of mine, with different paints, fabrics and lots of splatters.


Part 3: Doing It


Cut out whatever you want to spray. Pin the pieces to the spray wall. Put the pins where the seam allowances will be. Make sure they’re tight, but not stretched.

If I’m spraying a bodice and a back, I line them up side-by-side so that I can spray across both. Sleeves would be the same. For skirts, pin them so that the bottom edge is at the bottom obviously if it’s a full circle, put lots of pins at the top, and you could angle your spray wall flatter.

Think about what direction the pieces will go when they are put together.  If you're spraying a sleeve, and you want the spray to be horizontal, it might mean spraying the sleeve sideways, or even a U shape.

Here is a sleeve where I decided to add a purple effect, after the fact. Neckband, and the right sleeve. The pattern is somewhat raglan, it's actually a test of a new pattern draft and I decided to do two tests in one, sew it out of white Lycra for pattern test and then airbrush the heck out of it. I think this is the way that the purple will line up:


Then once all the pieces are done, I lay them out to make sure I've got it right before sewing it together. In this particular case, I didn't like the way the left sleeve had the purple on it, so I discarded it and cut a new sleeve and sprayed again.


Getting down to the details:

Prepare the paint. If I’m doing a multicolor effect, I use the siphon cup and keep pouring the paint in as it empties. It makes a nice color change doing gradients. This is a bit advanced and you’d work it out in practice on samples. For now, try a color effect on a hem.

Pin up the skirt. Starting off the hem, begin spraying with the center of the flow on the edge of the skirt. This puts the most solid color on the hem. Sidenote: I hem the skirt afterwards. Spray another swath overlapping that one and continue upwards. If you angle the brush upwards, you’ll get a thinner effect as you get closer to the top of the skirt. (You worked this out on samples, right?) Let it dry (it probably is already), and then go back and layer that same color on top until it’s evenly thick. It’s common to get a lined effect. You want solid.

To add another color, start with the second color where you want the transition and spray a swath and continue upwards going overtop where you left off with the first color. Go back and deepen the color when it looks like you should. Let it dry and then look again.

For a white hem:


For a skirt, start at the waist edge and spray a circle. Do the same on the other side if it’s two pieces, or if it’s one (pinned up circle) make sure you keep consistent pressure. Do more circles outwards until you’ve reached how far you want to go. I am assuming that you’re going to have a white-edge hem. Then, starting back at the waist, develop the color layers by spraying on top. The paint will dry very quickly. I prefer to water down my paint and make many, many layers. Keep spraying until you’re happy with it, and let it dry. If matching the skirt to a bodysuit fabric, let it dry, compare the color, and possibly respray. It’s tricky to color match an airbrushed piece to an existing Lycra or stretch velvet. Tip: I don’t try to match the Lycra, I cut the entire garment of one color and spray the whole thing. Velvet is easier to match “close enough” because of the shading in velvet.

Perfectionist moment: Because the paint stays mostly on the top of the fabric, if I think the underside is ugly, I’ll turn it over and spray the underside. You could try to spray more densely on the top so that it soaks through, but the soaking is inconsistent. It all depends on the fabric. With the crepe georgette that I use, it soaks right through and looks like dye. With Lycra skirts, the paint sits on top.

Take the fabric off the spray board, heat set and sew it into the garment. After you sew the garment together, you might find that the sides don’t match up evenly or it needs a little extra, like one of the spots where a pin was. You can touch it up by holding the dress over your arm with your arm inside the dress. If you pin it back on the board, made up, make sure you put plastic, or a piece of cardboard between the front and the back in case of soak through.

I'm deciding how to rhinestone the top and I'm still not happy with the transition to the purple. Can you see that the purple in the armpit doesn't match up to the back of the sleeve? That's partly because of trying to draw a new pattern and not sewing it up yet and not thinking out where everything goes together. I will overspray this to touch it up. There is also a dot at the center front of the skirt from a pin that needs to be touched up.  The bodysuit pattern in this particular dress didn't work out quite the way I wanted it, so it's been great to use for airbrush practice.

If I could offer just one piece of advice, this is it: Less is More. Airbrush is a great effect and a little goes a long way.

Thank you, C.R.H.! If you have questions for C.R.H. this is your opportunity! Leave your questions in the comments.

Do you have questions for Ice Mom or the Advisory Board? No problem! Send me an e-mail! Are you an expert like C.R.H. is? Terrific! Contact me about writing a guest post. E-mail: icemom.diane@gmail.com.


Ice Mom's Summer Camp Survey

Tuesday, March 9, 2010

How-to: Make a Fleece Seat Saver for Figure Skating Competitions

I went to a synchronized skating competition a few weeks ago. The rink stands were packed. Like most spectators, we'd brought our no-sew fleece blankets and spread them out carefully over our bench seats. It's a smart thing to do because the folded blankets keep your rear end from freezing to metal benches and the blanket saves your seat if you have to grab a cup of coffee or run to the restroom.
The competition was so packed, though, that other spectators had a hard time leaving and returning to their seats. The folks behind us must have had very small bladders because they kept coming and going, each time crossing over our blankets.
 
These people stepped all over our blankets, trod on our coats, and nearly upended a cup of hot cocoa on me.
 
Competition lesson #1: Never wear anything in the stands that won't look good with a splash of someone else's coffee on it. Ice Grandma? This means you. Do not wear that fur coat, Mom. I don't care if you've just fed it and walked it. Someone's going to spill on it and you'll be loud, obnoxious, and telling everyone in a 50-foot radius how mink looks lousy with mocha. Leave it at home, Mom. Yes, the hat needs to stay home, too.
 
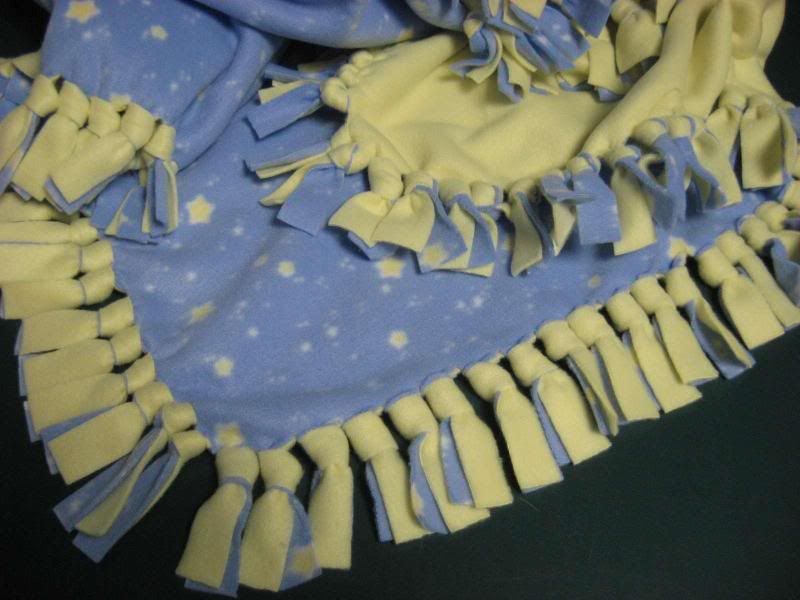
Competition lesson #2: Make cool no-sew fleece seat savers. (It's the same for a big no-sew fleece blanket, just smaller)
 
The synchro team next to ours had a very smart bunch of parents. These people brought no-sew fleece blankets like the rest of us, but theirs were narrow and perfectly sized to fit the bench seats and accommodate two people sitting on them. The blankets had their synchronized skating team colors - one color on each side - and were embroidered with the team's name. Alright, the embroidery was kind of over the top, but I guess the embroidery prevented others from taking them. At least, it prevented me from taking one.
 
Materials:
  • 1 1/2 yards double-sided fleece - any color
  • 1 1/2 yards double-sided fleece - another color
  • sharp shears
  • ruler
 
Method:
  1. Wash and dry the fleece fabric
  2. Lay the fleece fabric on top of one another, wrong sides together and edges squared up
  3. Make a straight line from selvage edge to selvage edge, 15 inches from the cut edge. (The selvage edges are the machine-finished edges of the fabric that run perpendicular to the cut edges.)
  4. Cut along that line
  5. Repeat steps 3 and 4 so you have three pieces of 15" wide fabric
  6. Cut off the selvage edges of the fabric, making sure that the edges of the layers are even
  7. On each corner, measure in three inches and draw a line. You should have a three-inch square at each corner. Cut out the three-inch square and discard
  8. Lay your ruler along one of the cut edges of the missing squares. Make sure that the ruler is straight across the square and parallel to the long edge
  9. Make cuts every inch along the ruler to make the ties. Your cuts will be spaced one inch apart and will be three inches long. Move the ruler as necessary
  10. Once you've finished cutting all the blanket ties, tie the front and back together in a double knot, skipping every other tie
  11. Flip the blanket and tie the remaining blanket ties with a double knot
  12. Look very smug when you put the seat saver blanket down on your bench seat
My plan is to make a couple of these for the next competition. If someone steps on my fleece seat saver, I'll just flip it over. And plot ways to trip those people if they stomp on my stuff again. Maybe I'll spill my hot chocolate on them, accidentally-on-purpose.

 
How about you? How do you survive all day at a competition on hard, cold bench seats? How do you keep your mother from embarrassing you in front of everyone? How do you keep your husband from working the crossword puzzle? Do you have any other competition day tips? Share 'em!

 
As always, please let me know if you have a question for me or the Advisory Board. If you have an idea for a post, or you'd like to write something yourself, that's cool, too! E-mail me at icemom.diane@gmail.com.

 
Ice Mom's Summer Camp Survey

Monday, March 8, 2010

How-to: Display Figure Skating Medals

Reader Anonymous sent me a comment:

[...] I was wondering how you display Ice Girl's medals. My daughter has been skating for a few years now but I have yet to think of a good way to display her medals. What do you think? Thanks!

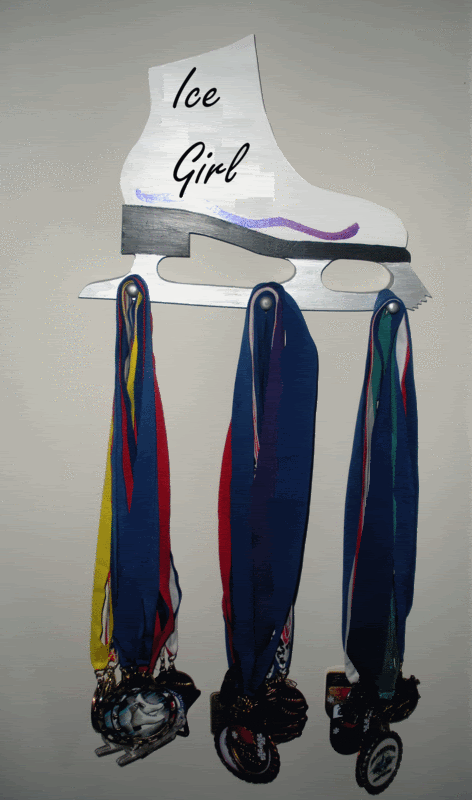
As you can see from the photo, this is how we display Ice Girl's medals.

I bought this wooden skate at a competition for an unbelievable price: $12. I wish I had bought two. The gal who made it had her husband cut the skate out of wood with his jigsaw. She sanded it, painted it, added wooden pegs to the front, and hooks on the back for wall hanging.

If you don't have a husband with a jigsaw, you can still accomplish this same thing pretty inexpensively. Craft stores carry ready-made boards with pegs on them. Paint, add hanging hardware, and display.

The whole project, including paint and hardware, should set you back maybe $10 - $12.

Update: A fabulous DIY renovation project from Advisory Board member, figure skating parent to an Olympian, and Life on the Edge blogger Allison Scott: One of the things that we used to do (though now it is totally impractical after 20+ years of medals) is to frame the top ones with the competition programs. Please note: If your skater stays in the sport for a long time and succeeds, you may be able to take each of those frames, cement them together and build an addition to your house – a little DIY recycling project that could help your bank account! 

What do you do with your skater's medals? How do you display the trophies? Please share your ideas in the comments!

As always, if you have a question for Ice Mom or the Advisory Board, please send it to me! If you have an idea for a post or would like to write a guest post, please let me know, too! E-mail me at icemom.diane@gmail.com

Ice Mom's Summer Camp Survey

Monday, February 22, 2010

How-to: Find Professional Figure Skating Boot Fitters


This guest post is courtesy of my friend and master skate technician, R.H.

Question from a reader: I've been searching on the Internet for a certified skate technician or professional to advise us on new boots with little luck. We have a gentleman who visits our rink monthly and is excellent, but seems to bring a very limited supply of skates due to the nature of traveling. Is there a Website or resource that lists professionals by geographic location?

R.H.: This is a very good question! I'm not sure who is coming to your rink for fittings and what brand or brands of skates he carries, but ideally you should work with a skate fitter who represents several brands of skates and is (relatively, at least!) impartial. Skates are like jeans - Levis may fit your waist/hip/thigh ratio perfectly, whereas I can't find a pair of Levis that fit my frame to save my life! Every skate brand fits slightly different and offers features that may work better for certain foot types, so to have a fitter who only sells one brand of skate or who is very partial to one particular brand can be a hindrance to finding the boot that is best for you! An experienced fitter will measure you for several different brands (as each brand runs different in sizing and width) and then steer you in what he or she feels will work best for you, your foot type and your skate needs.

Unfortunately there is not a Website that offers this information. Each and every boot company has a list of retailers in your area that carry their brand of skates, but this is not a guarantee that you'll be fitted properly by someone who has adequate experience. The best method for finding a shop/person who does an excellent job is to first ask your coach. Most coaches do have an opinion as to the skate shop he/she prefers and trusts, and this advice is worth considering. If the coach doesn't have an opinion or you dislike the shop he/she mentions, then my recommendation would be to ask AT LEAST 5-10 people actively involved in the sport WHOSE OPINION YOU RESPECT (if you are willing to travel, even ask around at competitions, skaters who are novice, junior and senior most likely didn't get to that level in consistently poor fitting boots, so their opinion will be worth a shot). The key is to ask a variety of people, and if necessary, you may have to travel a good distance.

How far you may ask? Well, many of my customers come from within an hour's drive of my store, but we do have several customers who drive 4-6 hours each way for fittings and sharpenings. That may seem like a long drive (and to me it is), but considering that the skate is the foundation of everything the skater does, it is important that the equipment be fitted by technicians who are experienced and can give you the benefit of their knowledge.

Question from a reader: Does anyone know of any formal training courses offered for this?

R.H.: Another awesome question! I wish there was...unfortunately there is none. The skate companies do offer some educational support to their retailers, but the training mainly comes from working with a highly experienced boot fitter on a daily basis for at least several years. Best of luck in finding the skates you deserve!

Thanks, R.H.!

Update: From reader Anonymous who thinks driving to a good skate shop is worth it: It is so important to get skates that fit properly! The last time my skater was complaining about the fit of her skates, I assumed that she had just grown - again. We took her to a different skate shop (based on recommendations) and discovered that her feet had not grown. Not only were her boots the wrong size but the boots were just plain wrong for what she was doing (also based on her height and weight). My skater was well on her way to serious foot problems. [...] We are several hours away from our closest skate shop (and the new shop is even further) but the trip is worth it! I like to save money wherever possible and skates are definitely the place to apply those other savings!

Update: From skate coach, skate parent, skate blogger, and Advisory Board member Xan of Xanboni!:  Just another word from a coach--when you buy your first "real" skates, please go to a reputable dealer, not to SportMart, or the bike shop, or that hockey guy, or the used skate store, or grandma's garage. Get the tech or the salesperson to give you a primer in skate technology and don't PLEASE don't lie about the skater's tested level.

So many people quit skating because they think they're incompetent, when really they just have the wrong skates.

Update: From reader Jillybean: Remember that just because someone works at the rink, it doesn't mean that they know how to properly fit a skating boot. I had a bad experience with my first pair of "real"skates. I was fit by the guy at the rink, and I ended up with a pair of boots that were too big, and much too strong for my skating level at the time. I ended up with some serious foot problems. My doctor wanted to operate on my foot to fix one of the problems and told me that after I healed, I would need to get custom made skates. I decided to skip the surgery and go straight to the custom boots, and the problems that I had just went away!

It's worth it to spend a little more to get the right boot.


Update: From reader poorer but wiser, who had a bad fitting experience: [...] sometimes even an experienced pro can screw up. Do as much homework as you can before hand, read reviews from other skaters using various boots and try to be as educated a consumer as you can possibly be. And don't let the fitter strong-arm you into buying something you're not comfortable with ...


Have a question for Ice Mom? Want to write a guest post? E-mail Ice Mom at icemom.diane@gmail.com.

Monday, February 1, 2010

Ice Mom's Sewing Guide: How to Dye Silk for Figure Skating Skirts

This post is part of Ice Mom's Sewing Guide.
Other posts in this series: All about Patterns, All about Fabrics, How to Dye Silk for Fabric Skating Skirts, Altering Your Growing Skater's Figure Skating Dress, Laying out the Pattern.
 
This guest post is courtesy of reader C.M. who knows way more than I do about dyeing anything. Please realize that I have zero experience with dying silk or using silk for figure skating skirts. Post any questions about this technique in the comments. Thanks! Ice Mom.

I (guest poster C.M.) use the silk chiffon from the Dharma Trading Company. They have several different weights available. Any of them can be used for skirts: if you want a "fluffy" skirt with lots of layers, the silk gauze works well. For most standard skirts with two layers I use the medium weight chiffon (10 mm). If you want a non-see-through single layer skirt, the double chiffon is best. They also offer this fabric in black because it is very difficult to dye fabrics a true black color. Black is the only color that I would buy ready-made.

The great thing about dyeing silk is that it is very easy to dye on the stovetop (far easier than tie-dyeing). There are several products available for this. I would steer clear of RIT, Dylon, or any other dye available in a craft store. These are general-purpose dyes that do not react with the fibers to form a permanent bond. The colors are not bright and will fade/run over time. My favorite product is the Jacquard acid dye (you can get this from Dharma, or you can go to the manufacturer’s Website to see if any nearby stores stock it). This dye does a great job of giving results that are vibrant, even, and (very) permanent. It is very safe to use as the only other chemical you need is white vinegar. It is very concentrated and a small jar will go a long way.

I have been following the directions posted on the Dharma Website and I have yet to have any problems. When you receive the dye, there will be a swatch on the jar that indicates the color that the fabric will come out if it is fully saturated with dye. It cannot get any brighter/darker than that. The directions tell you how much dye is needed to fully saturate a pound of fiber. In order to determine how much dye you need, you should weigh your fabric (I have an inexpensive gram scale) and calculate how much dye you need from that. If you use more dye than this, some of it will not react with the fabric and will end up getting poured down the drain (these dyes are not all that hazardous, but it is best to be safe). If you want a lighter shade, you can cut the calculated amount of dye by a factor of 2, 4, etc. To get pastels, I cut it by a factor of 10. As long as you don't exceed the saturation point, there should be little to no color left in the dye bath once the simmering is complete.

I don't cut out the pieces of the skirt before dyeing because the edges of the fabric tend to come out a little darker. Once the process is over, you can rinse the fabric in a special detergent called synthrapol in order to remove any unreacted pigment (there is not a lot of excess runoff with this product, but it will soften the fabric). Once it is done, I hang it to dry. It is best to not put this fabric in the dryer because it will shrink and gain a crinkly texture. Once it's dry, it is good to sew. Just remember to cut the skirt a little bit bigger because it does not stretch.

The most nerve-wracking part about this process is getting the dyed fabric to match the Lycra. The best way to do this is to compare a swatch of your Lycra to the different colored dyes available and select closest color match. Some people are advanced enough that they can successfully mix colors; however I feel that the manufacturer offers enough colors (and most skaters select more or less "standard" colors for their dresses anyway). No matter how hard you try, you will not get an exact color match, but nobody is going to notice as long as it’s close. If you are anal about it, you can dye small swatches and take notes about how much dye you use. I just estimate using the swatch on the jar and I always get "in the ballpark" results.

When I first tried this, I had my doubts. However, after my first attempt, I was shocked at how nicely the fabric dyed. If you follow the directions and keep good notes, you cannot fail at this. Dharma as well as the manufacturer have great product support and are happy to answer your questions if you call them. It seems scary, but it is not that hard.

I have read that some designers also dye their own Lycra with this product (i.e. Sasha Cohen's seamstress). However, the same dye recipe will not yield the same color in the Lycra and the silk. This means that you have to use two different recipes to get the same color (not fun to figure out).

The dyeing technique that I described is only useful for solid color dyeing. I only use it when I need to match the silk to a colored lycra bodice. For example, if I were to make a royal blue dress, I would buy the blue lycra and I would dye the white silk to match the lycra as best as I could. I have heard that some people use tub dyeing to achieve an ombre effect, but I have never tried it, so I can't give you any advice on that. When it comes to doing an ombre effect, I use an airbrush with a special paint called dye-na-flo. This is a special paint that can be used with an airbrush on pretty much any fabric you like (not just silk). Just remember to follow the directions.

The link to the acid dyes (and their instructions) can be found here. You might notice that Sasha Cohen's seamstress is featured on this page for using this product (if it's good enough for her, it's good enough for me!).

Dharma offers silk chiffon in a few weights and any of them could be used depending on what type of skirt you like. This fabric is semi-sheer in most cases, so you will usually need to do multiple layers in order to avoid the see-through skirt. I almost always use the medium weight 10 mm. For this, you need to make a double-layer skirt.

If you want to make a single-layer skirt, use the double chiffon. It all depends on what look you are going for. I think having a see-thru skirt defeats the purpose of having a skirt, so I always double up or go with the thicker material. Be warned that the commercial patterns (such as Kwik-Sew) are designed to make skirts with stretch material, so you will need to cut the skirt a little bit bigger. Pin it to the bodice and have the skater try it on so you can make adjustments to the fullness.

I learned all of this from buying the products and trying them out for myself, so you might find something that works better for you. Unfortunately, a lot of dressmakers are very secretive about how they do things (especially when it comes to airbrushing), making trial and error the only way to learn. That being said, if you are interested in improving you need to be willing to be brave and try out things that have no promise of working. If you think things through before you do them, they usually work. It is also helpful if you have a skating friend who gets their dresses professionally made (and that you like the look of). If you ask them (nicely) to bring it with them to the rink, you can take a good look at them in inside and out to see how they are constructed/beaded etc. My sister (the skater in my family) had a friend who splurged for a Tania Bass dress that she let me take a look at.

Being able to study good examples of handmade dresses takes a lot of mystery out of the (often) mysterious world of making figure skating dresses. I think most skating designers started out as some skater's mom or relative that wanted to save money buy making their own, but ended up really enjoying it.

Thank you, C.M., for your excellent post! You’ve given me the courage to try dyeing silk for a skirt – the flowy effect looks stunning. I’m also asking for an airbrush for my birthday, I can tell you that!

Update: From reader Anonymous: The fabric that has worked very well for me is Glissenette. This is a sheer stretch fabric that doesn't roll at the edges when cut. It is easy to sew with and floats beautifully as the skater moves. It is available in limited colors so there is some matching difficulty. I order it from spandexhouse.com, spandexworld.com and Jone's fabric (more expensive, but bigger selection) There is a sheer nude color that I use over nude spandex for nude looking cut-out backs that still provide some warmth.

Update: From post author C.M.: Although this fabric does not contain any elastic fibers (making it a not suitable for bodice material), the fabric does have a little bit of stretch to it, which makes it a little more resilient. However, you still need to cut it slightly bigger and "gather" it around the bodice so the skater can still pull it on and off.

Update: From reader Anonymous: I airbrush with paint as dying on polyester is too much chemical manipulation for my liking, although I could do it if I was dedicated enough. [...] The secrets are in the products, dye vs paint. I've had great success with Jacquard products but they can be expensive.

Do you know more than Ice Mom? Great! E-mail me with your guest post! icemom.diane@gmail.com

Wednesday, January 13, 2010

How-to: Cope with Two (or More) Figure Skaters in the Family

Question from a reader:

I'm in quite a predicament. I have two [figure] skaters, one 10 years old and one 8 years old, that are now both at the Pre-Preliminary competition level. I'm not sure how to handle this because I'm not crazy about my girls competing against each other in a competition, but I also don't want to hold one back. What do you think?

I put this out to my advisory board and here's what two members had to say:

C.L.: Oh I love adding my two cents. This is what I would do. I would put one in restricted or test track pre-pre and the other in well balanced pre-pre. Test track being the easier one (this one for the older skater). Of course, if the parent can convince them that they are only really competing against themselves then it shouldn't matter how they place. Perhaps not even checking the judges’ sheets after would be a good policy...if they skate better than in practice or at the best they can skate haven't they really come in first anyway? :)

Pairs Mom: I'm not sure I'm "qualified" to answer this question but I will try and give some advice...

Most mid-size competitions will have two or more groups of Pre-Preliminary skaters that are grouped together by age and normally this is done by the referee. If the girls take from the same coach or if they do not, have one of the coaches email the referee and ask that they be placed in two different groups for the competition. We normally group skaters together by ages 6 - 9 and 10 - 12 but this can vary slightly due to entries. This avoids the girls having to compete against each other. This way they also get to cheer for each other! Good luck!

Here's my take (caution: long and preachy):

Ice Mom: Kids are more like snowflakes than widgets. Each person is unique. Each person learns and develops at his or her own rate. This is a good thing. Learning something isn’t about the destination: it’s about the journey. It’s about collecting experiences that build up our knowledge.

That sounds pretty flowery, so let me make it more concrete. According to my favorite cognitive scientist, Daniel Willingham at the University of Virginia, the brain doesn’t like to think. This is true. Our brains love to work on experience. Given the choice between thinking of a new solution and relying on experience, our brain will almost always choose experience.

What does this mean for figure skaters? Each skater must build up his or her own experiences. Remember me ranting about that stupid Axel? Well, the figure skater who lands the stupid Axel in one month might not have built up the body of experience that the figure skater who lands it in a year has built up. Or, possibly, the one-month Axel kid has built up many years of figure skating experience and can land the jump more easily because of that experience. Building up that experience allows a figure skater to know when the jump doesn’t feel right and how to save it. Building up that experience teaches a figure skater how to fall so it doesn’t hurt as much. Building up that experience makes it easier to learn the next jump.

Willingham says our brains aren’t like file cabinets with a limited amount of storage. Instead, our brains are like magnets. The more experience and knowledge you put on the brain, the more magnetized the brain becomes. The more the brain holds, the more information and experience it gathers. So that year-long stupid Axel process isn’t a waste of time. It’s an experience-gathering period of time. None of the falls, set backs, and two-foot landings are a waste: they’re building up that knowledge base.

So comparing one 10-year-old figure skater to another 10-year-old figure skater is a tough thing to do, because each one collects different experiences. It’s even tough to compare the 10-year-olds if they are twins in your own family. I know twins who look so similar that I’m grateful when they wear jackets with their names on them. One twin is a lefty, the other a righty. One usually places a bit higher at competitions than the other, but they’re pretty evenly matched. How does the mom cope? She tries very hard to enter them in bigger competitions where the twins might not compete against one another. She includes a note in the registration envelope to ask that the girls not be in the same group. She also tries to teach them good sportsmanship and to be happy with their individual performance.

Does it work? Well, pretty much. I won’t lie to you: one girl is usually pretty disappointed and tries to put on a happy face for her sister. That builds up the knowledge bank, too.

I know another family where the skaters are two years apart. The younger one just landed her double Axel. The older one is still working on it, but she’s genuinely happy for her sister. Why? I think she’s realized that there isn’t a limited supply of double Axels. Sure, not everyone gets one, but for skaters who put in the time, have built up experience, and benefit from good coaching, the double Axel is something figure skaters can earn. One sister’s double Axel achievement doesn’t prevent the other one from earning one, too.

Note: This all sounds great on paper, but you all know that I still hate that stupid Axel and all of the frustrations it brought. Yeah, yeah. Build the knowledge base and all that. I get it. I still hate that stupid jump, though.

Alright. I’m done preaching.

Update: From reader JustPat: You can influence how they handle winning and losing, especially to each other. Your reactions to winning and losing will influence their perspective of how important it is to be a "winner."

Everyone who has been involved in skating for some time will tell you that it's important for the skater understand that if they have skated their program to the best of their ability, that's what should count in the skater's mind. If they are rewarded by the judges, it's a bonus.

I'm sure that it's difficult to lose to a "little sister." Perhaps you could also emphasize the things that the older child does better/ is allowed to do that the younger one can't.

In the meantime, make a note on the registration forms when you enter them in competitions. (Or as mentioned earlier, have the coach contact the ref.) I used to organize our club's local competitions and with the referee's permission, we made every effort to accomodate those requests. In some cases we couldn't split the groups, so the parent chose to put the siblings in different events- one would do Freeskate, the other Moves, or Showcase for example.

Update: From reader Xan of Xanboni!: First of all, if you think you're kids aren't competing already, you're delusional, but frankly my experience coaching MOST sibs is that they support each other more than they compete with each other. [...]if they learn not just to handle, but to take joy in each other's successes, well, that's one of those life lessons that makes figure skating such a great thing for kids to do.

Update: From reader Mary Beth Niedermier: My advice is to tell your child to do their best. After competitions, one of the first questions I always ask them is if they thought they did their best. There are so many variables to competition, that I stress that they should be happy doing their best and be proud of the effort they put into it.

So, parents. How do you cope with two (or more) figure skaters in the same family? Please add your experiences in the comments.

Reference:
Willingham, Daniel. (2009) Why Don't Students Like School?: A Cognitive Scientist Answers Questions About How the Mind Works and What It Means for the Classroom. Jossey-Bass: San Francisco. http://www.danielwillingham.com/

Do you have a question for Ice Mom? Send it to me at icemom.diane@gmail.com.
RCZXZD2EKAPT

Monday, December 28, 2009

How-to: Deal with Ice Rink Bullies

Note from Ice Mom: The comments section for this post is awesome. Thanks, readers, for your advice and personal anecdotes. I'm sure you've helped a lot of frustrated figure skaters.

Hello, Readers. This post is courtesy of a reader who is having problems with higher-level figure skaters who are making her ice time miserable. Here’s the e-mail:

Icemom-

I regularly follow your blog and was wondering if maybe you or your readers could help me out with an issue I'm having. I'm 19 and started skating merely 6 months ago. I've come to skating from 15 years of dance training so I'm not struggling, and have a lot of family support in choosing skating over dance. I realise I've started far too late and am far too old to get anywhere besides competing in adult divisions- and that's the cause of my issue.

At my rink I have the earliest ice time, 4 a.m., with my coach. Straight after at 5.30 is an open figure session, where I work on what I've been assigned (at this point, edges, balance and jump preparation). However this is rather impossible as the 13-16 year old "senior" level skaters have taken it into their heads to taunt me and interrupt my practice by either stopping directly in my path, entering jumps or fast spins very close by. I've informed my coach, and she's seen this going on; however, she doesn't coach any of the girls and isn't ice marshal for that session, and so can't tell them off. She's spoken to their coaches who refuse to acknowledge their students are capable of such things. I don't want to move rinks because it would be far more travel and I would lose my coach.

It's at the point where I'm leaving the rink straight after my lesson to avoid these girls, because their actions and attitudes are too much to ignore.

I put this question out to my advisory board and here’s what we came up with:

Ice Mom: This problem happened to Ice Girl, too, especially when she was new. I think it has a lot to do with the culture of the rink. Fortunately for Ice Girl, the other coaches and the ice monitor were supportive of Ice Girl when an ice troll plowed into her and left Ice Girl sprawled on the ice. We were new to the club, so the other coaches and the ice monitor took the problem to the board and the board put the troll on probation.

However, it sounds like coaches and ice monitors aren’t supportive of you. Document a week or two’s worth of incidents and include details like the skater’s name, the problem, what you did to correct it, and the result. Approach your skating club’s board with your list. Point out how hard it is to grow a program if new skaters don’t feel welcome.

You pay the same amount of money as the mean skaters to be on that ice. You don’t get a discount if folks are mean to you. Fight for it.

(Ice Girl has since tried killing the ice troll with kindness and the troll has softened some and is nice back to Ice Girl. Ice Coach and I think that Ice Girl should leave the troll alone, but I.G. is a nice person. Nicer than I am, obviously.)

Ice Coach: I say: I feel her pain. Even if there isn't much her coach or the others will do about it, I would tell her not to give in. She has just as much of a right to be there as everyone else. Just because she is a lower level [skater] doesn't mean she has to be the one that moves out of the way all the time. She should stand her ground and make the others move out of her way sometimes, too. Or say something to them when they stop in her path like "excuse me." If she confronts it, in a nice way of course I bet the younger skaters will get the point.

Remember when [the ice troll] decided to jump on top of [Ice Girl and me] last year during a lesson? All I said was "excuse us." Of course, it wasn't the nicest voice, but guess what - she didn't do it again. I think she would just rather people ignore her while she stomped off.

C.L.: I think this gal should talk directly to the skaters in a non-confrontational tone. For example: "I just wanted to let you know that I'm uneasy if you get to close to me while I'm on the ice." "I'm not as experienced as you and I don't want to cause an accident." "I really enjoy skating but I'm concerned for my safety when you guys spin and jump very close to me." If that doesn't work then I would talk to the parents of the skaters.

PairsMom: If the coach has seen no change even after speaking to the other coaches about their student's behavior then it is time to set up a meeting with the Figure Skating director at the rink. This meeting should be brief (15 minutes) and if possible the coach should try to attend with the 19-year-old skater. Also, the figure skating director could post a list of Freestyle Rules and Guidelines on the rink website AND in the monitor booth. Each skater (and/or parent), regardless of age or level, needs to sign a freestyle contract stating that they will abide by the rules and regulations posted by the figure skating director, etc. Also, it might be helpful if the 19-year-old skater brought along some friends, other skaters her age/level to skate on the same sessions with her.

By the way: congratulations to PairsMom’s son and his partner, gold medal pairs winners at U.S. Junior Nationals in December 2009!

S.F.: I forwarded this problem to my daughter's ice coach and she suggested the following: This should be brought to management's attention. Coaches are supposed to be role models and teach more advanced skaters to be thoughtful of younger or lower level skaters. [Our rink] has rules posted and if they are not followed, we meet with the coach, skater & parent. If the skater doesn't want to cause issues, I would ask for the rink's freestyle rules first.

Bottom line: This is an issue of safety, etiquette, and money. No one should bully other figure skaters off the ice or jump so close that it's a safety issue. Take it up with the skaters, the coaches, the parents, and board/rink management. It’s not fair. Don’t let the ice trolls win.

The comments section is terrific for this post. Here's a sampling of what folks are saying:

Update: From Reader Heyfigureskate: This year, I have finally sucked in my pride and when [this skater] would perform a really nice move, I would say "Good job!" or when she would fall, I would ask, "Are you okay?" Since, when she comes to the rink (rarely) she compliments me as well. So a good turnout I suppose...

Update: From Reader Anonymous: All I can say is that you have every right to be out there and practicing. Believe me, they were beginners at some point. You don't need to be rude, but stand your ground.

Update: Terrific comment from Xan of Xanboni! (read it all in the comments section):  If you are following basic practice ice protocol-- don't stand in the middle of the ice, keep moving, hold to standard jump and moves patterns, yield to program run throughs and lessons, etc.-- just hold your ground. They will pull back at the last minute. If you are called on it you can either plead ignorance, like they are doing, or say, "oh I thought the general protocol here was never yield to another skater, since that's what always happens to me" (a wide-eyed innocent, yet subtly sarcastic delivery would be called for here.)

Update: From reader TNT: Sometimes newer skaters are a hazard because they are either oblivious to other skaters, oblivious to the rules (lutz corner, spin areas, right of way goes to lessons and those doing their program) or unable to get out of anyone's way because they lack the skills to do so. Not sure if that is the case here, but if so the skater should seek a different session until they are no longer a safety hazard.

Sometimes newer skaters are not accustomed to how close other skaters may be on a freestyle session, and that can be scary. It's not always harrassment; sometimes a newer skater desires a wider "comfort zone" but on a high-powered or crowded freestyle session that's just not possible.

Update: From reader Season: I used to skate when I was younger and I'm also African American. Unfortunately, racism was and sometime is still a big problem in the skating community. My daughter and I have experienced skating trolls since we have been involved in skating because of racism. Many Caucasian skaters that are racist feel that African American skaters have no business being on their ice or involved in their sport. They feel that skaters of other race bring down the integrity of the sport and they doing anything possible to sabotage your chances of being successful. [...]

[...]It is important to remember that skating trolls are breed and created by parents and coaches that are not considerate of other skaters. These parents and coaches do not and sometimes refuse to teach their skaters respect and common curtiousy. Another problem is that most of the skaters that act this way are skating more than they are able to socialize with other people that are not skaters. Their whole life is skating and they have no balance in their lives. They loose their ability to socialize and act appropriatly around people who do not skate as much as they do. It is very sad. Because after skating is over they do not know how to be a normal happy person. I hope this is helpful. Adult skater and skating mom for 12 years, Season Williams

Update from the ice-troll victim: I thought I would give you an update on the Ice Trolls and the situation. Upon reading your entry (thanks to your panel!) I rang the Rink Director (who also arranges the Figure Club), my coach and the 5.30am Ice Marshal to schedule a meeting, which is in a week's time. I have both written evidence, other skaters who have witnessed the occurances and also some video footage- taping your routine can turn around to bite you!

I also had something to say about some of the comments given to the blog entry- a few people thought I was on practice ice above my level. At our club, if you've been in lessons for 6 or more months and are a member of the club, you can use practice ice. It's called 'Figure Ice' and the only requirement is the novice Aussie Skate levels, no jumps or spins if you don't want. I am well versed in where jumps, figures, spins, etc are to be executed, and being a dancer I don't have a large 'comfort zone'. These girls are using physical and verbal bullying.I just wanted to clarify that we don't use 'Freestyle Ice'- maybe it's an American thing? But all is in action to hopefully have them stopped.

If not, I'll try IG's route and kill them with kindness :)

Update: From reader Rosalie who gets an atta-girl award: I've had to deal with bullying, too, and it wasn't because I was new. The bullying didn't start until after I had been skating for a while. However, other coaches, the Skating Director, and the Ice Marshals were not helping (even contributing) to the problem. Eventually, I went with my now skating partner to general management (who mostly dealt with hockey and employees in the box office, etc.) to talk about my problems. I still get the cold shoulder, but the rest of the bullying stopped.

 Do you have advice for this skater? Please share your thoughts or stories in the comments.

Do you have a question for Ice Mom? E-mail me at icemom.diane@gmail.com. I'll do my best.

Monday, October 19, 2009

How-to: Survive 6 a.m. Freestyle Ice


I am a zombie. So is Ice Girl. She has three mornings of 6 a.m. figure skating freestyle ice, which makes it tough to fit in homework, Facebook, and sleep.

It’s the homework and sleep that we struggle with and I’m sure all of us 6 a.m. ice parents are struggling with it, too. To tell the truth, we struggle with Facebook, too, but it seems like it’s only a problem for me. Ice Girl likes Facebook just fine.

Six a.m. ice is a fabulous thing, especially during hockey season when afternoon freestyle ice is limited. Fewer skaters attend 6 a.m. ice and we parents have a camaraderie that comes from the warrior mentality we share.

So. How do we balance sleep, skating, studying, and socializing? Not well. Here’s what I’ve tried that works/doesn’t work.

Homework in the van. This has marginal returns. Sometimes Ice Girl claims that she has car sickness and can’t study, sometimes she does fine. I have purchased a couple of Lightwedges that I keep in the van. They’re great for reading books, but lousy for doing math.

Enforcing a bedtime. This seems like the obvious answer, but it’s a tough one to enforce. Ice Girl sometimes has homework that takes her past the early bedtime and what do I do? Call the coach and cancel the 6 a.m. lesson? Still working on this one.

Banishing that stupid cell phone. I get it. Ice Girl wants a social life. Part of that life is texting. However, when she’s doing homework or supposed to be sleeping, that cell phone is in a different room. We’re working on setting a homework timer and allowing five minutes of texting for every 30 minutes of homework. How’s that working? Great – when we remember to set the timer. Not so great when we forget.

Sleeping in skating clothes. If you tell Ice Grandma that I send Ice Girl to bed in her Under Armour I will deny, deny, deny it. But, between you and me: I do. This is actually Ice Girl’s great idea and I just pretend that I don’t know she sleeps in her skating clothes. Let me tell you: it’s better for her to wake up five minutes before the van leaves and squeeze in enough Z’s than to wear p.j.s that she’ll just throw in the backseat anyway.

Facebook. I come home from work and Ice Girl and I have the homework discussion. How much of it requires the computer? She’s allowed to use the computer only for that portion. The problem is that Facebook often distracts her from that portion. This is an ongoing problem that most teens and parents have, I think. My only solution is to do spot checks on her, but those have marginal returns.

All in the van before bed. Neither Ice Girl nor I are great at thinking in the morning, so we both put everything we’ll need for 6 a.m. ice in the van before bed. I keep a checklist on the garage door so we don’t forget socks, gloves, or skates. This works pretty well most of the time. Sometimes Ice Girl just assumes that we have pony tail holders in the van because we almost always do…until the one time we don’t.

Coffee. After 10 years of living caffeine-free, I’ve given in. Java, java, java! Ice Girl hates the stuff.

Social. Ice Girl fills out the ice contract each month, so she knows when she has ice and when she’s free. This works pretty well most of the time. However, her friends aren’t planners like we are. Ice Girl just received a Halloween party invite that conflicts with ice time. Am I such an ogre that I’ll force I.G. to skate instead? Nope. I’m a softie. Here’s to hoping we can get a switch!

No ice the night before. I won't take Ice Girl to the rink the night before 6 a.m. ice. It's just too much to ask her to skate, study, eat, and sleep in the four hours between the final school bell and setting the alarm. We're pretty successful with this, but then Ice Girl skates a ton on the weekends. That's tough in her new skates.

Update: After reading this comment from Anonymous, I shall never whine about 6 a.m. ice again. Right. We all know that's a total lie.

Only 6am?! Lucky Ice Girl! I have 4am ice three times a week and start work at 5am on the alternate days- it took me about six months to get into a proper routine for it, and I fell asleep at work twice (which is pretty hard when you work in a casino!)

Update: Reader Anonymous gives 10 tips for surviving 6 a.m. ice. Here are two:

5. no double trips in one day if you're going to go in the morning don't go at night homework needs to be done at some point

9. do not i repeat do not fall asleep on the drive over this is what loud music was made for

Update: Reader Anonymous has a male figure skater. Here's what Anony's son does:

He only skates during the week and is off weekends. He keeps the same bed time during the weekends and gets up on his own.

Update: I have no idea how this works, Anonymous, but I'm willing to learn.

My skater is still small enough that she warms up and stretches in the backseat during the 30 minute drive. By the time we get to the rink, she's pretty much ready to go.

How do you survive 6 a.m. ice? Are you doing a better job than I am? What’s your secret? Please share both successes and failures!

Monday, August 24, 2009

How-to: Break in New Figure Skating Boots

Oh, how I love this tip.

My favorite skate tech, Renee at Rainbo Sports, recommends that skaters break in their new figure skating boots by vacuuming the house.

This isn’t just a cheap ploy to encourage your kid to work off the cost of the new boots; it’s legit. It also has the bonus of making me smile when I have to blast the TV’s volume to drown out the Hoover. *Bliss*

Vacuuming helps break in the skates, Renee said, because the movements are similar to ice skating. The figure skater walks forward and backward while vacuuming. She bends her knees to vacuum under the sofa. These steps help to break in the new boots – and the carpet’s clean, too.

Here’s how to do it:
  1. Put hard skate guards on the blades.

  2. Lace the boots up to the third hook, not all the way up to the top or fourth hook.

  3. Set the timer for 10 – 15 minutes.

  4. Vacuum.

  5. Stop when the timer rings.

  6. Unlace the skates and take them off.

  7. Wiggle toes and feet.

  8. Lace ’em back up and drag the vacuum into the family room.

  9. Set the timer.

  10. Vacuum.

  11. Repeat until the house is clean!
The lacing/unlacing/wiggling steps are really important. These steps will help the skater break in the new boot and prevent blisters, too. Renee recommends that skaters who are breaking their boots in on the ice do lots of stroking and spinning. Hold off on jumping until the third or fourth day with the new boots. When skaters start to jump, they should focus on waltz jumps first. Again, when breaking in the boots, the lacing/unlacing/wiggling steps every 10 – 15 minutes are not a waste of ice time – they’re necessary to breaking in the boot and preventing blisters.

Renee cautions against other methods of breaking-in skates. I hesitate to list the rites and rituals skaters perform when they buy new boots because I’m worried folks will try these methods on their own boots. Let’s just say this: new figure skating boots are a huge purchase for most of us. Talk to your skate tech before you put anything in the boot besides a foot or a sock.

In other posts, I’ve also recommended Silipos Gel Sleeves to help figure skaters with the break-in process. A pair will set you back $30, but I’d rather pay the $30 than a) hear my skater whine and b) waste $500 or more on boots she’ll never use.

What works for you? Feel free to fill the comments area with ideas that figure skaters can use to break-in their boots.

Monday, July 13, 2009

How-to: Remove Hotfix and E6000 Crystals from Figure Skating Dresses

If you set crystals, this post is going to rock your world.

I heard a rumor a few months ago that a gal was removing crystals from dresses with no damage to the dress. No way, I thought. No way.

Way.

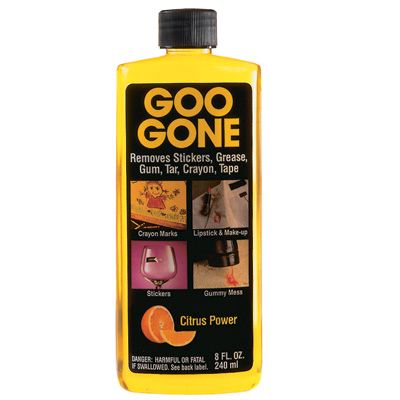
I talked to the gal who removes the crystals and she just shrugged and told me she uses Goo Gone. It takes them right off and doesn’t leave a stain.

I tried it on that Harry Potter pillow case – the one that has both hotfix and E6000 crystals on it. It took off the crystals and left no stain. It also removed the sequins from that troublesome fabric in an earlier post with no stain, either.

How to remove crystals with Goo Gone:
  • Use a tissue. I tried cotton rounds, but cotton left fibers behind.
  • Saturate the tissue. You’ll use lots of Goo Gone for this.
  • Dab the front and back. Dab at the crystal area from both the front of the fabric and the back of the fabric to loosen the crystal.
  • Don’t tug. The crystal will loosen eventually. Don’t tug on it the rest of the way or you’ll remove some of the silver paint on the back of the crystal. Be patient and keep dabbing at the bugger until it releases on its own. Then you can re-use the crystal (with E6000 as a glue; you can’t hotfix it again).
  • Hotfix comes off easily. Hotfix crystals came off the pillowcase the easiest, but the E600 wasn’t too bad. The crystals came off, but left a little lump of glue on the lycra. I just peeled off the little lumps.
  • Do a practice run. Glue some crystals to a scrap of lycra before using the Goo Gone on a dress. You can take my word that it doesn’t stain, but I’d rather you didn’t. Give it a shot for yourself and see if it works for you.
Update: lighter fluid, the kind you put in a lighter and is sold alongside tobacco, not charcoal, is terrific at removing crystals, both hotfix and E6000. As always, test first!

Share your results! Did you try this at home? How did it go? We’re all curious, so let us know!