Monday, November 3, 2008

How-to: Ruin a figure skating dress with fabric paint


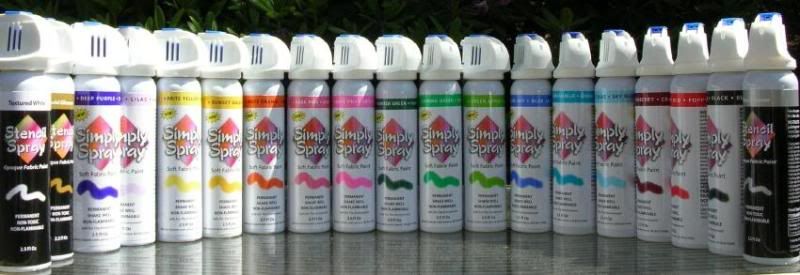
I ruined a dress on Saturday. This is not the fault of Simply Spray, the spray-on color that I used to ruin the dress ($4.99/can). Nope, I was pretty pleased with the initial results. The paint is pretty and easy to use. In fact, I plan to construct another dress and have another go at it.

What I did right:
I practiced a few times with the paint and I’d recommend that to anyone who wants to try a color fade on a dress (ombre effect). I did my test on an old white T-shirt and a scrap of fabric leftover from cutting.

What I did wrong:
I took the advice of someone who’d used an airbrush on some skirts for our club’s spring show. She took the finished skirts to her husband’s body shop and just airbrushed them there. It was simple, she told me, and the skirts looked great.

My experience wasn’t so simple. Before I sprayed the finished dress, I cut out tagboard to fit underneath the layers so the paint wouldn’t seep onto the leotard or make spots on the back of the dress. This worked pretty well on the front, but the back of the dress had a zipper, so the paint seeped through to the front of the dress and made stains that I couldn’t spray out.

After half an hour, I had to remove the tagboard because the paint was starting to stick to it. Once I removed the tagboard, the paint began to dry darker in some spots than in others, which created an embarrassing Shroud of Turin effect along the panty line.

Lessons:
  1. Spray the fabric before constructing the dress.
  2. Spray the fabric on a very smooth surface. My first test was on a box that I’d opened up. The slight dips in the corrugated cardboard made the fabric dry in stripes, which is cool, but not what I was going for.
  3. Start spraying off the fabric and then spray on the fabric in a continuous spray. Don’t shut off the spray on the fabric, either. You’ll get spots.
  4. Watch it at the end of the can. Don’t try to spray the last bits of paint out of the can or you’ll have spots.
  5. Try to do this outside, weather permitting, but be careful of the wind. (It’s going to be snowing/raining this coming weekend, so I plan to spray in my garage. Don't tell Ice Dad.)
  6. Buy more cans than you think you need, but check the store’s return policy. I used two cans to destroy that dress and one to practice on the shirt and fabric scrap.

I was pretty ticked off Saturday night when I realized I’d ruined that dress. After all, I’d struggled with that darn Specialty Sportswear pattern (more on that later) and I finally had the dress constructed and presentable when I ruined it with my purple stains. *sigh* I didn’t cry. Much.

Ice Girl was very sweet and told me that she had many beautiful dresses to choose from and that she wasn’t disappointed. She handed me tissues. Really, Momma, it’s O.K.

Ice Girl wore the dress I’d made last month to yesterday’s Cranberry Classic competition in Rockford. She skated well and is a pretty sweet kid, too.

Anyway, I have $80 worth of violet crystals, four cans of purple paint, and a JoAnn Fabrics coupon. I get paid on Wednesday. Ice Dad flies to Florida on Thursday and I have a half-day on Friday. Ice Girl has a sleepover and I have the house to myself. That dress is mine.

Wednesday, October 15, 2008

Buying crystals for figure skating dresses


Anyone who reads my blog knows that I’m obsessed with the cost of everything in the skating world. The prices just floor me.

I sew Ice Girl’s dresses and I put the beads on myself. I know that I’m saving money on the dress, but should I be cutting corners on the crystals?

Lots of folks swear by Swarovski and claim that their crystals are more sparkly than anything else. I’ve sewn a bunch of dresses and used the cheaper, machine-cut Preciosa crystals on each one.

Here’s the thing: no one – not one person – has said to me, “What a beautiful dress, but those crystals just aren’t very sparkly.”

In fact, the opposite is true. The last dress I made and beaded had a gross of 42ss and a half gross of 40ss cystals on it. I think the bling blinded folks – including me.

Preciosa crystals are real lead crystals, just like Swarovski crystals are lead crystal. The difference is that the Czech-made Preciosa has fewer facets (8) than Swarovski (12). Some folks believe that the Swarovski has more sparkle, but from a distance, like at an ice rink with no spotlight, the crystals look pretty darn similar.

You’re not saving huge amounts of money buying Preciosa, though, so don’t get too excited. Swarovski crystals cost about 20 percent more than Preciosas. So, if I’m buying a gross of 12ss flatback crystals, Preciosa will set me back $4.85 for a gross of crystal; $7.50 for a gross of colored. Swarovski will cost $5.90 for a gross of crystal; $6.75 for a gross of colored.

I think I saved about $10 in the last order I placed for Preciosa crystals, but I spent $7 for shipping. Buying Preciosa instead of the Swarovski is like getting the shipping for free or paying for an hour of ice time.

Of course, Ice Coach would point out to me that I'm not saving money when I make a dress every other month instead of making one per season.

But, well, I like the sparklies. And I can't resist the pretty fabric.

Resources – all of these are U.S. retailers
http://www.espallstarrhinestones.com/
Good prices, standard shipping rates. Terrible online color charts.

http://www.dreamtimecreations.com/
Competitive prices (some are a few cents higher, some a few cents lower), standard shipping rates. Great online color and size charts. Lots of Preciosa colors to choose from. Good shipping times.

http://www.rhinestoneguy.com/
Good prices on crystal, great prices on colored stones. Weird site layout. Shipping unknown. Good online color chart, but blurry. Not as many Preciosa colors to choose from.

Sunday, September 28, 2008

Learn to Skate is the best bargain in figure skating

I've written about my deep love for Learn to Skate before on this blog. I swear, I'm really in love today.

Learn to Skate is the only figure skating bargain that I know of. For $90, I can get Ice Girl six 1/2-hour lessons plus 1/2-hour practice ice. Since she's done with the basic lessons and freestyle lessons, it's pretty much a 1/2-hour private lesson. Let's see: that would normally cost $17 for the lesson and $10 for ice time. Through Learn to Skate, I pay $15.

I'll sign Ice Girl up for Learn to Skate until she goes to college, I swear.

Ice Girl is only 12, but Ice Coach (the LtS director) graciously offered to let Ice Girl assist with the little Snowplow Sams for 1/2 of the Learn to Skate hour. Ice Girl is learning a skill - coaching (albiet little ones) - and when she turns 14, she'll be able to receive a paycheck for it. She's already dreaming of the music downloads she'll buy.

Me, I'm such a groupie. I was snapping photos through the rink door of Ice Girl scooping the tots off the ice. Another parent asked which kid was mine.

The one in the blue-striped shirt.

He was completely confused.

Err. The tall one. Blonde. With the pony tail. She's helping that small boy to his feet.

Oh! She's an instructor, he said.

Well, sort of. She's learning. It's her first day.

We chatted. His kid is three. Ice Girl had the little one picking up colored rings, skating over to some cones, and stacking the rings on the cones. When the cone was full, Ice Girl scattered the rings again. That poor kid looked so disappointed that she'd ruined his hard work. Ice Girl, however, looked pleased, gushed about the kid's ring-gathering skills, and scooped him up occasionally.

She called one of her friends when we came home. "I just got home from work," she said. "It was great."

See? I love Learn to Skate. In Learn to Skate, Ice Girl learned to swizzle, then jump, then spin. Now she's learning responsibility.

It's the best bargain in figure skating, I swear.

Thursday, September 18, 2008

Two figure skating parenting articles: which kind of figure skating parent are you and how much does elite training cost?

Susan at Lifeskate posted a great article "What Kind of Skating Parent Are You?" by coach Bob Mock.

Mock separates figure skating parents into three categories.

I'll paraphrase:

1. The drive-by parent. This person drops her kid at the rink, goes to get her nails done, and picks the kid back up with the car engine running.

2. The nut. Mock writes that these folks try to take over the decisions from the coach, and I think he's right. I really believe that these parents have spent so much money on their kids' skating that it warps their brains. I'm too new to figure skating to call anything an investment, but I've heard parents use that word.

3. The normal parent. Mom or Dad drives the skater, watches encouragingly from the stands, smiles and nods when the coach gives instructions, and writes checks. The normal parent trusts the coach to know skating best and provide the best advice; the coach trusts the parent to bring the skater to practice, be encouraging, and not write checks that bounce.

I would add the malicious gossip, the ready volunteer, the scheduled mom (she takes a kid to the rink, then to soccer, then to piano), and others. However, from a coach's standpoint, I think that's about right.

How much does it cost? Susan at Lifeskate also posted a link to an article about how much it costs to support a figure skater's training in the St. Joseph News-Press. This gal in Missouri is raising a champion at home and she predicts next year's figure skating bills will amount to $80,000 - $100,000.

Yeah. That's a ton of money and, at that level, it's obvious why parents call that kind of spending an investment.

Here's the question: at that elite level, how does a #3 normal parent not become a #2 nut? I'm thinking medication.

Wednesday, September 17, 2008

setting crystals with E6000 glue on figure skating dresses


Renee at the Pettit’s Rainbo Sports shop sat me down for an E6000 lesson last time I visited. Her method? She uses a paper plate and toothpicks. I kid you not. So…I tried it on the Ron and Harry pillowcase last night.

It works surprisingly well. Use a small dab of glue on the paper plate (in my case, it was a sheet of printer paper, folded over) – about the size of a nickel. Sprinkle your crystals on another piece of paper/paper plate. Flip them flat-side up. Touch the toothpick to the glue and swirl a small amount on the tip. Touch the glue-y toothpick to the flat side of a crystal. It will stick. Move the crystal to the fabric; flip the crystal carefully onto the fabric so that the toothpick is at about a 45-degree angle between fabric and crystal. Slide the toothpick out and use the dry end to push the crystal into the fabric.

What I like best about this low-tech application is what happens when the glue begins to dry out, which is right away. When the glue begins to dry, it leaves webby strings. I turned the toothpick over a few times and most of the strings disappeared. Any strings that remained I could remove before I touched a bead with the glue. Stray stringy glue is easy to remove from the fabric with a dry toothpick.

Renee uses a lot of glue when she sets her crystals – she makes sure that the glue comes up the sides. Renee does this because sometimes the crystal separates from its foil back. I decided not to do this, but if I see Ice Girl sprinkling crystals over the ice, I might.

I beaded the collar of Ice Girl’s figure skating dress last night with the honking huge crystals (40s and 34s). It took me maybe ½ hour. I have a lot more beading to do tonight. It’s important to remember that, unlike hot fix stones, E6000 requires drying time.

That means I’ll be setting crystals all night tonight. Ice Girl competes on Friday!

Wednesday, September 10, 2008

Cheap freestyle ice: I do not need an intervention!

At club ice last night, I found out that a hockey rink 20 minutes north of my house has open freestyle ice at 6 a.m. on Wednesdays and Fridays, starting in October.

“And nobody goes,” this other mom told me.

She said that for $10, Ice Girl can skate from 6 a.m. until 8 a.m. There might be four other girls on the ice. That’s it.

I was excited, of course.

When I left the rink I called Ice Dad.

“Guess what? Sauk City has $10 6 a.m. ice starting in October and nobody goes. Isn’t that great?”

“You need an intervention,” he said.

If loving early, empty ice at $10/2 hours is wrong, I don't want to be right!

Ice Girl is on my side with this one. She’s pumped because her favorite ice is empty ice, no matter what the time. My favorite ice is cheap ice. We both win here.

“Are you sure you want to add another 6 a.m. to your week?” I asked her.

“Mom. Mo-ooom. Mom. It’s fine. I’d rather get up early so I can do my homework after school,” she said. (She hates doing math in the van.)

I don’t need an intervention. What I need is a map to that rink. And cheaper gas. And a fog horn alarm clock. And to begin a coffee addiction. Tea’s just not cutting it.

Friday, September 5, 2008

Harry Potter and the E6000 Glue Experiment


Becky from Sammy Skate Wear suggested on one of my posts that I try E6000 glue to affix crystals to figure skating dresses.

It's something I've wanted to do because my beloved hotfix crystals don't come in the very, very large sizes.

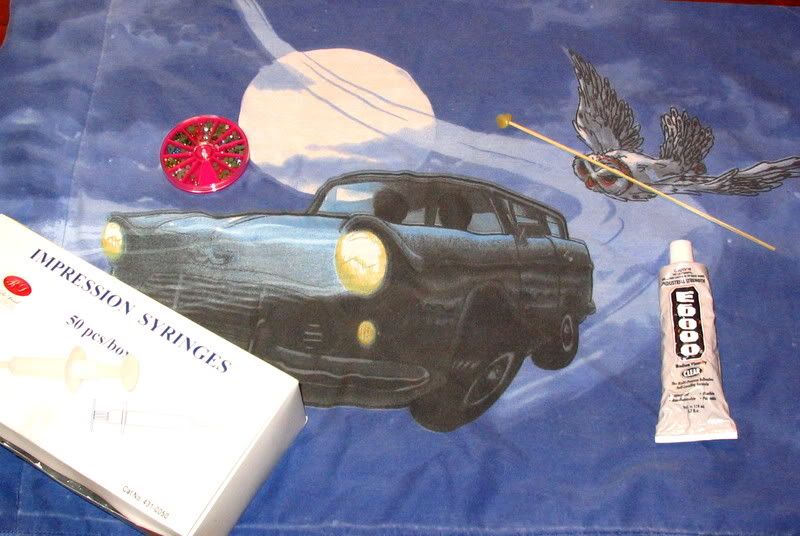
As Becky suggested, I found some syringes to squirt the glue. These are a must because the glue comes out of the tube in one big burp. I bought the entire box of 50 disposable, needleless, dental impression syringes online for $9.99.

I also bought some tacky wax that I found at a modeling store. It's cheap; a whole hockey puck of it set me back $5 and I can't imagine going through very much of it. I wrapped it around the end of a wooden skewer (that's the magic wand thing you see in the photo).

For my experiment I used an old Harry Potter and the Chamber of Secrets pillowcase. I figured Harry and Ron wouldn't mind some sparkle and glamour.

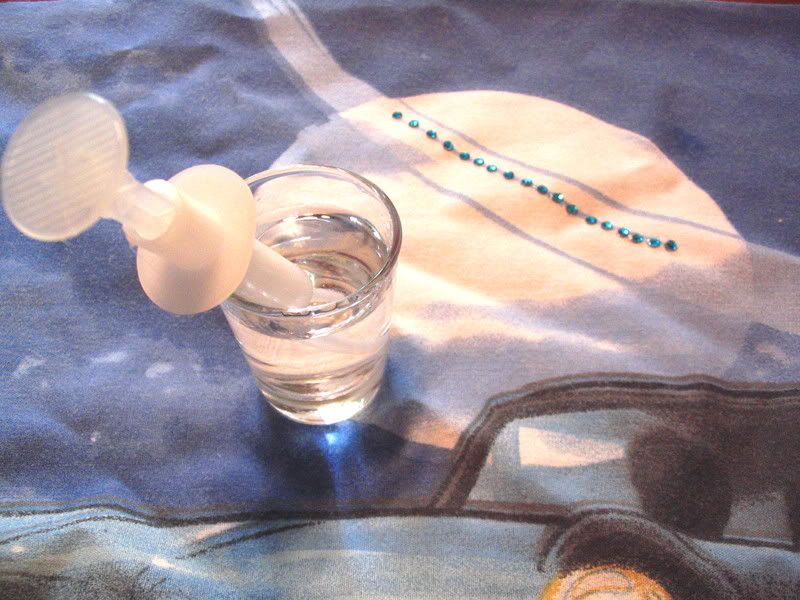
The experiment went well. I laid out about 10 beads of glue initially and picked up the beads using the tacky wax. The bead released when it hit the glue. The second try with the glue had the glue freezing up a bit and leaving strings. The strings didn't stick to the fabric, so when the beads dried, I brushed them off using a clothes brush. To prevent the glue drying up in the syringe, I dipped the whole syringe in a shot glass full of water. E6000 is magical stuff - it can dry underwater, too. It just does it slowly. I decided to force out a bead on some paper before returning to my beading line.

These beads take about 10 - 20 minutes to fully dry, during which time I could reposition them slightly to make them form a better line. That's something you can't do with hotfix.

I also found that putting the glue on the fabric is a bit like making a soft-serve cone: squeeze a little glue onto the fabric and push down with the syringe instead of lifting up right away. You'll get the same curl-top that you do when you make a soft-serve cone. (I knew that stint in a frozen yogurt shop would pay off some day.)

Bottom line: After the test, I'm willing to risk it on the figure skating dress I just made. Initial costs are kind of high: E6000 glue = $6 at my local, pricey hardware store. Wax = $5. Syringes (50) = $9 plus $4 shipping. Beads = always pricey. If I use the E6000 often, the price will go down, of course, because that tube o' glue will last years and so will the wax. I have 49 syringes, so I'm set for a while, too. It's those beads that kill me. I just bought 3 gross for $66.