- Do not talk about other competitors in the audience. I didn't do this, I swear! However, two moms told me about videotaping their daughters' programs at a competition. When they reviewed the video from their living rooms, they could hear snarky parents sneering about different competitors. Eeew.
- Bring your wallet. They sell flowers ($1.50 each) to give to the girls. You can buy a photo package of your child standing on the awards podium. (The package I bought set me back $29.99.) You can also arrange for the photographer to take tons of photos of your daughter during the program. I didn't do this in time, so I'm not sure how much that would have cost me. A gal was selling dresses (I resisted), someone sold T-shirts, and another person had a wooden skate to display medals. Did I mention sugary and salty snacks from the concession stand? Video games and pop machines? I could have dropped $100 and I'm glad that I left having spent maybe $45.
- Dress warmly. This one's kind of obvious; however, the heaters went out in the judges' area and they froze, poor dears.
- Be thankful for the coach. The coach takes the skater through the whole competition process while the parent watches from the stands. I did hair, dress, make-up at 6 a.m., then watched from the stands. Very nice.
Saturday, April 26, 2008
Newbie: first figure skating competition
Ice Girl attended her first figure skating competition this morning. She did well (first place in her event!), but I gathered some useful information about competitions and etiquette.

Tuesday, April 22, 2008
Newbie: hard guards and skate shows
This is going to be quick since my home computer is on the fritz and I'm posting from the library.
The newbie lesson for the day involves a locker room full of giggling girls at a figure skate show. If you haven't experienced this, here's how it goes:
"Where are my blade guards?" asks a small voice.
"Well," I reply. "What color are they?"
"Pink [insert purple here, too] with sparkles."
Some helpful shrimpy kid gathers up all the skate guards and presents them to me like a bouquet of pink and purple sparkly plastic.
"Are any of these yours?" I ask the small voiced-girl.
"No."
Of course not!
Newbie lesson: Do not buy pink or purple blade guards/hard guards! Every girl and her next-of-kin has pink/purple blade guards. Black, I tell you. Of course Ice Girl has purple blade guards. I'm going to write her name on those guards with a Sharpie and then replace them with the ugliest ones I can find.
Monday, April 14, 2008
Newbie: club ice attire
 I had thought about calling this new feature a bunch of different things:
 - Ice Mom: making mistakes so you don't have to
- Pratfalls, slips and missteps
- Gaffe o' the day
I used to keep lists of this stuff when I was just starting out in something. When I began teaching high school, I made a terrible fool of myself. Once, I taught an entire lesson with my zipper down. The kids kept asking me if there was a fly in the room, but it was December and I had no idea what they were talking about. *sigh*
Well, here's the first of many idiotic things I've done as a new member of our local figure skating club. Please learn from my example! :) Realize that your club might be different, is probably different. If you have some interesting mistakes to share, please send them my way!
Ice Girl wanted to skate after school the other day, but I couldn't send her to the tennis courts on her PIC skates because it was raining and the thoughtless folks at our village's parks department haven't built an enclosed tennis court, let alone an ice rink.
On the spur of the moment, Ice Girl and I hopped in the van and went to the figure skating club ice time. The previous week, some kind soul tried to explain how club ice works for me. If you're new, listen to these kind souls. Sometimes you're so new, like me, that you don't even know the questions to ask. I tried to remember all the stuff about the right of way on the ice, which corners were reserved for jumping, where to spin, and how to avoid the harness jumper. I made sure Ice Girl understood these things, too. I thought we were set. Ho-ho! Not the case.
Right. Ice Girl was happy to add her name to the list of kids on the ice, Ice Mom wrote the check, and Ice Girl skated out onto the ice.
"Which one is yours?" the ice monitor asked me.
"The one in the purple sweatshirt."
The ice monitor squinted and said what I've come to think of as fatal words, "Oh. The one in jeans?"
Yep. Being the dorky newbie that I am, I had no idea that jeans were **gasp** inappropriate. I had the good fortune to meet many club parents that night and the ice monitor introduced me to each of them as the mother of the girl in jeans. Yes, yes. I get it already. Practice skirt and tights.
Did I mention I met the lovely grande dame who is our club's test chairperson? Yep. What did she say to me? "Oh, dear. Your daughter is wearing jeans. You should really get her proper attire."
Newbie lesson: Wear the stinkin' practice skirt and tights or risk having everyone in the club explain the expectations to you. Twice. Each. (I swear, next time I'm going to wear a practice skirt and tights, too. :) )
Wednesday, April 9, 2008
Accessory review: PIC skates

 I broke down and finally bought PIC frames and wheels and another pair of boots so Ice Girl can practice figure skating on the tennis courts two blocks away.
Before I get into my review, the two biggest things to consider: cost upfront and cost long-term. These puppies aren't cheap. But ice time isn't cheap, either. *sigh* That's why I popped for these.
Are they really like figure skates? Pretty much. The PIC skates you see above have a new boot that is the same as the ones she currently skates in. The PIC skates weigh a bit more than Ice Girl's figure skates. One Jackson Classique skate weighs 2 lbs, 2 oz. Her boot and PIC frame (as you see in the photo on the left) weigh about 3 lbs. They're a little heavier than figure skates, but they feel very similar, except for the wheels. When Ice Girl first used the PICs on Monday, the first thing she said was that the wheels were weird, as compared to the ice. They're a bit bouncy, like wheels should be. Her feet hurt a bit, too, but those were new boots she had on, so that's something that would happen with any new figure skate. I made her wear knee, elbow, and wrist pads, too. Initially they felt funny on her knees, but we all know that tennis courts have a harder surface than ice rinks. I don't actually care how funny those pads feel, Ice Girl, you put them on, kid, and you like them.
Can PICs really do all that figure skating stuff? When I cruised the PIC folks' website for the past, oh, two months, I kept staring at those people in the photo gallery. Wouldn't it be great, especially since Ice Girl is still early in her training and ice crazy, to send her up to the park with those? Well, it is great. They work fine in the basement, too, but our basement is a bit small. After skating on the PICs for maybe half an hour, Ice Girl could perform all the tricks she could on the ice, with the exception of a hockey stop.
What about the transition from PICs to ice figure skates? This is the one that had me really worried. When Ice Girl puts on plain ol' inline skates, she nearly falls on her face. Skating on the ice is even worse after an hour of plain ol' inlines. It's like she's never been on ice before. Yesterday afternoon, it rained, so Ice Girl couldn't go to the tennis courts. I threw her and the Zuca in the van. We drove to the Figure Skating Club's ice time so she could walk on. No problems. No problems! I tell you, I expected her to have to re-learn how to skate, but the transition from PICs to figure skates was seamless. Geez, I was relieved.
On the road. Initially, when I bought the skates, I thought I'd have Ice Girl just use them on smooth surfaces (tennis court, basement, school cafeteria), but that lasted, oh, maybe five minutes. The wheels are pretty tough and they survived the skate from the van to the tennis court. Replacing the wheels, which I'll have to do eventually, will set me back $32 plus shipping, so about $40. Not so bad.
Accessories. The PIC skate company sells a DVD for coaches. It's O.K., not fabulous; I probably wouldn't buy it again. The skaters are marvelous, but there's not much instruction given, just people performing various tricks. I understand why there's no instruction: these are skates for figure skaters who receive instruction. If you don't know how to do a jump or spin on figure skates, skip it on PIC skates.
They also sell a carrier for the skates, which I bought. (Geez, I bought the whole store.) The carrier is like a pair of blade covers for the wheels and the two covers attach with a removable piece of belting. The skater can sling the skates over her shoulder, one skate in front, one in back. The blade covers also act kind of like hard guards, but I don't think they'll last long if a skater wears them on the wheels. That's for getting from the house to the car, I think.
I bought the pink book about jumping and spinning on inline skates. The text is O.K., but the drawings are awful and distract from the writing. I haven't read very much of it and Ice Girl hasn't read any of it. I don't skate, but Ice Girl does. She did just fine without the book.
Assembly. I received the frames from Harmony Sports (the PIC skate people) and the boots from a different company. Harmony Sports' delivery was very fast; the other company lagged a week behind in their shipping. The instructions that come with the PIC skates are simplistic, but I managed to mount the boots successfully after a bit of cursing. The toughest part is aligning the frame from toe to heel on the boot. The diagram shows the toe pick at 1 1/8" from the boot toe. Geez. Measuring that was difficult. Once I installed one frame properly, I measured the spot on that frame and boot and drew it on the bottom of the other boot. Installing the second frame was much easier. The screws aren't steel, but I wish they were. It's kind of tough to get the screws in the frame without dropping them on the way. I have a magnetic screwdriver, but that didn't work with those screws. Set aside 30-45 minutes to install the frames. If you do it in less time, don't tell me because I'll want to throttle you.
Wear and tear on the toe pick. This is what you'll see in the second photo. That's the wear on the pick part of the skate from six hours of skating in the basement and at the tennis courts. The toe pick can be turned, but you have to use a screwdriver to do it. I love Ice Girl, but that kid strips screws. It's going to be a job for Ice Mom and Ice Dad to turn the picks, maybe once a week. I can live with that. Replacement picks run $1.95 from the PIC skate people, plus shipping. I just put in an order for 10. Those should get Ice Girl through the summer, I think.
**update** Turning that rubber toe pick is a pain in the rear. You need a screw driver and the two allen wrenches that come with the PIC skates to accomplish this feat. That toe pick is really jammed in the frame, so it helps to loosen or remove the first wheel when you rotate or replace these puppies. Allow 15-20 minutes and 5-7 curse words to complete the toe pick rotation.
Cost. Oooh. This isn't pretty. Ice Girl skates in starter skates, so the boots came with the blade. The new figure skates set me back about $150. The PIC frames and wheels set me back $147, including shipping. That's about $300. I knew this would be the cost and I did it anyway. Summer's coming and the hockey rink melts the ice in one rink and shuts down the big sheet for two weeks. Ice Girl is going to be spending a lot of hours up at the park, skating her heart out while Ice Mom and Ice Dad are at work. Ice time at the rink costs $10/hour. The tennis courts are free. I'll have those puppies paid for before school lets out for the summer.
Overall review: 4 out of 4 stars. It's not a perfect system. PIC skates are a bit different from figure skates and assembly is a pain, but Ice Girl loves them and refuses to take them off when she comes home from the park (it's O.K. as long as she doesn't attempt stairs). The amount of practice and enjoyment that Ice Girl is getting/will get from those skates is worth the $300 investment. Oh, and I bet I can unload the used assembly pretty easily once Ice Girl jumps up a boot size. That reduces my overall investment, too. Would I buy them again? Yep. In a heartbeat.
Sunday, April 6, 2008
How-to: sew blade covers or soakers
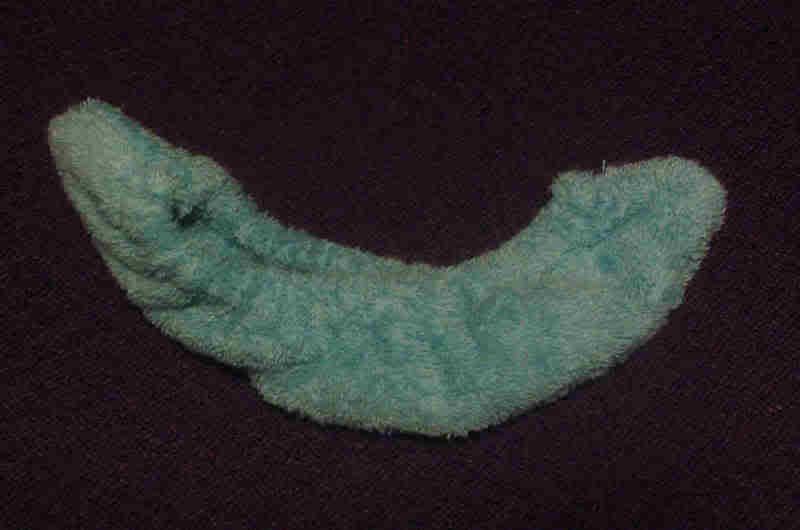
 O.K. I've got it figured out. Here's the recipe for do-it-yourself blade covers or soakers.
Supplies:
- One terry cloth hand towel, the thinner and cheaper the cloth, the better. Try to find a towel that has no interesting decoration on it at all, not even a stripe near the bottom of one side. Wash it first to make sure that the color won't bleed all over your kid's skate bag when the blade cover gets wet.
- Thread
- 5/8" elastic, one 1-yard package (you'll have some left over)
- Sewing machine and a few spare needles (step 8 might break a needle)
- Iron and ironing board. The iron should be ready for steam and on the cotton setting.
- Pins
- Drawstring threader (It's not essential, but it's very helpful and you'll use it again and again whenever someone pulls the string all the way through a sweatshirt hood or a sweatpants waistband.)
- Dressmaker's chalk or something similar for marking
Cutting:
This is so easy.
- Cut off the hems on the bottom and the top of the towel. Leave in place the selvage edges from the sides. (For the purposes of this post, we'll call the selvages the parts of the towel that aren't fluffy.)
- Arrange the towel so that the short sides are facing you (hamburger style). Measure the entire towel, short end to short end. Find the midpoint and cut the towel into two pieces at that point, from one selvage edge to the other.
Sewing
- Take one towel half and fold it in half hot-dog style (long end to long end). When you fold it this way, it looks more like a hot dog than a hamburger and the selvage edges are along the short sides. Make sure the cut edges line up and pin in place along the long side. Stitch a 1/4-inch seam with a straight stitch. Repeat for the other towel half.
- Turn the tubes you've just made inside out, so that the seam you've been working on isn't easily seen.
- Bring the towel halves to the ironing board. Iron each half so that the seam runs down the center of each half. In other words, when you're looking at the blade cover and it's oriented so that the long sides are facing you, you see a folded edge at the top, the seam in the middle (about 3" from a folded edge), and another folded edge on the bottom. To the right and left are the selvage edges that lead to the inside of the tube. Got that? Great. Flatten that puppy with your iron. You want nice creases where the folded edges are. Now, flatten the other one.
- Bring them back to the sewing machine. Straight stitch down the center, following the seam line. My mom calls it stitching in the ditch. You should have just sewn the tube in half and now you have two connected tubes. Stitch in the ditch of the other blade cover, too.
- Remember those folded edges that you flattened in step 3? Great. These are going to become casings for the elastic. Sew a straight stitch seam 3/4 of an inch away from that folded edge. You'll need to do this on both folded edges for each blade cover for a total of four seams along the folded edges.
- Take your elastic out of the package. Measure 7 1/2" along the elastic, but don't cut the piece. Instead, mark it with your chalk or whatever you use. Thread the elastic through the 3/4" casings, lining up the cut edge with one side and letting the long tail hang out the other end. If you have a drawstring threader, this will be a walk in the park. If you don't have one, spend the $3 and get one or curse me, elastic, and the world while you figure out how to get that elastic through the casing.
- Sew the cut end of the elastic and the casing, 1/4" from the selvage edge of the fabric. This seam should be really short and just cross the casing end, about 3/4" long. Pull the long, uncut bit of elastic until you see your 7 1/2" chalk mark at the other end of the casing. Pin it even with the other selvage edge and sew it with a straight stitch, just like you did the first side, 1/4" from the cut end. Snip the long bit of elastic along that cut edge. Repeat steps 6 and 7 for the remaining three elastic casings.
- Sew up the sides. Fold the blade covers in half, hot-dog style, so that the selvage edges line up and the elastic casings meet at one end. Sew the side seam with maybe a 1/2" to 5/8" seam allowance. This is where things get a little tough. There's a lot of bulk going through your machine. You might want to drop the feed dogs while you position the fabric under the presser foot so you can stuff it all under the needle. Don't forget to put the presser foot back down and the feed dogs back up. Don't panic if you bust a needle. Just replace it and move on with the seam. Sew up all four sides of the blade covers. The towel selvage edges are good to go, so you don't need to finish off the seams with a zig zag stitch.
- Turn the blade covers inside out. They should be fully functional and look much like the photo above.
Cost and effort: This project costs $2.94 for the hand towel (Wal-mart), and $.97 for the elastic (Wal-mart again). That's $4 and some time for the soakers. The best part was that Ice Girl did most of the work. I had her cut out the covers and sew all the straight seams. The only thing I did was help her thread the elastic through the first casing and sew up the sides in step 8. She did a pretty good job, I think.
rant: American Girl people have it in for skating moms
 I was reading other figure skating blogs and I found out from Required Elements that we're all doomed. Yep, American Girl dolls from the Pleasant Company (headquartered 10 minutes from my house and--I can exclusively reveal--located two, maybe three blocks from an ice rink) has added Mia to its line-up.
Mia is available only in 2008, so you might as well budget. Mia and her book will set you or the grandparents back $90. To get her starter set of clothes is gonna cost you another $168. Yep. Starter Set.
If your daughter wants to dress like Mia (thank God Ice Girl doesn't fit in those American Girl clothes anymore), that's another $84. Did I mention look-alike p.j.'s? Yep. Mia's pajamas are $22, but your daughter's p.j.'s are $56.
Ice Girl is 12. She hasn't received an American Girl doll for two years. She likes them, she's a girl. When I showed her Mia on the American Girl site, Ice Girl said that Mia looks like her (Ice Girl). Darn it, she's right. Ice Girl's hair is a bit shorter and Ice Girl is a bit taller, but they could be sisters.
I might as well accept my fate willingly: Mia will be coming to my home for the holidays, I'm sure.
Good thing I won't have to pay for Mia's ice time and coaching, too! That Mia kid is involved in figure skating and hockey. I can barely afford Mia's wardrobe, let alone her extra curriculars.
Maybe Ice Girl should make matching "Will Babysit for Ice Time" t-shirts for Mia, too. Whaddya think?
Friday, April 4, 2008
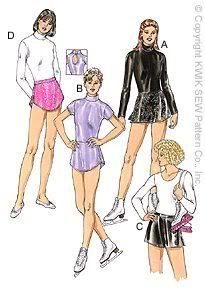
Sewing review: Kwik*Sew pattern 3051
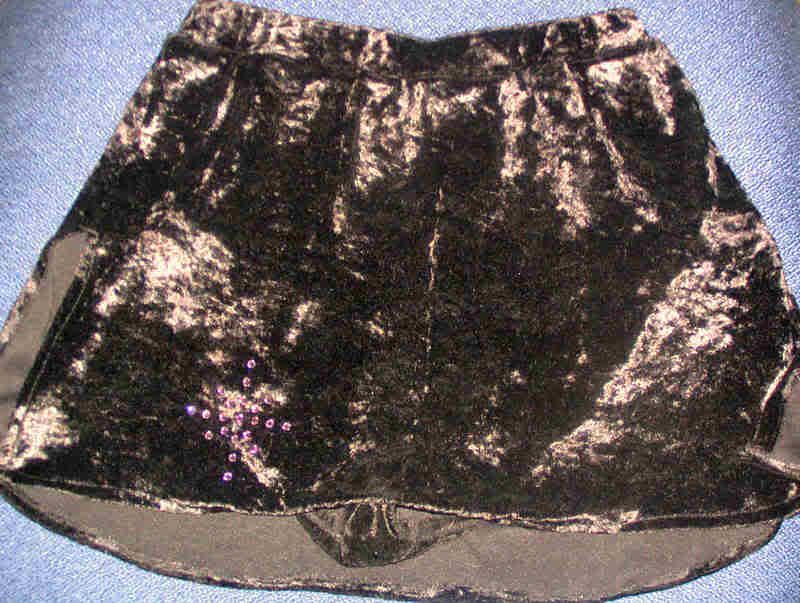
After the disaster that was the Green Pepper pattern, I found the Kwik*Sew patterns at my local Hancock fabrics. They're not cheap - $8 a pop. The finished skirt is on the left--it's hard to show the black panne, but it looks pretty good when Ice Girl's wearing it.
I started with pattern 3051, which has practice skirts and a dress. I made practice skirt C, with a straight hem and leotard bottom. I used the dreaded black stretch panne, and yes, it was a pain in the behind. But I'm not reviewing fabrics here. You can see my fabric review earlier in this blog.
The Kwik*Sew pattern uses real paper, not thin tissue paper, for its pattern pieces. All sizes, from XS to XL are in the envelope. Sizes run true to the measurements. Ice Girl measured as a small and the small size in the envelope fit her.
The cutting layout was good, but kind of a pain because the selvages had to meet in the middle. I don't think that's Kwik*Sew's fault, though. Kwik*Sew is trying to save us money on fabric with this layout.
The directions were very good: easy to follow and intuitive. Of course, the panne is a pain in the butt to work with, but when the Kwik*Sew directions tell you how to insert the elastic for the legs and the waistband, the directions work.
If you sew this pattern, anticipate problems when sewing the waistband to the rest of the skirt. I really had to stretch the bugger to get it to fit and then I had to do some seam ripping and swearing.
I used some iron-on sequins on the front panel of the skirt. After all, there's no tag and Ice Girl would be very likely to wear it backwards as well as forwards.
The pattern comes with a piece for cutting out blade soakers, too. I haven't tried it, but I bought a couple of terry towels that will be perfect for making the soakers. They're not stuffed like the $13 ones you find in the pro shop, but my hand towels cost only $3 each and I think I can make two out of each towel.
Overall rating: 3 1/2 out of 4 stars. I really like the pattern and it worked as expected. I like the sturdy pieces because, let's face it, I'm making more of these little skirts. However, the waistband is a pain in the butt. I don't know what the pattern people can do about that, but ripping seams makes Ice Mom cranky. I took off 1/2 star for my crankiness. Probably unfair, but, hey: I'm still buying their patterns, aren't I?
Parenting: 6 a.m. ice time? I must be nuts.
 Ice Coach is excited about Ice Girl and her new program, I think. Ice Coach, bless her heart, has found ice time at...6 a.m. on Saturdays to create the program. Ice Coach wants this time because the full sheet of ice is nearly empty at that hour. I'm guessing all the sane parents are at home in bed.
But, I'm excited, too. How cool will it be to have a nearly empty sheet to create the program? Ice Girl doesn't know about the 6 a.m. thing, but when she finds out, she'll be in bed by 7 p.m. and willing herself to sleep.
I'm sure you've spotted the problems, though.
- Starbucks opens at 6. No time to get coffee.
- I don't drink coffee. Damn. I think I need to start.
- Open skate for the middle school crowd is from 7:00 until 9:30 p.m. on Friday nights. Ice, lights, music, sugared soda. It's a big deal for Ice Girl and her friend du jour. I think we'll have to leave at 9, though.
- It's 6-freaking-o'clock-on a Saturday morning. Is the sun even up?
- Ice rinks are cold. I'm going to be shivering my rear-end off at 6 a.m. on a Saturday so my daughter can jump and spin to cool music.
There was no question when I received Ice Coach's e-mail at 7:45 a.m. this morning (she's a morning person, I think).
Yep. We'll be there.
Update: Well, I survived the first 6 a.m. ice time. I had a mug of English Breakfast tea (still no coffee) and I worked the music in the hockey penalty booth. Maybe it wasn't the penalty booth, but you could see and smell it from where I was.
Did I mention that the 6 a.m. Saturday session has a twin? Yep. There's a 6 a.m. Friday session as well. Ice Girl's coach won't be there (she's not completely insane), but I guess I will be. Honestly, I hope I won't see anyone there. Not that I'm selfish about the full sheet of ice, but no one needs to see me before the sun is up. Something about vampires and messy hair.
Wear garlic around your neck if you plan on being there with me. It won't keep me away, but the smell might help me wake up and not walk into you.
Thursday, April 3, 2008
Ice Girl's t-shirts: new shirt
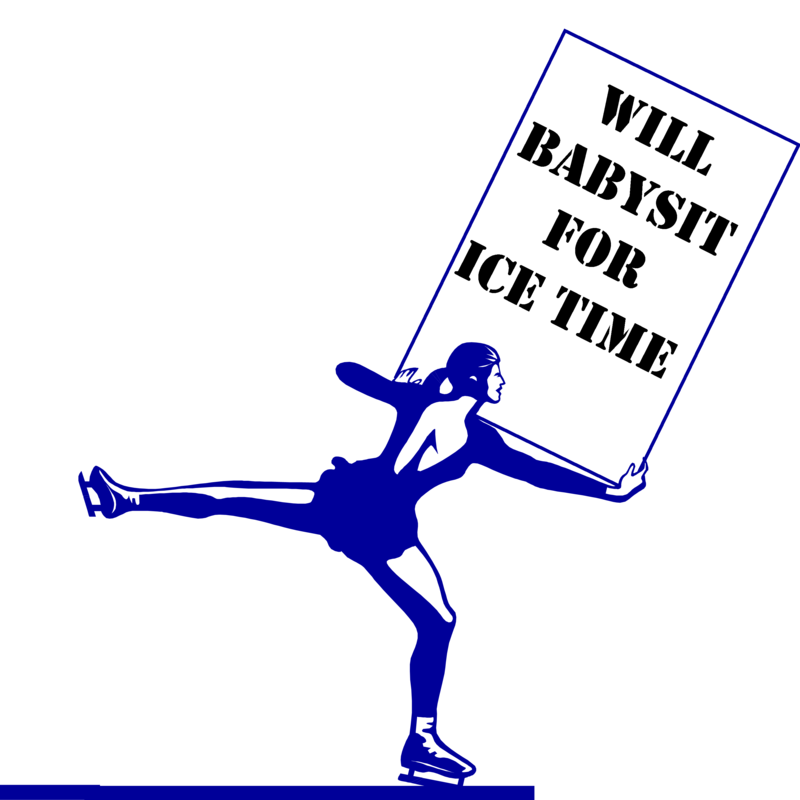
I just wanted to post this new t-shirt design from Ice Girl's t-shirt shop at CafePress.com. (Click on the image to go to her site.)
It's the fourth babysitting design and I'm ordering one for Ice Girl to wear around town. I thought a nice ice blue background would look terrific for this not-so-subtle HIRE ME! shirt.
The others (see a few posts below) are cute, too.
Book review: Figure Skating for Dummies
 I bought Figure Skating for Dummies
From a parent's perspective, this book is great because Kristi Yamaguchi gives great advice parents can use.
- Equpiment. Yamaguchi explains how boots should fit feet. She wears her custom-made boots one size too small.
How-to sections. Yeah, I'm not a skater, but I was hoping to read these sections and be able to identify a flip from a lutz. It's tough to write about movements, tough to show them in diagrams, and hard to understand from a few photos. These sections helped me very little. However, the bits about why something like the triple salchow is hard were good.
Music and programs. What I learned from this is to listen to music, find instrumental music that is interesting but not too avant garde, and let your coach guide the skater the rest of the way.
Amateurs v. pros. Very interesting section on how the USFS looks at eligibility, money, and competition. If you don't buy the book, it's worth checking out at the library just for this interesting bit. Not hugely helpful for a skating parent, though.
Competitions. I was hoping to learn more about the basic levels of competition, but I think that competitions have changed a bit on the basic level. Interesting, but not hugely helpful for a skating parent.
Judging and scoring. Interesting stuff, but let's face it: scoring's kinda dull. Yamaguchi spices it up a bit with anecdotes, but, yeah. There's no glitter or sequins in these chapters. The scoring's out of date - it's the old 6.0 system, not the new IJS.
Ten things every parent should know. Yamaguchi's mom wrote this and it's fabulous. Do you want to know what this woman did for her kid? She drove her kid to the rink to practice from 5 a.m. until 10 a.m. every morning, bless her heart. The family went into debt to finance the kid's skating. Great stuff, good reality check.
Overall rating: 3 out of 4 stars. For a skating parent, the beginning and end sandwich an unhelpful and kind of boring middle. That said, it's worth the price of a used book on Amazon (they're selling for under $7 right now).
Coaches: choosing a good one

If you haven't read this article from the U.S. Figure Skating website, do so: http://www.usfigureskating.org/content/BS-coach.pdf
With that out of the way, here's how I found a private coach out here in the real world.
Ice Girl was taking Learn to Skate lessons at Madison Ice Arena. One of her instructors realized that this was a kid who wanted to be on the ice all the time. Ice Coach offered to coach Ice Girl privately as well. Ice Coach's rate is $34/hour, $17.50/half hour. I said I'd think about it, but Ice Girl had visions of spins dancing in her eyes.
Another LtS level, another offer from a coach. I heard two coaches talking - yes, I eavesdrop! - about how Ice Girl had been putting in tons of time and progressing very far without the aid of a private coach. Well, that got me thinking seriously about the coaching thing.
How did I choose Ice Coach? Well, she's fabulous on the ice and I've seen her teach. She's patient, praises appropriately, and corrects students. Furthermore, it turns out that Ice Coach was a student in one of my freshman English classes 12 years ago (boy, I feel old). If you've ever taught freshmen, you know what I'm talking about here: I know this girl. She was nice, quiet, and shy. A serious kid, but well liked.
Ice Coach also runs the LtS program at another rink, so I knew that she was organized and a member of the USFS.
I really lucked out, I think. Another mom went with a different LtS instructor. What I'm seeing is that the other instructor praises too much and corrects too little. Don't get me wrong; praise is important, but I think that getting the trick/move correct is more important.
Update (2/18/09): I've added a coaching requirement: must love ice. See additional post here: http://icemom.blogspot.com/2009/02/how-to-choose-skating-coach-part-two.html
Music: Ice Girl's choice is Laura's Zest
I could spend this entire space typing about how much Ice Girl's skating improved after 20+ hours of ice time over spring break. Don't roll your eyes - this is a kid who walks into walls on dry land. This is a kid who falls up stairs and breaks two fingers doing it. I could brag about her skating, her progress, etc., but I won't. It's just a pleasure to watch her excel at some sport - any sport.
Instead of blathering on, I'm going to talk about music. Ice Girl and I are huge Project Runway fans. We loved Laura Bennett's designs from Season 3, but really, her show music was so, so cool.
Ice Girl's coach approached me with a smile the other day and gave Ice Girl and me an assignment: find some instrumental program music. Immediately, Laura's Zest, Bennett's show music from Spot on Sounds came to mind. Wanna hear it? Go here.
Ice Coach needs to pare the almost five-minute song down to a little over one minute (about 1:10). I sent her here for Audacity free music editing software.
Anyway, listen to the music and let me know what you think. Ice Girl and I think it's hip, yet retro. Very, very cool.
Wednesday, April 2, 2008
Ice Girl's t-shirts


These are the three designs for Ice Girl's new t-shirt shop at CafePress.com. I just received the one on the left, the Bielman spin one, as a gray sweatshirt that Ice Girl can wear at the rink. She's very excited about it. I'm ordering the other two as t-shirts that she can wear under a zip-front sweatshirt. It's nearly summer and I think that the t-shirts will be very useful.
Let me know what you think! Oh, and if you need a babysitter, Ice Girl is a good one. Red Cross certified and all that. Unfortunately, she will probably teach your kid to jump and spin on the kitchen floor, though.
Subscribe to:
Posts (Atom)